Note: This is an early peek at a chapter from my next book, De-Enshittify Windows 11. This book will be available for purchase soon, hopefully by the end of February. –Paul
—
OneDrive is Microsoft’s cloud storage service for consumers and a key integration in Windows 11 when you sign in using a Microsoft account. But Windows 11 auto-enables a OneDrive feature called Folder Backup without telling users that it is doing so, to drive customers to subscribe to Microsoft 365, which includes additional OneDrive storage over the 5 GB provided to all users.
The problems with Microsoft auto-enabling OneDrive Folder Backup
In Windows 11 version 25H2, Microsoft has subtly changed how Microsoft OneDrive Folder Backup works. And though some of the changes are improvements over the previous behavior, problems remain. Among them:
OneDrive never tells the user that it is enabling Folder Backup. OneDrive will silently enable Folder Backup, which syncs the Desktop, Documents, and Pictures folders on your PC to the corresponding folders in OneDrive, without informing you.
You may not want OneDrive to sync the Desktop, Documents, and/or Picture folders to OneDrive. Depending on how you work, you may not wish for all the files and folders in the Desktop, Documents, and Picture folders to sync to the cloud. Regardless of how you work, these folders often contain files that shouldn’t be synced to all your PCs and other devices. For example, many games save game data to your Documents folder and syncing that content to the cloud unnecessarily takes up storage space and may lead to you needing more storage. Which you have to pay for.
When you disable Folder Backup for a particular folder, OneDrive asks you where to put the content in that folder. This sounds like a good idea—you can choose to keep the content in OneDrive or move it to the local version of the folder on your PC—but it’s half-baked. When Windows 11 silently enabled Folder Backup, it commingled the contents of the local folders with the content of the OneDrive-based folders. So when you choose to reverse this change, OneDrive prompts you where to keep the content. And all the content in each folder, including whatever was already in OneDrive, will be moved to the location you choose. If you choose to keep it on your PC, you may not have enough storage space. And the files and folders are all mixed up with whatever was in OneDrive already.
ℹ️ More info: In previous versions of Windows 11, Microsoft would prompt you to enable OneDrive Folder Backup during Windows Setup when you first configured the PC and later using a pop-up notification. Then, it would simply ignore your choice and auto-enable Folder Backup if you declined the offer previously. In Windows 11 version 25H2, Microsoft no longer prompts you to use OneDrive Folder Backup. Instead, it simply auto-enables this feature after you sign in to Windows 11 with a Microsoft account.
💚 Uninstall OneDrive
OneDrive is useful for all kinds of reasons, including even the Folder Backup feature that this chapter is largely concerned with. But if you don’t use OneDrive, perhaps because you use a rival service like Google Drive instead, you can easily uninstall OneDrive in Windows 11. Doing so will free up system resources and clean up the File Explorer user interface a bit.
To uninstall OneDrive, open Settings and navigate to Apps > Installed apps. Then, locate Microsoft OneDrive in the list of apps installed on your PC. Click the “More options” (“…”) link to its right and then select “Uninstall” from the context menu that appears. Then, click “Uninstall” when prompted that this app and its related info will be uninstalled.
You don’t need to reboot after this change. But File Explorer will continue to display one vestigial OneDrive feature, the Gallery item in its navigation bar on the left. To remove Gallery from File Explorer, open Terminal with administrator privileges and use the following command line:
reg delete “HKLM\SOFTWARE\Microsoft\Windows\CurrentVersion\Explorer\Desktop\NameSpace\{e88865ea-0e1c-4e20-9aa6-edcd0212c87c}”
Gallery will be removed from File Explorer instantly.
✅ Tip: Uninstalling OneDrive in Windows 11 doesn’t remove any files you may have stored in Microsoft’s cloud storage service. You can still access those files using the OneDrive website or via the OneDrive app on your other PCs and devices.
💚 Prevent OneDrive from enabling Folder Backup when you set up a PC
If you are setting up a new PC or a newly reset PC, you may be able to prevent OneDrive from auto-enabling Folder Backup if you move quickly and know the trick: You have to do this right after you complete the Windows Setup Out of Box Experience (OOBE) and arrive at the Desktop for the first time.
Wait for the OneDrive icon to appear in the Taskbar’s system tray area. When it first appears, it will display with an angled line through it, indicating that Windows 11 is updating the app.

When the update is complete, OneDrive will restart, so the icon in the system will disappear and then re-appear. When it signs into your Microsoft account again, the angled line will disappear. Then, click the OneDrive system icon and open OneDrive settings by clicking Help & Settings (gear) and then Settings. In the “OneDrive Settings” window that appears, select Sync & backup and then “Manage backup” next to “Back up important PC folders to OneDrive.” The “Back up folders on this PC” window appears.
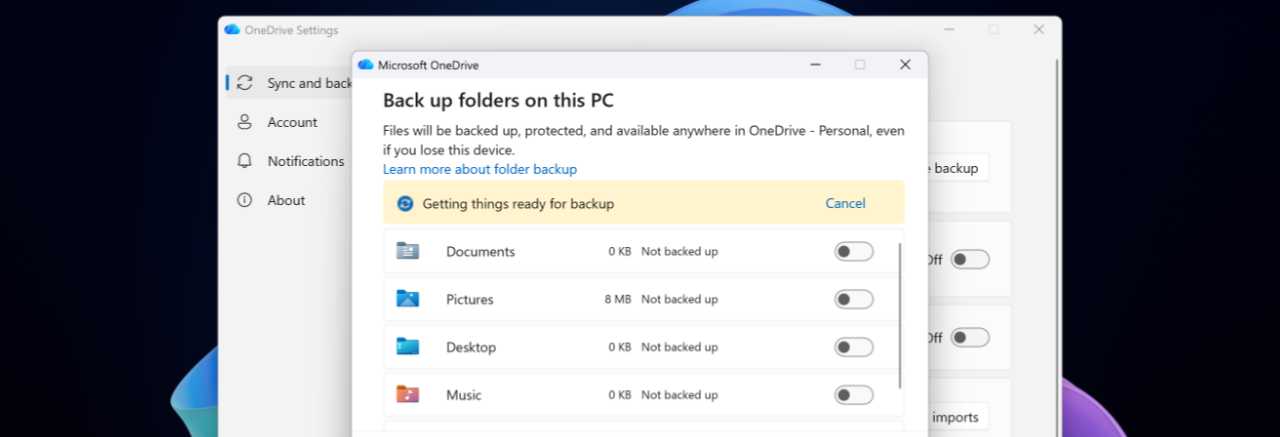
If you’re lucky, you will see a yellow info bar at the top of this window with the text “Getting things ready for backup.” To prevent Folder Backup from auto-enabling, click the “Cancel” link.
✅ Tip: How long do you have to click this “Cancel” link before it disappears forever? In my experience, the yellow info bar will appear in the “Back up folders on this PC” window until shortly after OneDrive finishes processing all the files you have in the cloud. So it depends on how much storage you’re using. In my case, using about 900 GB, this takes about about 30 minutes.
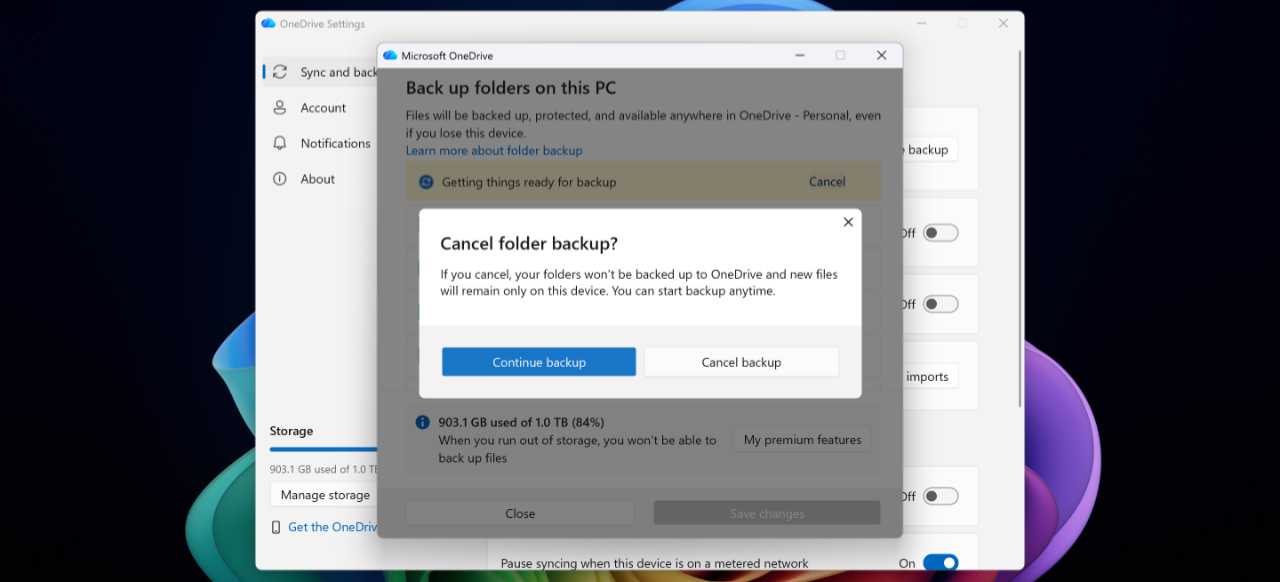
In the “Cancel folder backup?” window that appears, click “Cancel backup.” Now, OneDrive Folder Backup won’t molest you further.
💛 Reverse the changes made by OneDrive Folder Backup
If OneDrive Folder Backup is already enabled on your PC, you can reverse that for any or all of the three folders—Desktop, Documents, and Pictures—it includes. When you do so, OneDrive will prompt you to decide where the contents of each folder should reside, in the cloud in OneDrive or locally, on your PC.
To disable OneDrive Folder Backup, open OneDrive settings, navigate to the Sync and backup page if required, and click the “Manage backup” button next to “Back up important PC folders to OneDrive.” The “Back up folders on this PC” window will appear.
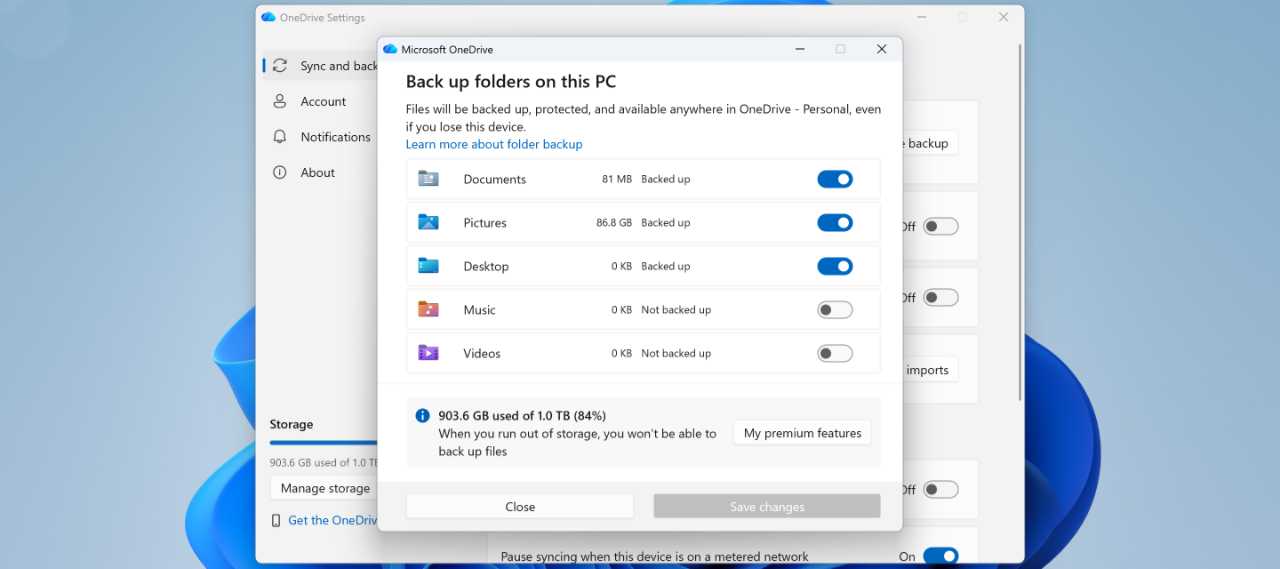
Unless you’ve changed this configuration, you will see that the Desktop, Documents, and Pictures folders are being synced with OneDrive. And that you can optionally enable this sync with the Music and Video folders as well.
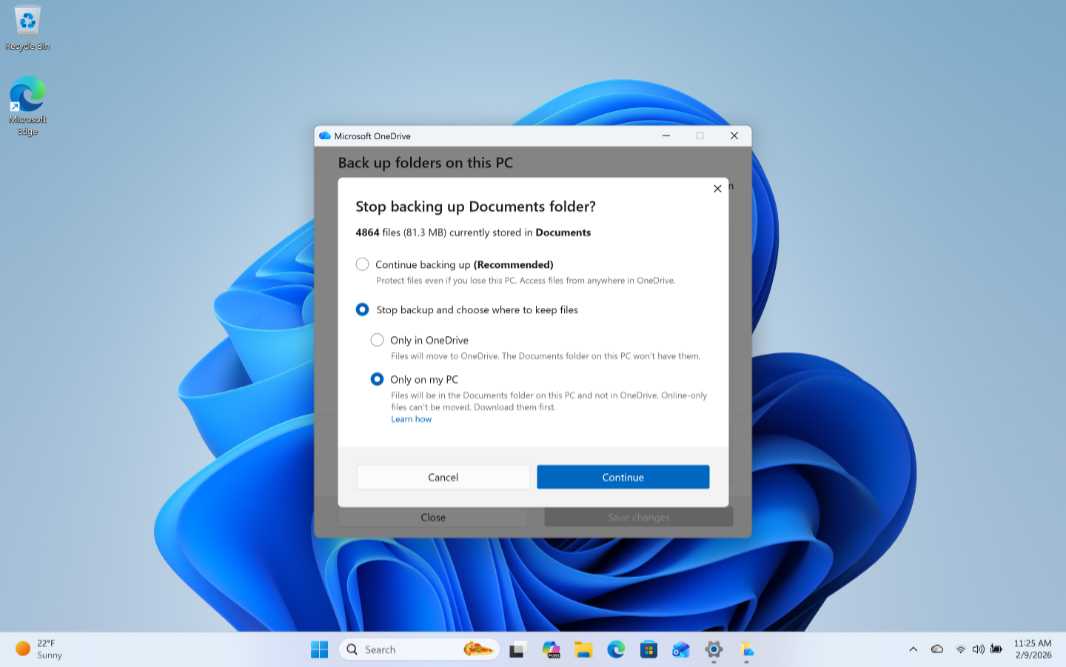
To disable folder backup, configure one of the synced folders to “Off”. When you do, a “Stop backing up [Folder name] folder?” window appears.
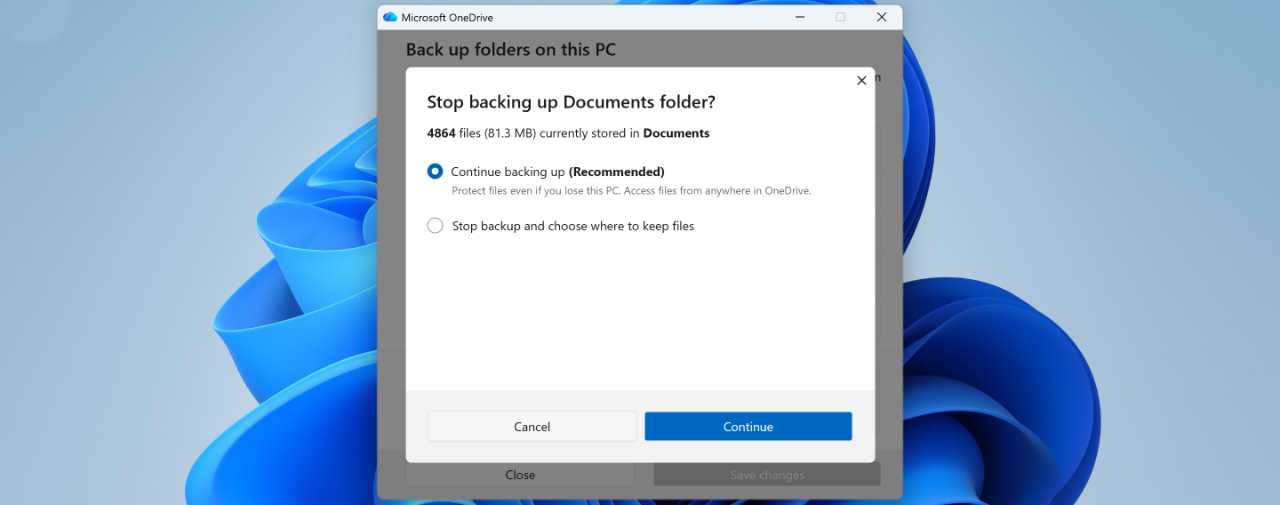
ℹ️ More info: This window explains how many files there are in this folder and the amount of disk space they require. That information might be crucial if you want to move the contents of this folder to your PC and it doesn’t have enough disk space.
Click “Stop backup and choose where to keep files.” Now, OneDrive prompts you to choose where you will store the files in this folder, only in OneDrive or only on your PC.

ℹ️ More info: In case it’s not obvious, when Windows 11 automatically enabled OneDrive Folder Backup, it commingled the contents of each local folder with the contents of the corresponding folder in OneDrive. For example, if your local Pictures folder contained 119 items occupying 183 MB of disk space, and the Pictures folder in OneDrive originally contained 12 items occupying 15.7 MB of disk space, the Pictures folder in OneDrive now contains 131 items occupying 198.7 MB of disk space. So OneDrive will move all the items in this folder to your local Pictures folder if you disable Folder Backup for that folder. This may or may not be desirable.
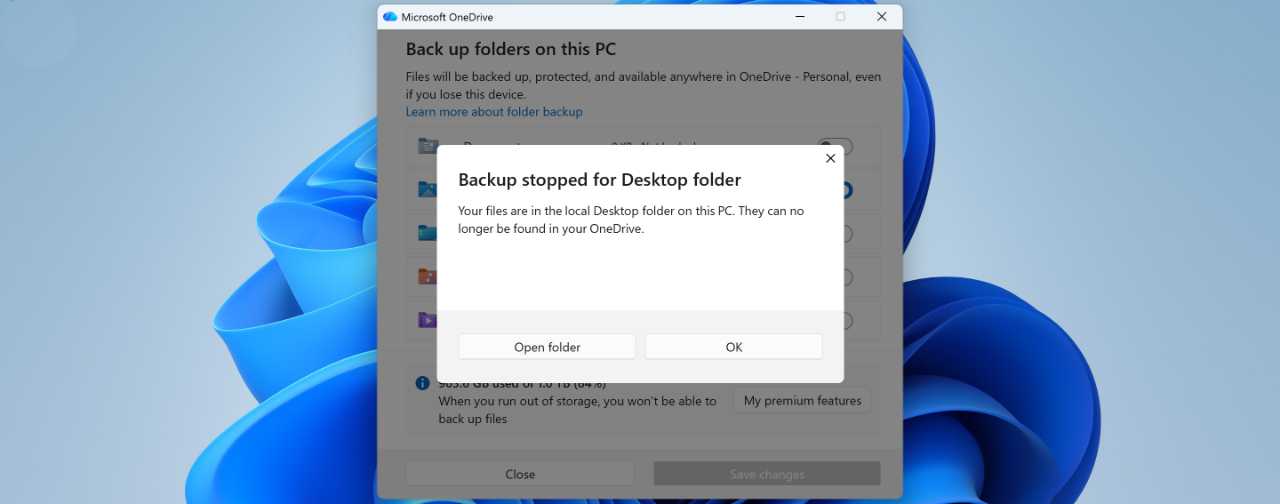
Click “Only on my PC.” OneDrive will attempt to move all the items in the cloud-based folder to the corresponding local folder. If successful, you will see a “Backup stopped for [Folder name] folder” dialog.
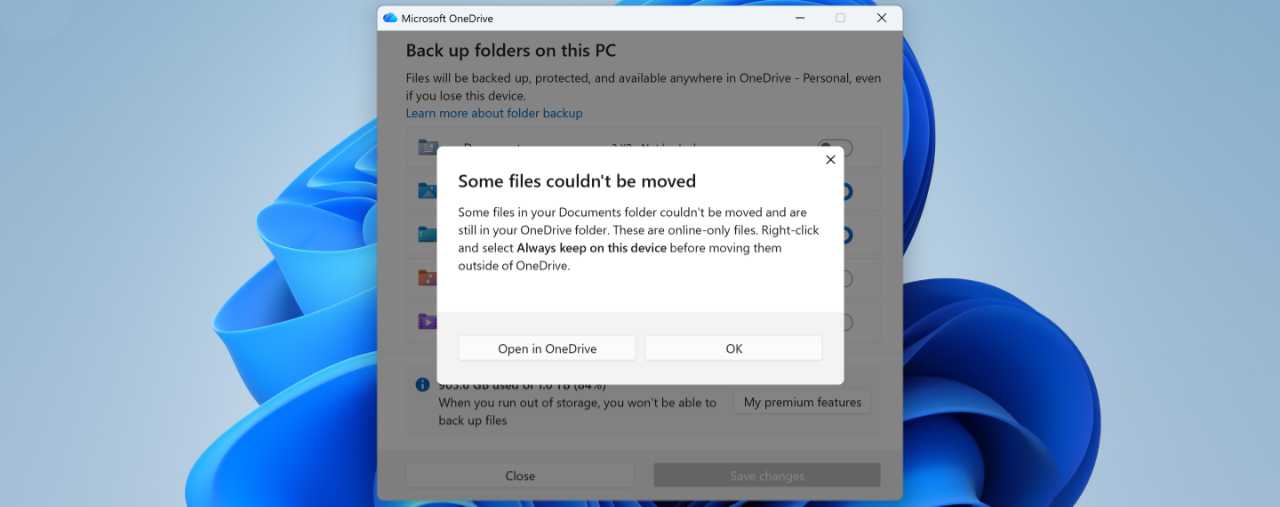
ℹ️ More info: In some cases, OneDrive may fail to move some or all of the items to your local folder. In this case, it will display a “Some files couldn’t be moved” dialog explaining what happened: Those files are still in OneDrive. So your only recourse is to move them manually using File Explorer.
If the change is successful, the files and folders that were once only on your PC and the files and folders that were once only in OneDrive will be combined into a single set of items that is only on your PC. This introduces two potential problems.
You may not want this. Unfortunately, OneDrive isn’t smart enough to differentiate between the items that used to be only on your PC and those that used to be only in OneDrive. So it’s on you to browse through the files and folders you just moved and optionally find those you wish to now move back to OneDrive. Sorry.
You may not have enough storage space on your PC to contain the commingled items. If the OneDrive folder you’re now disabling contained lots of files, perhaps consuming many gigabytes of storage, you may not have enough storage space on your PC to contain the items you wish to move. In this case, the operation will fail and those items will remain in OneDrive. However, Folder Backup is disabled, so you can use File Explorer to manually move at least some of the items out of OneDrive and to your PC.
💚 Eliminate other OneDrive annoyances
Aside from its forced Folder Backup usage, OneDrive integration in Windows 11 is mostly excellent and can be quite useful. But there are a few small annoyances you may need to address.
You need more OneDrive storage
⛔ The problem: Microsoft provides everyone with a Microsoft account with 5 GB of OneDrive cloud storage. But that’s not enough if you’re going to rely on OneDrive for work, backing up your phone photos, or just about anything else.
💛 A workaround: Sadly, there’s no getting around the 5 GB limit in OneDrive: If you need more storage, you need to pay, and not just once but monthly or annually in the form of a Microsoft 365 subscription. The cheapest is Microsoft 365 Basic, which provides 100 GB of additional cloud storage for $19.99 per year. But most will be better off with Microsoft 365 Personal ($99.99 per year) or Microsoft 365 Family ($129.99 per year), each of which provides an additional 1 TB of OneDrive storage per user (in the latter case for up to 6 accounts/people). If you pay for Microsoft 365 Personal or Family and require even more storage, Microsoft offers add-on storage plans in 200 GB ($1.99 per month), 1 TB ($9.99 per month), 5 TB ($49.99 per month), and 10 TB ($99.99 per month) increments as well.
✅ Tip: If you don’t mind switching services, you can save some money by using a paid Google One plan instead. Everyone with a free Gmail account gets 15 GB of Google Drive storage, or you can get a Google One Basic (100 GB, $19.99 per year), Google One Standard (200 GB, $29.99 per year), or Google One Premium or Google AI Premium (2 TB, $99.99 per year) subscription.
OneDrive displays annoying “Memories” notifications
⛔ The problem: OneDrive displays “On this day” memory notifications every day if you have any photos in your cloud storage from the same day but in the past. This is the type of thing most people already see on their phones, so some will find this additional PC-based notification superfluous if not annoying.
💚 The solution: You can disable this feature. To do so, open OneDrive settings, navigate to the Notifications tab, and configure the option “Notify me when ‘On this day’ memories are available” to “Off”.
You want to move OneDrive to a different disk
⛔ The problem: You would like to move your OneDrive files to another disk, but Windows 11 configures is to live on your C: drive by default (at C:\Users\username\OneDrive).
💚 The solution: While the default location of your OneDrive files in Windows 11 is ideal for those with a single SSD or other disk, those with two or more drives may wish to move OneDrive to a new location. To do so, open OneDrive settings, navigate to the Account tab, and click the “Unlink this PC” link. In the “Unlink account on this PC?” dialog that appears, click “Unlink account.” A “Set up OneDrive” window appears. Sign-in to your Microsoft account as prompted and then step through the mostly promotional screens until you get to “Your OneDrive folder.” Click “Change location” and choose the new location for your OneDrive folder.
✅ Tip: You still need to delete the previous version of your OneDrive folder to regain that disk space. And if you use Files on Demand, you will need to resync whichever folders and files you prefer to make available when your PC is offline.