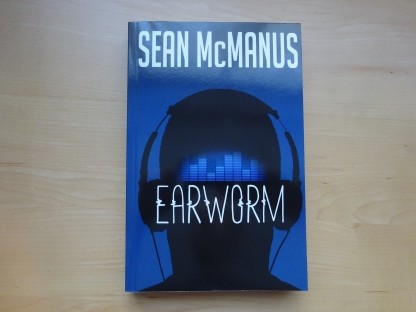
Earworm
New 10th anniversary edition of my acclaimed novel about what happens when AI and the music business collide.
Discover how to play your own music on the Lego Retro Radio (10334) set by putting a Raspberry Pi computer inside. My project description includes Python code you can use to play your own music.

When I saw the Lego Retro Radio set, I wondered whether I could put a Raspberry Pi inside it. If you've reached this page through your interest in Lego, you might not know about the Raspberry Pi, a credit-card-sized cheap computer that you can connect to your own electronics projects. There's more information about the Raspberry Pi here, and in my book Raspberry Pi For Dummies and my free Coding Compendium.
The good news is that you can not only put a Raspberry Pi inside, but can also connect it up so that the tuning knob on the Retro Radio controls the music playback.
This was a project where the "easy" bits were hard, and the "hard" bits were easy. Getting the tuning knob working, which was essential for the project to make any sense, turned out to be relatively easy. Getting the Raspberry Pi to play the sound out loud was surprisingly difficult.
I enjoyed building the Lego Retro Radio, which uses Lego Technics for the tuning mechanism and to hold the front panel in place. The design is excellent, with several moving parts to add authenticity and playability, and there are fun facts about radio to accompany the build in the manual.
It's a nice touch that the back is designed to be removed, and there are clips to hold your phone so you can set it playing a radio station and hide it inside the Lego shell.
The killer feature is the Lego sound brick, a 4 x 4 (x 1.6 high) block that has a button in it. When you turn the radio's tuning dial, it presses the button on the sound brick and triggers a short audio clip. Although brief, these sounds are fun and turn the radio into something quite special. I only wish the "Everything is Awesome" surf-style clip was longer.
For my build, I made a number of customisations to the Lego design:
There are lots of ways you could put music inside the Retro Radio, including hiding a Bluetooth speaker inside or putting your phone in, as the designer imagined. For me, the question was: can I integrate a Raspberry Pi with the tuning knob, so that it changes the music playing? That would make the Lego Radio truly functional.
It took me a few iterations to get this right. My first design was too strong, and the dial wouldn't turn or parts of the radio would split apart if I forced it. When the replacement sound brick was not strong enough, it would ping off when you turned the tuning knob. The photo below shows the solution I arrived at. Getting the button in the right place was essential to make it work effectively. I glued a 6mm tactile button to a Lego dot (a smooth stud cover), and soldered wires to it (not shown below). I affixed this button stud to a one stud piece, used a two-stud-wide plate with a central stud to centre the button, and mounted it on two bricks with front studs. The photos below show the finished sound brick, and an exploded version. In the exploded version, the 4x2 plate that holds the bricks stable is not shown.
This brick goes in place of your Lego sound brick in the radio.
You need to solder wires to two diagonally opposite prongs on the button. These wires will connect to the Raspberry Pi, so I used wires that had socket connectors on the other end.
You may need to experiment to find your optimal sound brick design, depending on the type and size of button you're using.


A Raspberry Pi board, with the GPIO pins shown along the top edge. Image by Raspberry Pi. CC-BY-SA.
If you don't know much about the Raspberry Pi, here's some jargon:
For this project to work, I needed a way to add audio output that would also enable me to access the GPIO pins. I started off using the Waveshare WM8960 Audio HAT, but I couldn't make the sound output work consistently. I suspect the software isn't compatible with the latest operating system (and some older ones I tried), but it might also have had dodgy speakers. This would have been a great solution because it exposes GPIO pins that I could connect my tuning button to, and because the HAT itself has a button built in that I could use as a power off button. (It's connecting to GPIO pin #17, if you're looking to program the device - this isn't clearly docoumented). The speakers are pretty large with this, so fitting everything inside the Lego radio would have been challenging, although it was much easier using the smaller Raspberry Pi Zero model.
It would probably have been possible to use a Bluetooth speaker if I could find one small enough, or a plug-in speaker for the headphone socket, but both would have required separate power and I really wanted something that would be passively powered from the Raspberry Pi so it was easy to turn on and off.
The solution I settled on was the Pimoroni Audio AMP SHIM. This is advertised as "fully assembled" and "no soldering required", but even with bending the Raspberry Pi's GPIO pins to achieve a tighter fit, I couldn't get it to work consistently. I soldered it to a female header and then plugged that onto the Raspberry Pi's GPIO pins and that worked well. If something had gone wrong with my soldering, I would only have lost the HAT and the header, not the entire Raspberry Pi which would be the case if I soldered directly to that.
The image below shows you which pins the Audio Amp SHIM uses on your Raspberry Pi. These pins are where the SHIM needs a good connection. I soldered the indicated GPIO pins (GPIO 18, GPIO 19, GPIO 21) to a female header, plus the two power pins (pins 2 and 4) and the pin 39 ground pin. I didn't need to solder the additional ground pins, which are also used, but you may need to do that depending on the manufacturing tolerances of the SHIM. The image below is from pinout.xyz, which enables you to see which pins various Pimoroni add-ons use.

Once you've fitted your replacement sound brick, you connect the wires from it to your Raspberry Pi's GPIO pins. The main thing is to make sure you don't try to use the same GPIO pins that the audio board is using (although the ground pins can be shared). If you use a different audio board, you may need to use different pins, and modify the code below accordingly. I recommend you only connect things to the Raspberry Pi when it is switched off. While I have tried to offer good advice here, anything you do is at your own risk.
I also added an additional button, which I can press to turn off the radio. My radio is set to power on automatically when the power is turned on. The button safely shuts it down, so that the micro SD card used for storage is not corrupted.
The pin connections are:
It doesn't matter which of the two wires from each button goes to ground and to the GPIO pin.
The picture below shows everything inside the radio case. The tiny speaker is held in place with two slanted Lego plates in the bottom right. I started out using a Raspberry Pi Zero (a cheaper, smaller, lower-powered model), but it takes quite a while to boot up, which meant there was a long delay before you heard any music. I'm now using a Raspberry Pi 3. Newer models are available, but this struck a compromise between booting faster, while also not tying up my latest and greatest Raspberry Pi in this project. I already had a Lego-compatible case for the Raspberry Pi 3 I bought off eBay, so that made mounting it easy. The replacement sound brick is the yellow and orange construction on the left.

This program uses the Python programming language. The Raspberry Pi operating system includes Thonny, which is a tool for creating and running Python programs. To set up this project, I connected a keyboard, mouse and monitor and got everything working. When it was working, I removed them all.
To use this Python program, you need to have a collection of songs and a collection of jingles in MP3 format. Find free jingles here. To make it feel more like radio, I chose session tracks by various artists in my collection, including Inspiral Carpets, Frazier Chorus and They Might Be Giants. I also enjoyed loading it with tracks from the 50s and 60s so that the music matches the aesthetics of the radio.
You should also add a jingle or sound effect called "goodbye.mp3" which is played when you turn off the radio. Mine simply says "thank you for listening".
For simplicity in the code, I renamed my music tracks to "song1.mp3" to "song14.mp3" and my jingles to "jingle1.mp3" to "jingle11.mp3". You can use your real filenames in the program here if you prefer, and there's no limitation on how many songs or jingles you have. Add more tracks to reduce the likelihood of them repeating.
All of your sound files need to be in a folder called "music", which sits in the same folder as your program code. Create a folder called "radio" and put your Python program and your music folder in it.
# Sean's Lego Retro Radio Raspberry Pi music player

import random, time
from gpiozero import Button
tuning_button = Button(2)
off_button = Button(20)

print ("Starting Sean's Lego Radio code")

# The audio files must be in the music folder
# Don't include the filename extension (.mp3) in the filenames here
songs = ["song1", "song2", "song3", "song4", "song5", "song6", "song6", "song8", "song9", "song10", "song11", "song12", "song13", "song14"]
jingles = ["jingle1", "jingle2", "jingle3", "jingle4", "jingle5", "jingle6", "jingle6", "jingle8", "jingle9", "jingle10", "jingle11"]

def play_track(current_file):
    global radio_on
    music.play_once(current_file)
    while music.is_playing(current_file):
        if tuning_button.is_pressed and radio_on:
            print("Tuning button pressed")
            music.stop()
            time.sleep(0.5)
        if off_button.is_pressed and radio_on:
            print("Off button pressed")
            music.stop()
            radio_on = False
            play_track("goodbye") # your goodbye jingle, called goodbye.mp3
        time.sleep(0.1)

radio_on = True
while radio_on:
    if radio_on:
        play_track(random.choice(songs))
    if radio_on:
        play_track(random.choice(jingles))

exit() # return to command lineTo make this program run automatically when the Raspberry Pi is switched on, follow these steps:
sudo nano ~/.bashrc
# Sean's Lego Radio addition
cd radio
echo Command line is triggering Lego Radio code
pgzrun lego_radio.py
echo Returned from Lego Radio code
sudo shutdown +3You can now use the Lego Radio without having a monitor or keyboard connected. When you plug your radio in, it will boot up and start playing music automatically. Expect a delay before you hear music, because it takes a little time for the Raspberry Pi to start up. When you turn the dial and trigger the channel change, a new track will play. When you press the off button you've added, the program will play your goodbye jingle and end. It then waits 3 minutes before powering down safely. The reason for that is to stop you getting locked out from the device if you want to make changes later. You can override the shutdown sequence by connecting a keyboard and typing in: sudo shutdown -c
I'm really pleased with how this project works, with the tuning knob on the Lego Radio effectively controlling the music. However, this project is really a demonstration and you can take this idea much further. I previously published a program called Raspberry Radio that indexes your MP3s for you (enabling vast song lists) and then uses computer speech to announce songs before playing them (making for a more radio-like experience). That project could be enhanced with this one, so that you have stations with different track lists and maybe even different DJ accents. I also looked at adding a PiGlow to create coloured light patterns inside the Lego Radio, but it wasn't possible to do this with the Audio Amp SHIM in the end because my soldering was too blobby.
Looking for music for your Lego Radio? Check out Artificial, my album about what happens beyond AI when the machines become emotional.
Find more inspiring Raspberry Pi projects in my free Coding Compendium ebook.
© Sean McManus. All rights reserved.
Visit www.sean.co.uk for free chapters from Sean's coding books (including Mission Python, Scratch Programming in Easy Steps and Coder Academy) and more!
New 10th anniversary edition of my acclaimed novel about what happens when AI and the music business collide.

A free 100-page ebook collecting my projects and tutorials for Raspberry Pi, micro:bit, Scratch and Python.
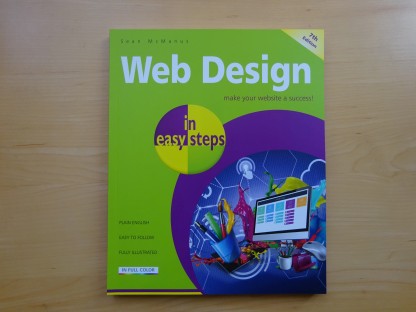
Web Design in Easy Steps, now in its 7th Edition, shows you how to make effective websites that work on any device.

Power up your Microsoft Excel skills with this powerful pocket-sized book of tips that will save you time and help you learn more from your spreadsheets.
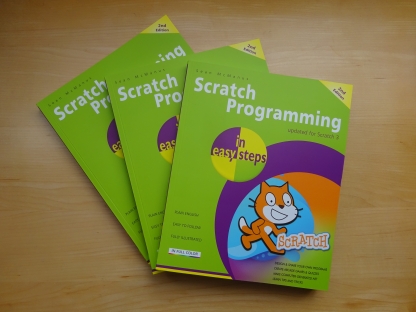
This book, now fully updated for Scratch 3, will take you from the basics of the Scratch language into the depths of its more advanced features. A great way to start programming.
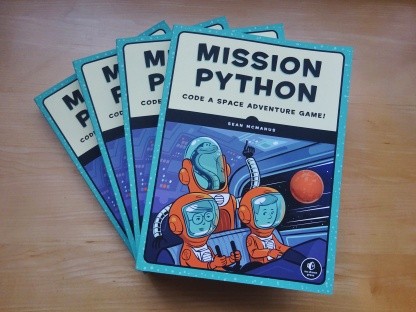
Code a space adventure game in this Python programming book published by No Starch Press.