Introduction
Over the years I have worked on various documentation teams and one of the more frustrating parts of creating documentation is creating and maintaining screenshots. So, when I started putting together the documentation for StellarAdmin, I knew that this was something that I wanted to completely automate.
In this blog post, I’ll talk about the framework I put together for automating the screenshot generation and maintenance.
Why is this a frustrating task
Before we get into the framework itself, let’s talk about why screenshots are such a frustrating part of documentation.
The first frustrating thing is that you need to set up the correct scenario. Screenshots typically demonstrate a specific feature of the application or perhaps some sort of edge case. So, before you can take the screenshot, you need to recreate that particular scenario in the application, which can be time consuming.
Many documentation websites now support light and dark mode. So, you’d probably want to take screenshots in both light and dark mode and use the correct one according the the documentation website’s current mode. This means you’ll want to take both screenshots of the exact same area of the screen - unless you want the screenshots’ viewport jumping around as the user switches modes. This gets even more difficult when you have annotations on the screen and is (probably) impossible to achieve without some sort of automation.
Finally, as the application changes, you need to go back and refresh those screenshots so that they accurately reflect what the user experience when they run the application. This means that you need to repeat everything I mentioned above when you created the screenshot the first time around.
My screenshot generation framework
The architecture I put in place makes use of Playwright and WebApplicationFactory. If you are unfamiliar with ASP.NET Core, WebApplicationFactory is used in ASP.NET Core integration testing and allows you to host your application in an in-memory test server.
At a high level, the architecture of my screenshot framework looks as follows:
flowchart LR
spec["<b>Specification</b><br/>YAML: the steps to take<br/>and what to capture"]
scenario["<b>Scenario</b><br/>C#: how StellarAdmin<br/>is configured"]
cli["<b>StellarAdmin CLI</b><br/>Runs each spec<br/>against its scenario"]
chromium["<b>Chromium</b><br/>Driven by Playwright,<br/>follows the spec's steps"]

subgraph factory["WebApplicationFactory"]
host["<b>Test host</b><br/>A plain ASP.NET Core app<br/>plus the scenario's configuration,<br/> on a real port"]
end

screenshots["<b>Screenshots</b><br/>PNGs and GIFs,<br/>light and dark"]
docs["<b>Website docs</b><br/>Pages place them by<br/>screenshot name"]

spec --> cli
scenario --> cli
cli -- drives --> chromium
cli -- starts --> factory
chromium <-- HTTP --> host
chromium --> screenshots
screenshots --> docs
I will go into everything in more detail in the rest of the blog post, but let’s briefly discuss what is happening here.
The two important parts are the scenario and the specification. The scenario is a C# class that configures StellarAdmin to a required state for the screenshots I want to take. The specification is a YAML file with my own DSL that I created and uses Playwright to automate the browser to get to the specific state(s) for the screenshot(s) I want to take.
Both of these are used by my internal development CLI. The CLI uses WebApplicationFactory to start the test server which is an ASP.NET Core web application. When the WebApplicationFactory starts up the test server, it will execute the scenario, which gets the application into the correct state.
It then executes the specification, which uses Playwright to automate the browser and also has some additional features, such as taking screenshots (and GIF animations), adding annotations, etc. The screenshots that are taken are stored inside the docs repository from where they are embedded into the various documentation pages.
Configuring StellarAdmin
Before we talk about each of the elements above in more detail, I think it is important to have a basic understanding of what StellarAdmin is and how users configure it.
StellarAdmin is a framework for ASP.NET Core that allows developers to rapidly create admin screens for applications. In other words, it is a CRUD framework on steroids.
StellarAdmin integrates into any ASP.NET Core application by registering various services and endpoints. At a high level this is what a typical ASP.NET Core application with StellarAdmin installed looks like:
var builder = WebApplication.CreateBuilder(args);
builder.Services.AddControllersWithViews();
builder.Services.AddStellarAdmin(admin =>
{
// ...
});
var app = builder.Build();
if (!app.Environment.IsDevelopment())
{
app.UseExceptionHandler("/Home/Error");
app.UseHsts();
}
app.UseHttpsRedirection();
app.UseStaticFiles();
app.UseRouting();
app.UseAuthorization();
app.MapControllerRoute(
name: "default",
pattern: "{controller=Home}/{action=Index}/{id?}");
app.MapStellarAdmin();
app.Run();
StellarAdmin requires the developer to call AddStellarAdmin() to register the StellarAdmin services and configure it, and MapStellarAdmin to map the various StellarAdmin endpoints.
The important part is the StellarAdmin configuration, which happens inside the AddStellarAdmin() callback. Let’s take a very basic example where I have a Trip entity (called a resource in StellarAdmin terminology) which I want to allow users to maintain. I can register the resource as follows:
builder.Services.AddStellarAdmin(admin =>
{
admin.AddEfCoreResource<Trip>(resource =>
{
resource.Index(index => index.Columns(columns =>
{
columns.Add(trip => trip.Code);
columns.Add(trip => trip.Title);
}));
});
});
The above registers the Trip resource, adds it to the navigation, and generates an index page displaying the list of trips.
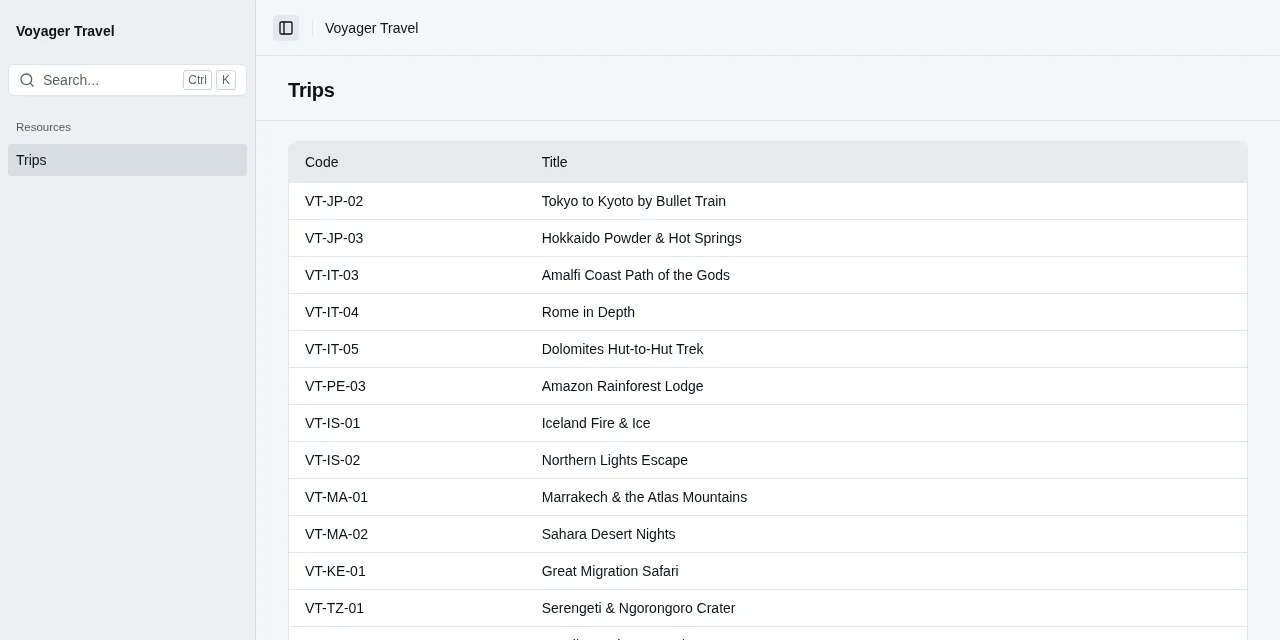
There is much more to StellarAdmin, but the important part for the purposes of this blog post, is that you configure StellarAdmin inside the AddStellarAdmin() callback function using the builder pattern that many .NET developers are already familiar with.
So, when we talk about a scenario in the framework diagram above and further on in this blog post, that is exactly what it is - those few lines of code highlighted in the code snippet above.
Scenarios
While the StellarAdmin configuration is still fresh in your mind, let’s start with scenarios. A scenario inherits from the Scenario class and must implement the ConfigureAdmin() method.
public abstract partial class Scenario
{
public abstract string Description { get; }
public abstract string Name { get; }
public abstract void ConfigureAdmin(StellarAdminBuilder admin);
}
For the previous example I used demonstrating how to add the Trip resource, the scenario will look as follows:
public sealed class QuickStartTripsScenario : Scenario
{
public override string Description =>
"The trips grid with Code and Title columns, from the quick start.";
public override string Name => "quick-start-trips";
public override void ConfigureAdmin(StellarAdminBuilder admin)
{
admin.AddEfCoreResource<Trip>(resource =>
{
resource.Index(index => index.Columns(columns =>
{
columns.Add(trip => trip.Code);
columns.Add(trip => trip.Title);
}));
});
}
}
This scenario’s ConfigureAdmin() method is executed as part of the WebApplicationFactory startup, which we will explain below.
Specifications
The specification is what drives the browser automation and it is my own DSL I implemented on top of Playwright using YAML. A specification contains a scenario key which links back to the scenario (quick-start-trips in the example above). It also contains a steps key with the sequence of steps that must be executed.
scenario: quick-start-trips
steps:
- viewport: { width: 1280, height: 640 }
- goto: /stellaradmin/trips
- screenshot: quick-start-trips
- colorScheme: dark
- screenshot: quick-start-trips-dark
A specification runner will execute all the steps in the steps sequence one by one. For the specification above, it will perform the following steps:
- Set the browser viewport to 1280 x 640 pixels
- Go to the URL
/stellaradmin/trips, which is the index page of ourTripresource - Take a screenshot of page and save it to the screenshot directory that was passed to the spec runner with the filename
quick-start-trips(.png) - Switch the browser to dark mode
- Take another screenshot and save this one with the filename
quick-start-trips-dark(.png)
The specification above is about as simple as you can get, but they can get quite sophisticated. Some of the more advanced features are the following:
- Logging in as a specific user for authentication scenarios
- Performing user interactions such as click, hover, scroll, etc.
- Drawing annotations or highlighting elements before screen capture
- Recording animations (as either MP4 or GIF) to better demonstrate certain user interactions
- Capturing (and recording) only specific regions of the screen, as opposed to the entire screen
- and more…
The host application and WebApplicationFactory
The last real important bit to this is the host application and web application factory. The host application is the ASP.NET Core application which will host StellarAdmin. It is a pretty standard ASP.NET Core application with Razor Pages, MVC Controllers, static pages enabled.
var builder = WebApplication.CreateBuilder(args);
builder.Services.AddControllersWithViews();
builder.Services.AddRazorPages();
var app = builder.Build();
app.MapStaticAssets();
app.MapRazorPages();
app.MapDefaultControllerRoute();
app.Run();
The web application factory is implemented in a class named ScenarioApplicationFactory that inherits from WebApplicationFactory<> and is passed the scenario we want to execute in the scenario constructor parameter.
internal sealed class ScenarioApplicationFactory(Scenario scenario)
: WebApplicationFactory<Host.Program>
{
private static readonly string HostProjectDirectory = typeof(Host.Program)
.Assembly.GetCustomAttributes<AssemblyMetadataAttribute>()
.Single(attribute => attribute.Key == "ProjectDirectory")
.Value!;
protected override void ConfigureWebHost(IWebHostBuilder builder)
{
builder.UseEnvironment(Environments.Development);
builder.UseContentRoot(HostProjectDirectory);
builder.ConfigureTestServices(services =>
{
// Helpers that register the required services for the test
// database and also ASP.NET Identity
services.AddVoyagerTravelDatabase();
services.AddScenarioSignIn();
// Run the StellarAdmin configuration for the scenario
services.AddStellarAdmin(scenario.ConfigureAdmin);
// Add startup filter to register additional middleware
services.AddTransient<IStartupFilter>(_ => new StartupFilter(scenario));
});
}
private sealed class StartupFilter(Scenario scenario) : IStartupFilter
{
public Action<IApplicationBuilder> Configure(Action<IApplicationBuilder> next) =>
app =>
{
app.UseRouting();
app.UseAuthentication();
app.UseAuthorization();
app.UseEndpoints(endpoints =>
{
endpoints.MapScenarioSignIn();
endpoints.MapStellarAdmin();
});
next(app);
};
}
}
The important bit above is line 22 which calls AddStellarAdmin() and passes it the scenario’s ConfigureAdmin method. This will ensure that the host contains the StellarAdmin configuration as specified by the scenario.
I did not mention this earlier, but the host application also contains a SQLite database I created that contains tables and data for an entire sample application. The DbContext for this is registered in the call to AddVoyagerTravelDatabase(). It also contains pre-seeded users which is used by ASP.NET Core Identity, which is registered by the AddScenarioSignIn() call.
One other thing you will notice is that I added a startup filter which adds the routing and authentication middleware, as well as the StellarAdmin endpoints. I could have added that to the host itself, but decided to keep the host itself as simple as possible. Both approaches will work.
The diagram below shows how these pieces come together. The ScenarioApplicationFactory will start the host application and update the host configuration, applying the StellarAdmin configuration from the scenario.
flowchart LR
host["<b>Host application</b><br/>A plain ASP.NET Core app"]
scenario["<b>Scenario</b><br/>ConfigureAdmin()"]
waf["<b>ScenarioApplicationFactory</b><br/>AddStellarAdmin(scenario.ConfigureAdmin)"]
app["<b>Running app</b><br/>Test host + the scenario's<br/>admin panel"]

host --> waf
scenario --> waf
waf --> app
The specification runner and CLI
The scenario, specification, and ScenarioApplicationFactory are the important parts to make all of this work. This final part is the specification runner and the CLI. The specification runner loads and parses a specification, finds its scenario and then starts the host via ScenarioApplicationFactory, passing the scenario. Once the host is up and running, the specification runner executes all the steps in the specification.
The CLI mentioned in this blog post is a development CLI (named stellar) that I use for various development related tasks. One of those tasks is the generation of the screenshots. I can generate screenshots for all specifications running the following command:
stellar docs generate screenshots
This will load all the specifications in a predefined directory, iterate over them and pass them to the specification runner which will execute them. I can also run a single specification by passing the --spec flag with the name of the specification:
stellar docs generate screenshots --spec quick-start-trips
Putting it together with AI
I can manually create the scenarios and specifications, but I have also automated that part with skills that understand the structure and the data of the sample Voyager database I use for my test host. It also knows how to use StellarAdmin to register and configure resources, how to create scenarios, how to create specifications, and how to execute a specification with the CLI.
So now, my day to day screenshot generation is completely driven from Claude. Typically, I would be working on a part of the docs and think it would be worth adding a screenshot for a particular feature.
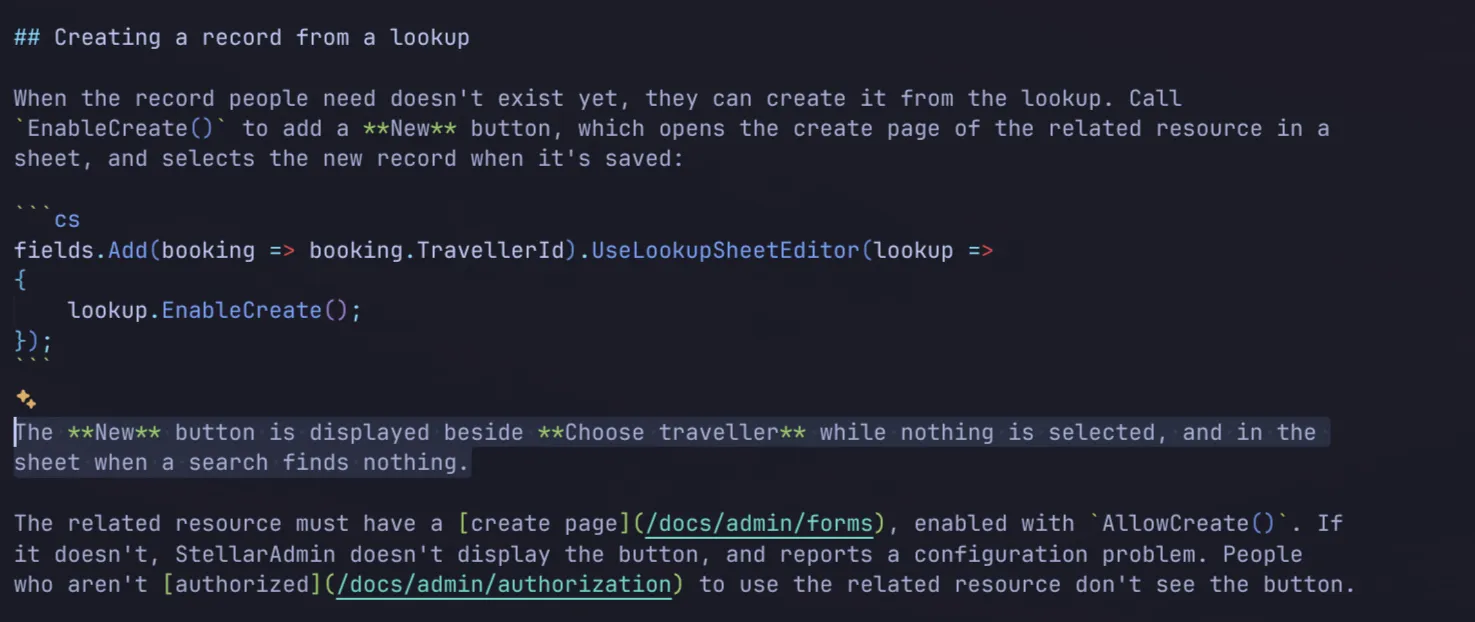
I’ll highlight the relevant part of the docs and prompt Claude to generate the screenshot for me.
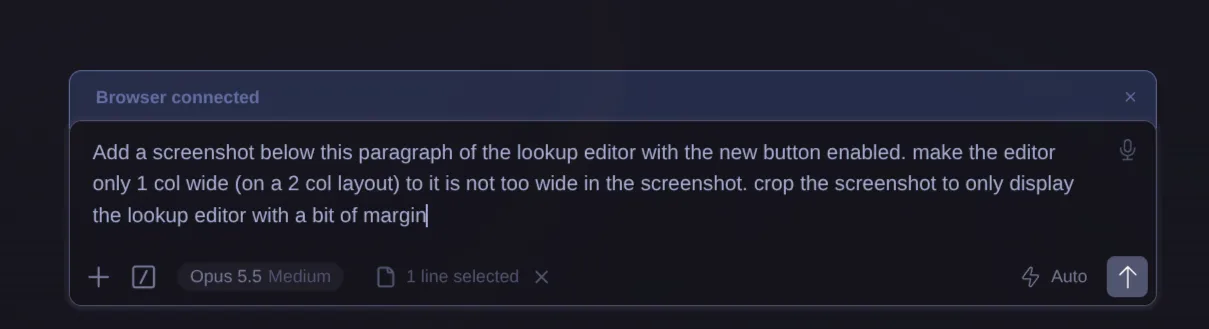
Claude uses the skills from the repo and writes a scenario and the spec for me.
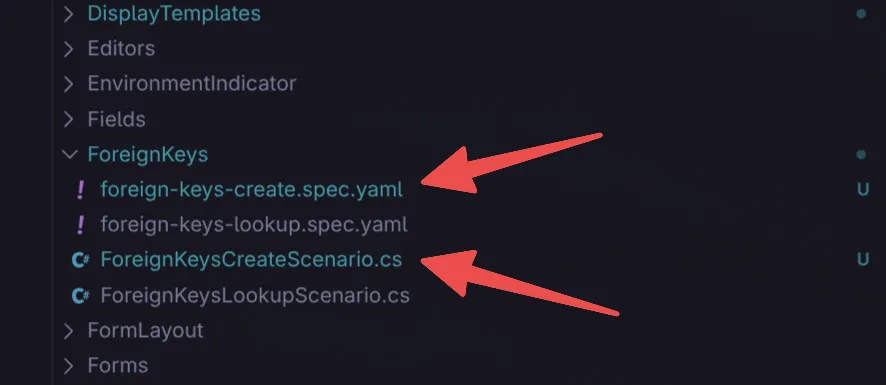
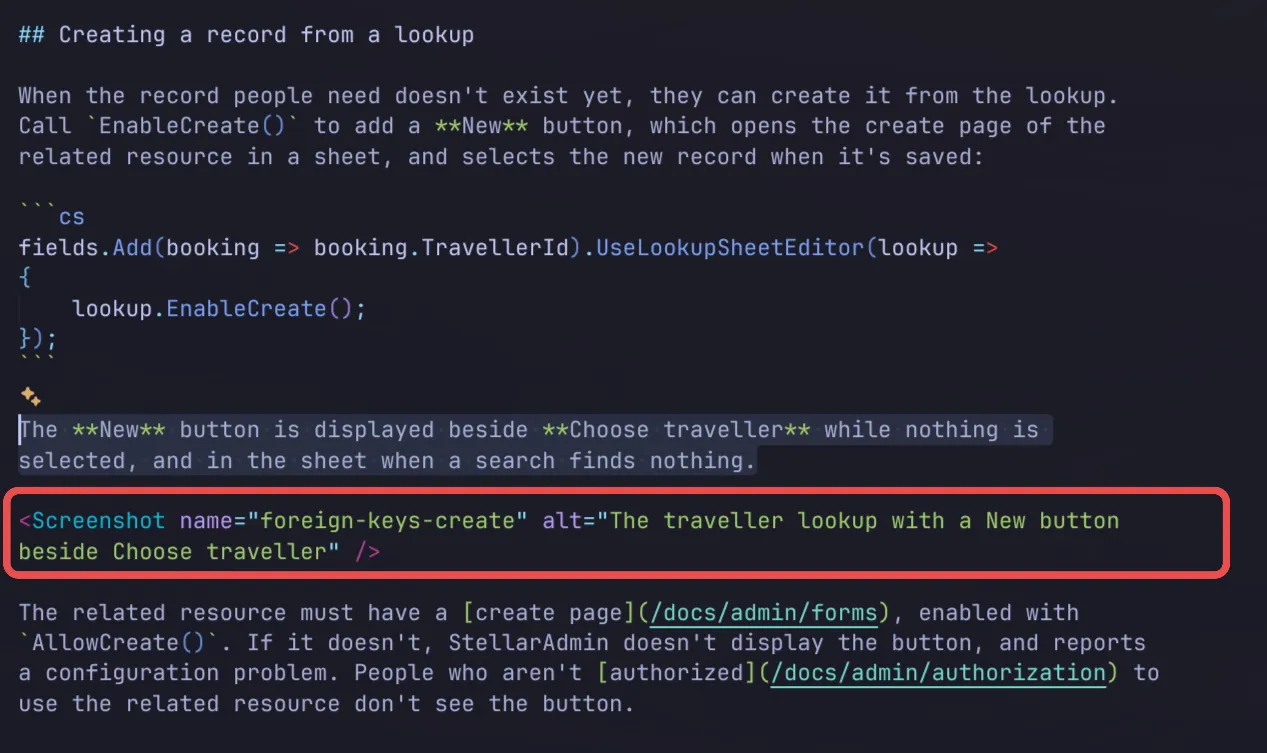
It also updates document I am working on to insert the link to the new image with the correct alt text.
And runs the CLI which generates the screenshot so it is displayed correctly in the docs.
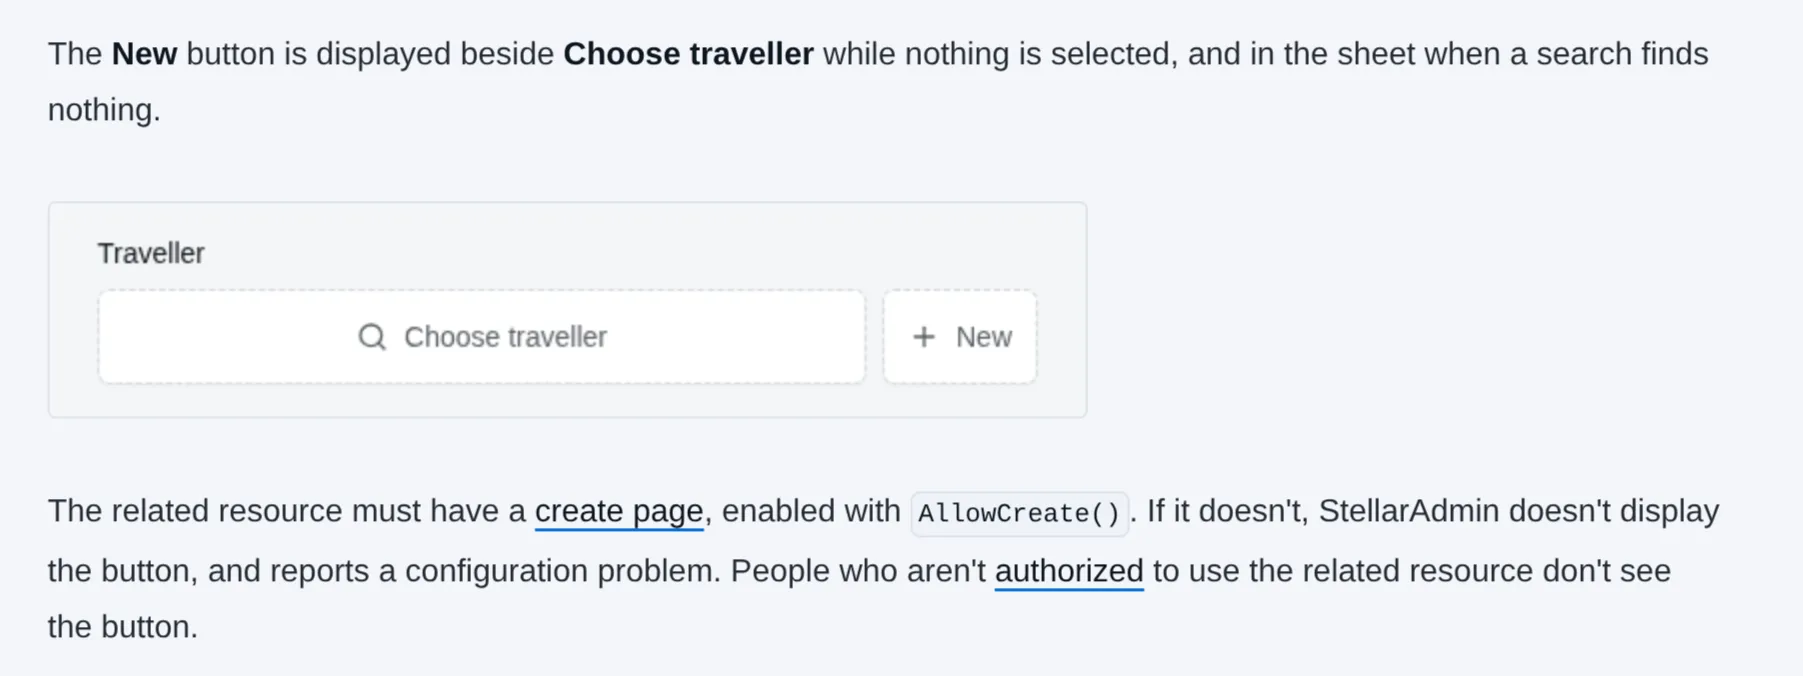
I took me a few seconds to write a prompt and Claude less than a minute to write the scenario and spec, execute it to generate both the light and dark mode screenshots, and insert the image in the docs.
And, since it is all automated, if anything in StellarAdmin changes that requires me to regenerate screenshots, such as changing stylesheets or an underlying component, all I have to do is run the stellar docs generate screenshots command and all my screenshots will be based on the latest version of the library and will reflect all visual changes.
Conclusion
In ths blog post, I spoke about the architecture and workflow I put together for generating screenshots for StellarAdmin. The entire workflow is automated and it is repeatable to ensure that I get consistent, high quality screenshots generated.
Most of the code above is simplified from the actual StellarAdmin source code. If you want to look at it you can start here:
- The StellarAdmin.ScenarioTesting project contains a lot of the infrastructure around scenarios, specifications, and the
ScenarioApplicationFactory. - The StellarAdmin.Cli project contains the StellarAdmin CLI.
- The StellarAdmin.ScenarioTesting.Host project is the ASP.NET Core host for running the scenarios.
- Two of the AI skills I use to help me create the scenarios and specs with an agent are located in .agents/skills/write-scenario-specs and .agents/skills/write-docs-screenshot-specs.