Creating quality content is essential for your site/blog to grow, although it is one of the strategies to make money online.
Google AdSense is a best-known ad network that helps publishers make money from their content. It is the best contextual high-paying ad service among all ad networks. Almost 80% of web publishers across the globe use AdSense.
Using the Adsense program is exciting. But, you must keep the user experience in mind during ads placement. Ads placement is critical and should be at eye level where people are stationary.
Google offers great importance to user experience, and ad placement plays a significant role in it. An AdSense heat map is the best guide that provides you guide about ads placement according to your site type.
Google regularly changes its policies. Similarly, it has newly created a whole different way of ads placement called AdSense Auto ads.
What exactly are Google AdSense Auto ads?
Google AdSense Auto ad is a new and better approach to put advertisements on your site. It uses a machine-learning algorithm that automatically detects the best place for ads placement and monetizes your ads smartly.
It will first analyze your pages, figure out potential ad placements, and show new ads when they’re likely to perform well and provide a good user experience.
What you have to do is, place the code for once to all your pages. Google will start to deal with the rest. If you want to serve different types of ads on different pages, you have to click new features and ad formats and turn them on. And that’s it.
Benefits of AdSense Auto Ads:
- Optimization: Using machine learning, Auto ads show ads only when they are likely to perform well and provide a good user experience.
- Increased Revenue: It will automatically detect any available ad space for placing ads. Thus, more ads mean increased ad revenue.
- Time saver: Once you put the piece of code there, Google will take care of rest.
- If you have page-level ads enabled, you don’t need to add separate code for auto ads as code for page-level ads, and auto ads are the same.
- You can use auto ads along with existing manually placed ad units on your website. Auto ads will consider the placement of your manual ad before it triggers more ads on the same page.
How to serve Google AdSense Auto Ads on your blog or site?
Here are some simple steps you need to follow and get started with it.
- Sign in to your AdSense account.
- In the left navigation panel, visit My ads and select Get Started.
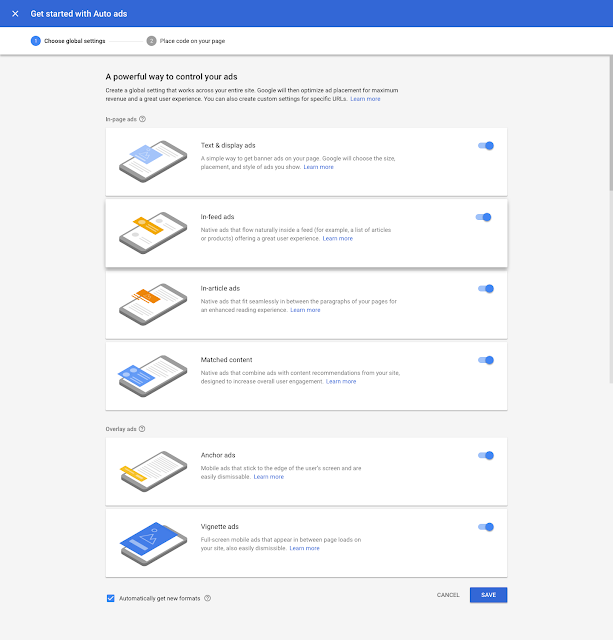
- On the “Choose your global settings” page, select the ad formats that you’d like to show and click Save.
- On the next page, click Copy code.

Paste the ad code between the and tags of each page where you want to show Auto ads.
Auto ads will start to appear on your pages in about 10-20 minutes.
Implement Google Auto Ads in Blogger
In the blogger dashboard, navigate to the theme section. Click on edit HTML.
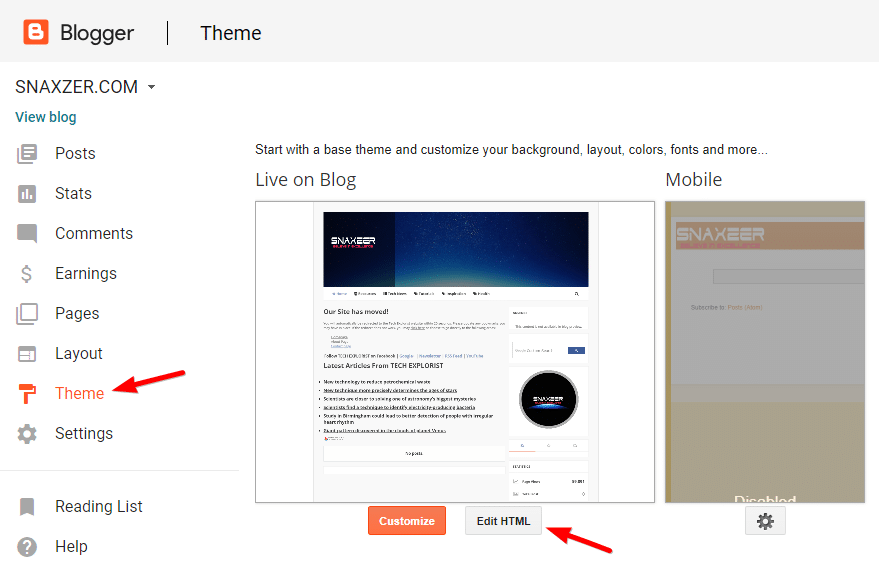
Now click in the editor section and hit CTRL + F and type in the search bar as shown in the screenshot below. Now paste your Google auto ads code just before and hit save theme button. That’s it.

How to customize Google Auto Ads?
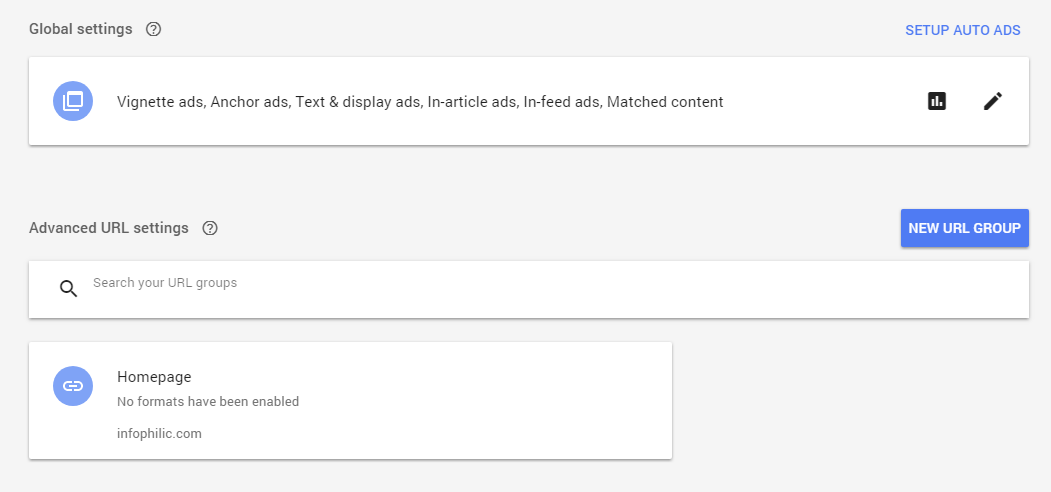
Adding code will show ads on all pages on your website or a blog. Let’s take an example for an instance if your blog is on WordPress CMS; then, you will have to put this code in the theme’s header file. It will show ads on all pages on your WordPress site. But many publishers don’t want to show ads on some pages like the homepage. So for this, you can use Advanced URL Settings in the Auto Ads.
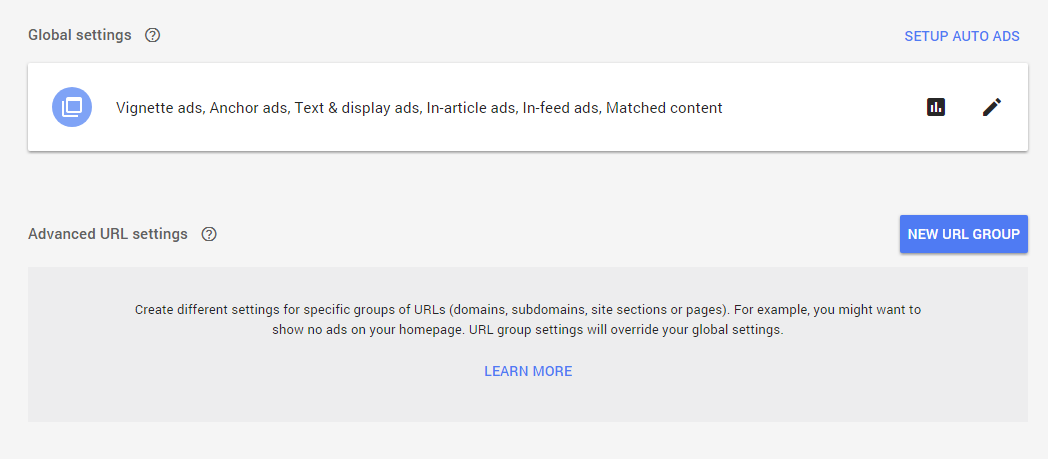
You can add as many URLs you want to customize or turn off ads.
To create a URL group, Click New URL group.
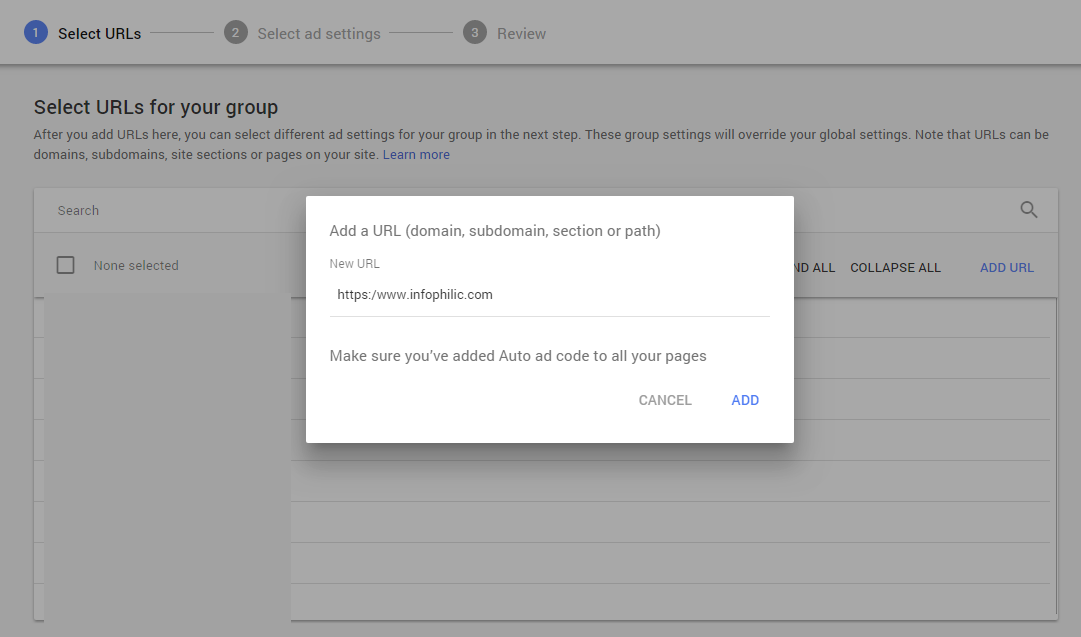
On the “Select URLs” page, select the URLs you want to add to your URL group. If you don’t see a specific URL, you can click Add URL and add it to your list.
Click Next.
You can add a domain, subdomain, page, or a category page.
On the “Select ads” page, use the controls to select the ad formats for your URL group.
If you don’t want to show any ads on the URLs you’ve selected for your URL group, leave all the ad formats unselected. For example, you might want to show no ads on your homepage and about page.
Leave Automatically get new formats selected if you want AdSense to automatically add new ad formats to your URL group as they become available.
Click Next.
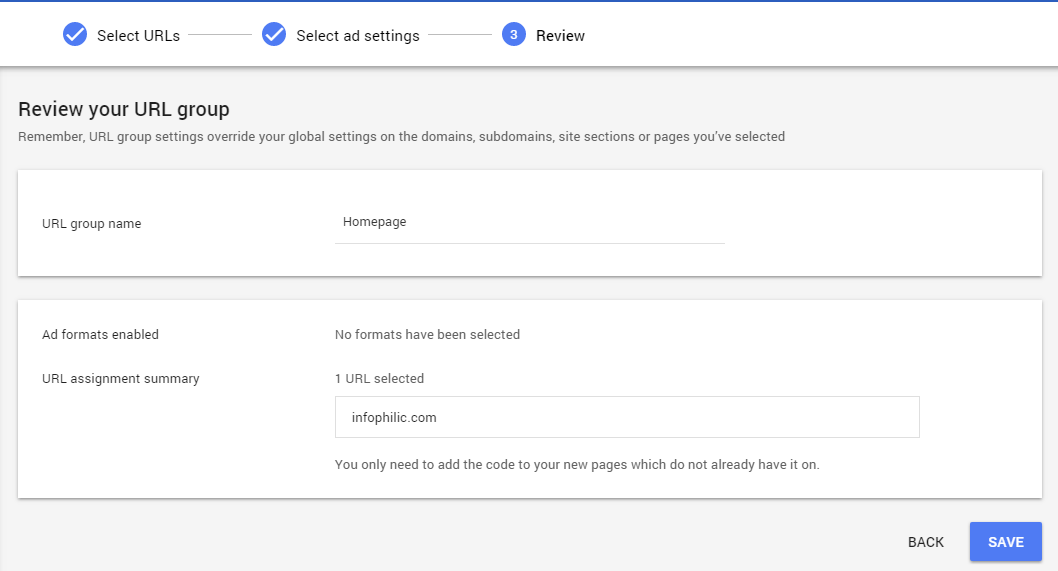
On the “Review” page, give your URL group a name and check the assignment summary.
Click SAVE.
The new settings will be applied to your selected URLs in about 10-20 minutes.
How to Disable auto ads on some pages?
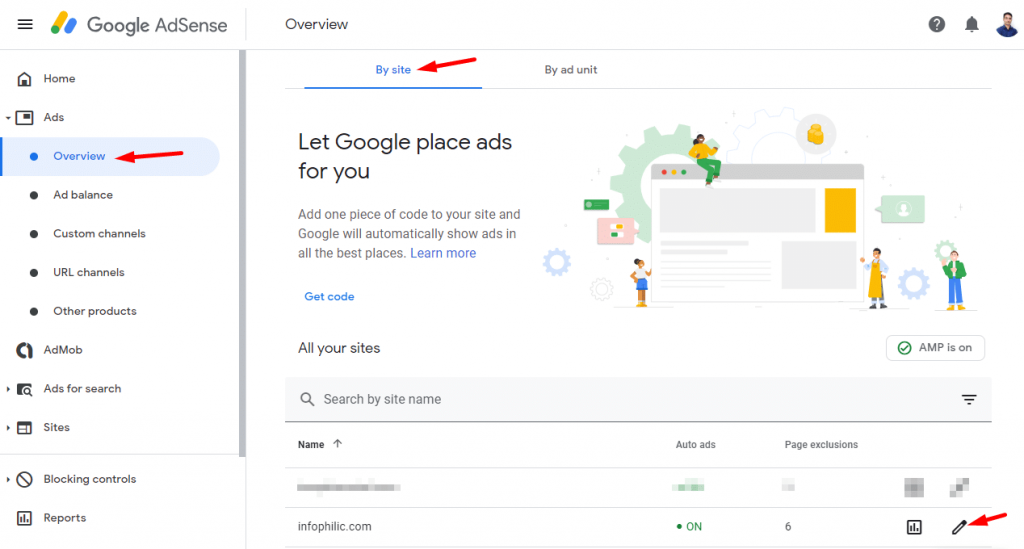
If you no longer want to display ads on some of your website pages, then you can use the page exclusion option.
Goto Google AdSense dashboard. Under Ads option, click on Overview. You will see ads setup by sites.
Click the edit icon for the site you want to edit setup. It will open Auto Ad settings for the site.
Here you can see the option to add page exclusions.
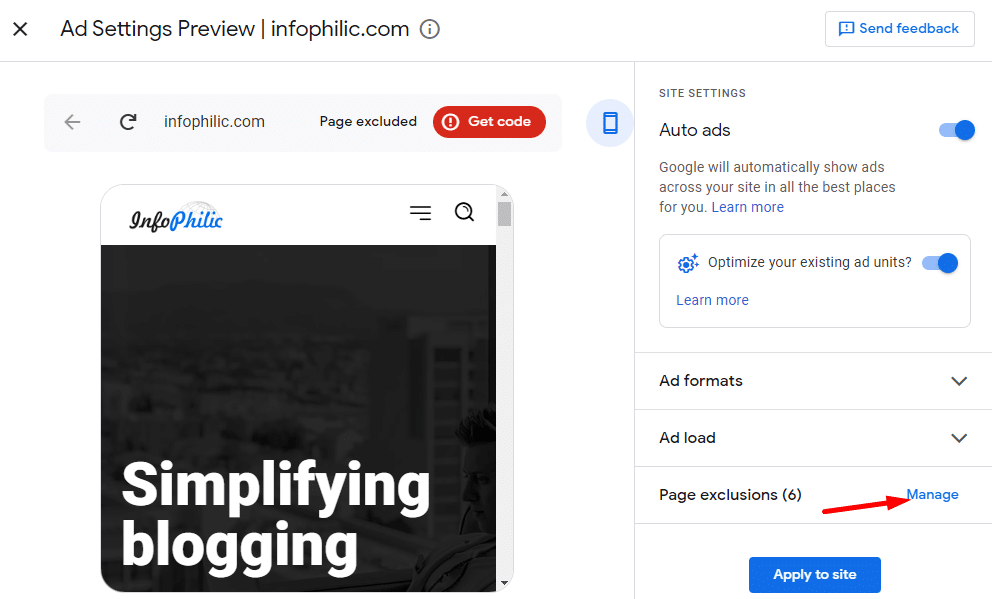
Hit on the Manage button.
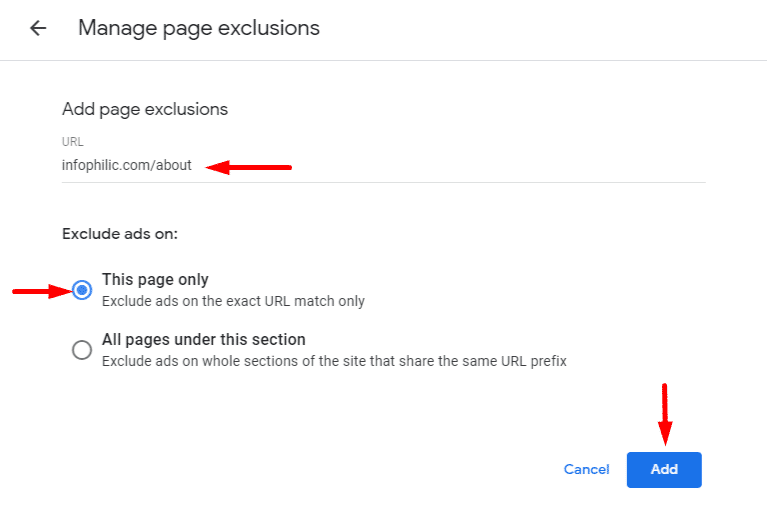
Click on Add Exclusion
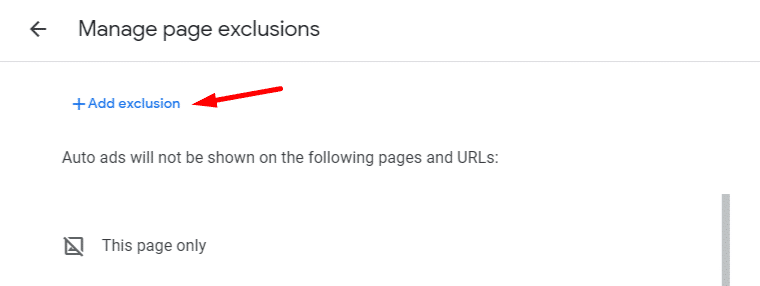
Add URL where you want to remove AdSense auto ads.
Here you will get two options
- This page only: Exclude ads on the exact URL match only
- All pages under this section: Use this to remove auto ads from a specific category or on URL pattern.
Remember, URL group settings override your global settings on the domains, subdomains, site sections, or pages you’ve selected.
Google Auto Ads showing many ads?
Enabling Google auto ads may start showing many ads on your site. It is because by default ad balance ratio is set to 100%. You can use ad balance to reduce the number of advertisements on your website.
To change ad balance ratio, go to your AdSense dashboard >> My ads >> Ad balance

What do you think about this new feature? Let me know in the comment section below. Along with this, you might like to read my article on How to Increase AdSense Revenue.
Comment Policy: Your words are your own, so be nice and helpful if you can. Please, only use your real name and limit the amount of links submitted in your comment. We accept clean XHTML in comments, but don't overdo it please.