Using procedural generation to create the 10,000 landscapes in The Sentinel
One of the most alluring aspects of The Sentinel is the starkly beautiful landscape. Filled with otherworldly peaks and plateaus, with their scattered forests and futuristic robots, the eerie world of the Sentinel is immersive and atmospheric in a way that is uniquely impressive.

Not only that, but The Sentinel boasts 10,000 of these landscapes, an almost unimaginable number on the 32K BBC Micro that birthed the game. This article looks at how these 10,000 landscapes are generated from nothing more than a bit of maths and a heavy dose of genius.
(Talking of which, I am indebted to Simon Owen for his amazing sentland.py project, which I've extended to generate the landscape images below. I highly recommend it, as well as Simon's even more impressive Augmentinel project.)
The generation process
----------------------
Each landscape is generated by an 11-step process that takes 1024 seed numbers (as described in the deep dive on seed number generation) and then massages those seeds into the game's tile-based landscape by scaling and smoothing each tile corner until the final landscape is produced.
Here's a visualisation of the landscape generation process for landscape 0000 (you can click on the image to see a bigger version, as with all the images in this article):
There are seven stages in this visualisation (as not all of the 11 steps produce a different landscape). We first generate the seeds, and then smooth the landscape twice. We then scale and cap the tile altitudes before smoothing twice again, and then we apply tile shapes to the tile corners to convert them into a tiled landscape.
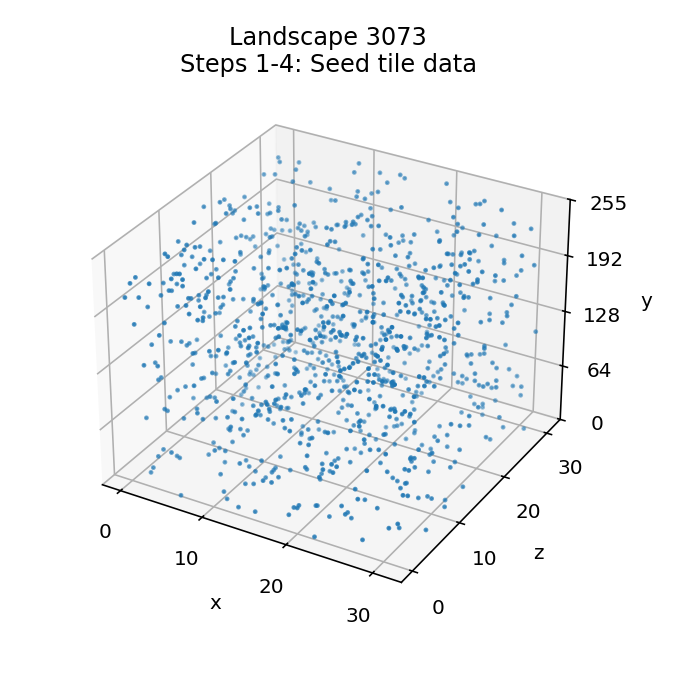
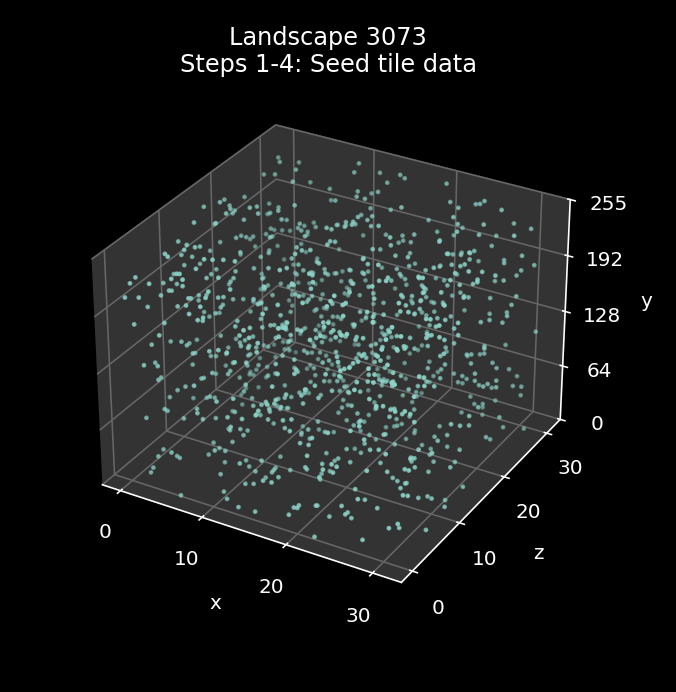
The landscape shown above is fairly average in terms of steepness. It has a tile data multiplier of 24, out of a range of 14 to 36 - we'll explain how this works below, but higher numbers tend to produce steeper landscapes. Here's the same process for the much steeper landscape 3073, which has a maximum multiplier of 36:

Steeper landscapes are much harder to navigate, while the gentler landscapes at the other end of the spectrum are a lot easier, though they are also more exposed if there are lots of sentries hunting for the player.
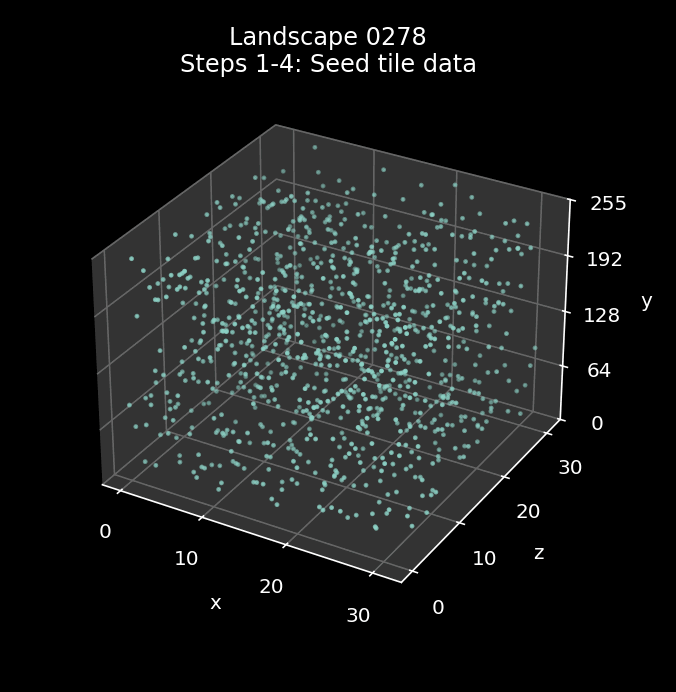
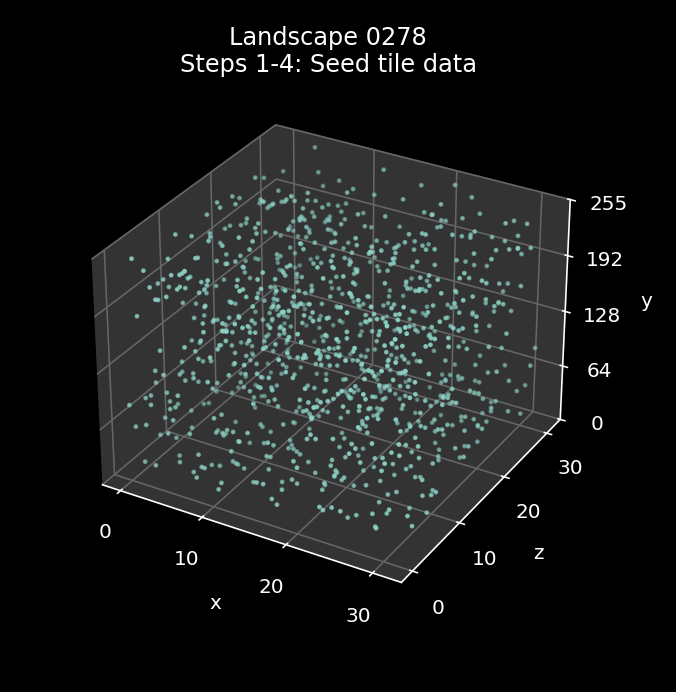
For comparison, landscape 0278 is about as gentle as it gets, with a tile data multiplier of 14. This is right at the bottom of the range, so the result is a rolling landscape with lots of wide plateaus and hardly any peaks to speak of:
Let's see what's involved in producing such a variety of landscape.
The generation process
----------------------
Here's a top-level breakdown of the full 11-step landscape generation process. I'll go into more detail about each step below, and you can click on a step number to jump straight to the detailed explanation:
| Step | Summary | Description | Code |
|---|---|---|---|
| 1 | Initialise seeds | Initialise the seed number generator so it produces seed numbers for the correct landscape | InitialiseSeeds |
| 2 | Flush seed generator | Generate 81 seed numbers and ignore them | GenerateLandscape |
| 3 | Calculate tile data multiplier | Calculate a multiplier in the range 14 to 36 for scaling the tile data in step 7 | GetNextSeed0To22 |
| 4 | Seed the tile data | Populate the tile data for the whole landscape with the next 1024 seed numbers | ProcessTileData A = &80 |
| 5 | Smooth by averaging (pass 1) | Smooth the landscape by averaging each tile corner's altitude with the three following tile corners | SmoothTileData A = bit 6 clear |
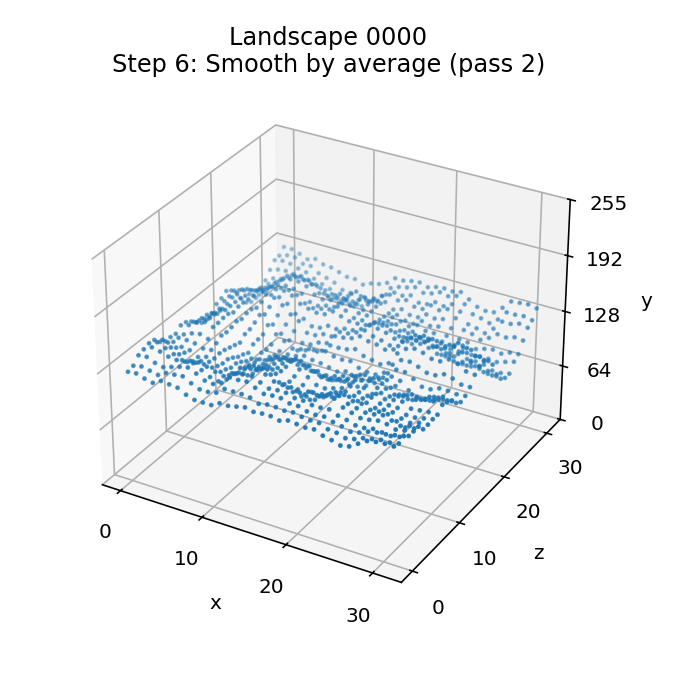
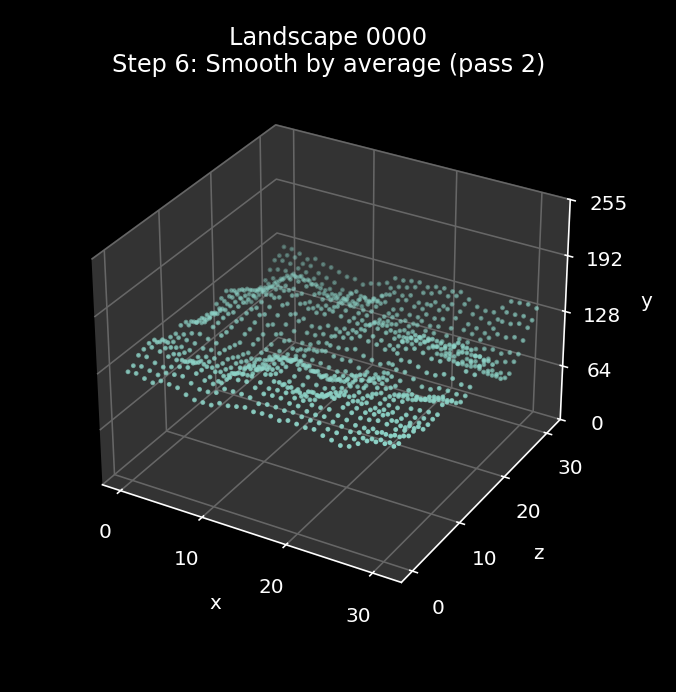
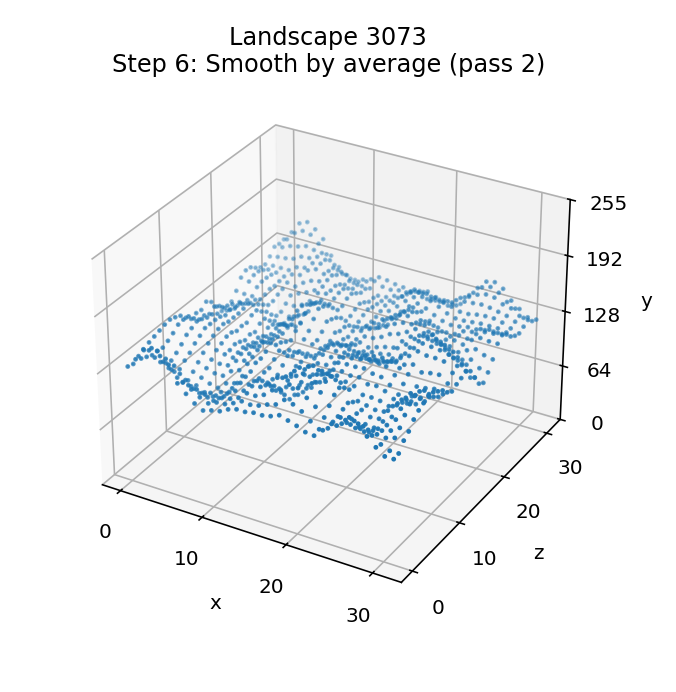
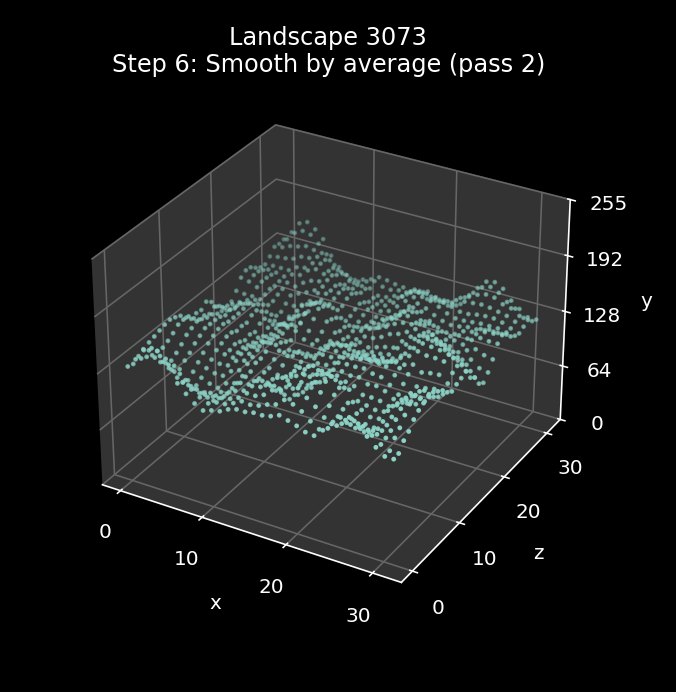
| 6 | Smooth by averaging (pass 2) | Repeat the smoothing process | SmoothTileData A = bit 6 clear |
| 7 | Scale the tile data | Scale the tile data for the whole landscape by the tile data multiplier and cap each byte to between 1 and 11 | ProcessTileData A = 1 |
| 8 | Smooth any spikes and troughs (pass 1) | Smooth the landscape by smoothing over any single-point spikes or troughs | SmoothTileData A = bit 6 set |
| 9 | Smooth any spikes and troughs (pass 2) | Repeat the smoothing process | SmoothTileData A = bit 6 set |
| 10 | Calculate tile shapes | Calculate the tile shape for each tile and insert it into the high nibble of the tile data | GetTileShape |
| 11 | Swap tile data | Swap the high and low nibbles in the tile data so the altitude is in the high nibble and tile shape is in the low nibble | ProcessTileData A = 2 |
The ultimate goal of this process is to fill the 1024-byte tile data table with the altitude and shape of each tile in the 31x31 tile landscape. Because of the way the tile data table works, this means storing tile altitudes for 32x32 tile corners and tile shapes for 31x31 tiles.
Let's work through each of the steps in turn.
1: Initialise the seeds
-----------------------
The first step is to initialise the seed number generator so it produces seed numbers for the correct landscape. The landscape is created from a stream of pseudo-random seed numbers that are the same for each individual landscape number (from 0000 to 9999), with no two landscapes having the same seed sequence.
The seeds are initialised in the InitialiseSeeds routine, which sets the bottom two bytes of the linear feedback shift register at seedNumberLFSR so they contain the landscape number in binary coded decimal.
See the deep dive on seed number generation for more details on this process.
2: Flush the seed generator
---------------------------
The second step is to generate (and, for the most part, ignore) 81 seed numbers. This is done at the start of the GenerateLandscape routine.
The purpose of this step is to get the seed number generator to a point where the output is usable and random enough to use - for example, the first 32 shifts will simply output the initial state of the register, so those aren't remotely random, but by the time we have shifted 81 bytes through the register we will truly be into pseudo-random territory.
There is also probably an element of obfuscation here, as those 81 bytes are stored in memory from stripData+80 down to stripData+0. There's no specific reason for this - they could just as easily be discarded - but anyone trying to hack the landscape process will probably get distracted by this step before realising it's just warming up the linear feedback shift register.
That said, the third seed number that's generated and stored at stripData+78 is used by the anti-cracker code in the SetCrackerSeed and CheckCrackerSeed routines, as it contains the high byte of the BCD landscape number. This is because the seed generator is initialised using the landscape number, and the third number out of the shift register is unchanged and still contains the initial value of that byte. See the deep dive on anti-cracker checks for details.
3: Calculate the tile data multiplier
-------------------------------------
The third step is to calculate a tile data multiplier that we can use to make the landscape more gentle (low values) or steep (high values). This is done in the GenerateLandscape routine, just after the seed generator is flushed.
The multiplier is an integer in the range 14 to 36 that gets applied to the tile data in step 7. Landscape 0000 has a hard-coded multiplier of 24, which is just on the gentler side of average (the middle of the range is 25). For all other landscapes, the calculation is as follows:
- Call GetNextSeed0To22 to get the next seed number for the landscape and convert it into the range 0 to 22. We do this by extracting bits 0-2 and bits 3-6 of the number and adding the resulting two numbers together. Bits 0-2 give a number in the range 0 to 7 and bits 3-6 give a number in the range 0 to 15, so the sum is in the range 0 to 22.
- Add 14 to the result get a number in the range 14 to 36.
We then store the result in tileDataMultiplier for use in step 7.
It's worth noting that the multiplier is still a random number, it's just in the range 14 to 36. Its size isn't related to the landscape number itself, but because it's based on a seed number, it's the same every time we generate each specific landscape.
4: Seed the tile data
---------------------
The fourth step populates the tile data table with the next 1024 seed numbers, which is one seed for each of the 32x32 tile corners that make up the 31x31 grid of tiles. The landscape is populated from back to front, starting at the far-right corner of the landscape and working along the back row from right to left, then doing the next row forwards from right to left, stepping forwards until we get to the front row, working from right to left to reach the front-left corner of the landscape.
This is achieved with two nested loops in the ProcessTileData routine, which we call with A = &80 to denote that we should be seeding the tileData table. The inner loop decrements xTile from 31 to 0 to move left along each row, while the outer look decrements zTile from 31 to 0 to step forward one row at a time.
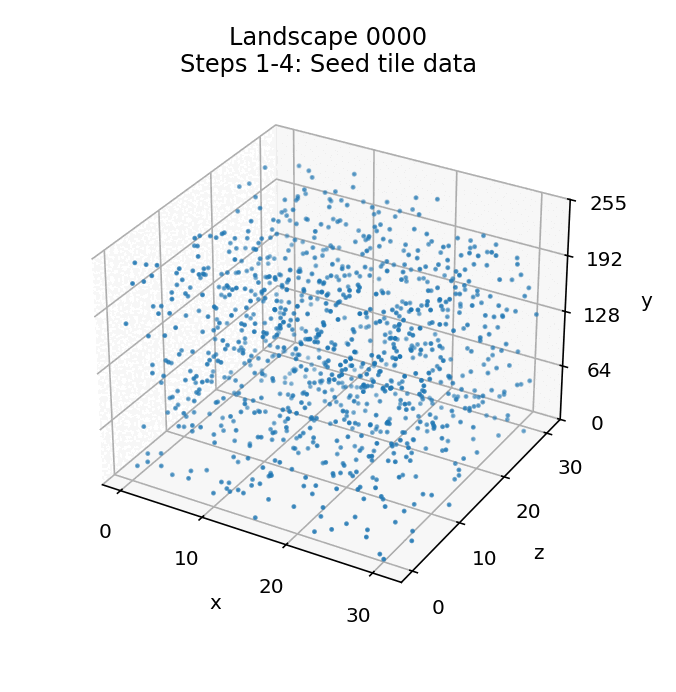
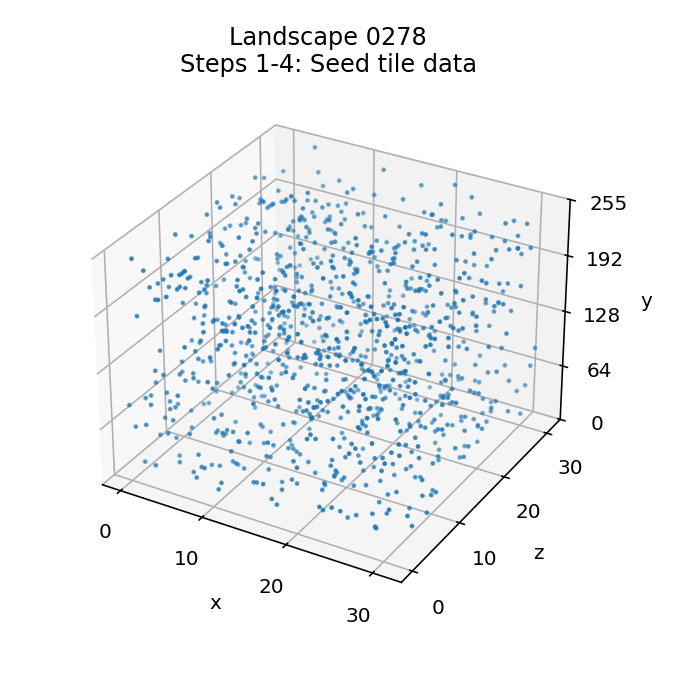
The seeds are random and all in the range 0 to 255. As an example, here are the initial tile seeds for landscape 0000:
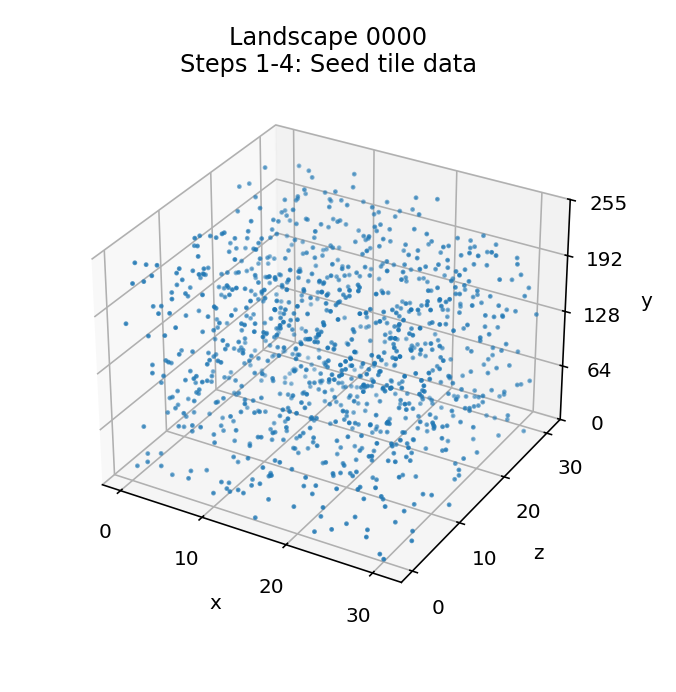
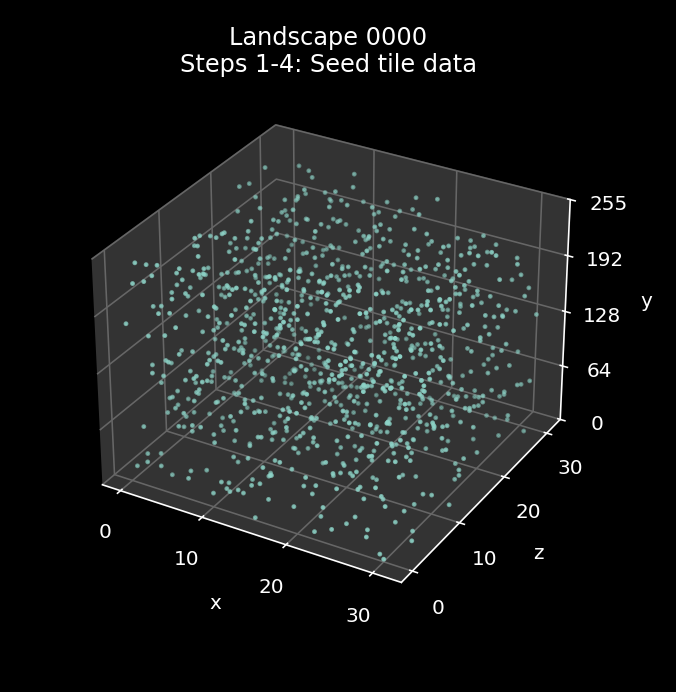
The x-axis is along the front left and the z-axis is along the front right, so the landscape grid is effectively the bottom level of this graph with the front of the landscape along the front left edge. Each tile has an associated seed byte in the range 0 to 255, which is shown by the height up the vertical y-axis.
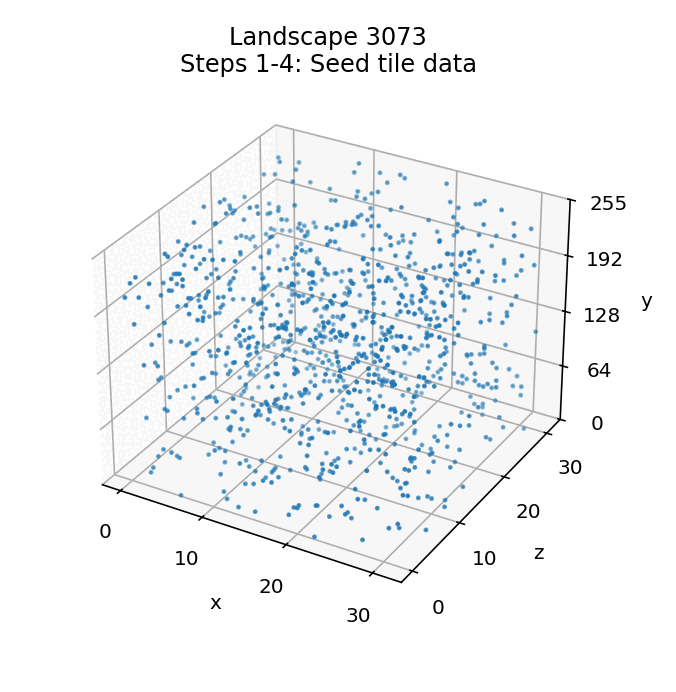
Just to show that the seeds are indeed random, here are the initial tile seeds for landscape 3073:
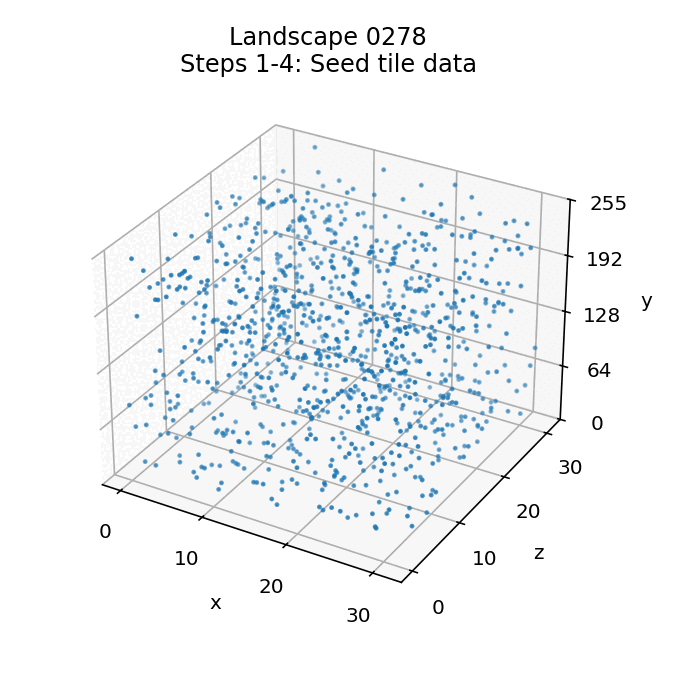
and here are the initial tile seeds for landscape 0278:
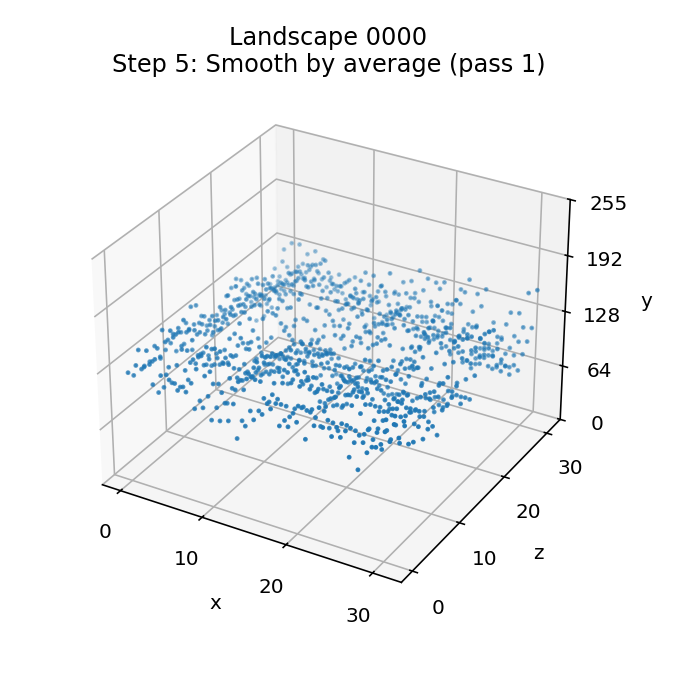
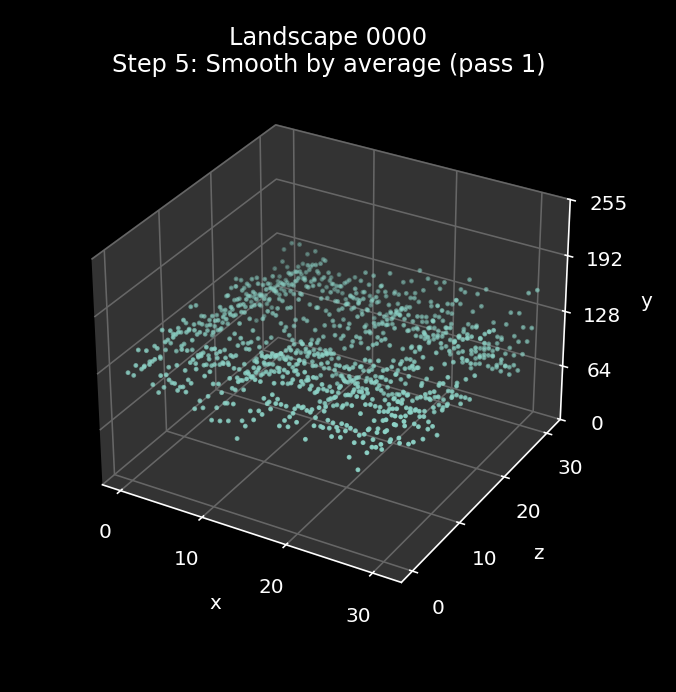
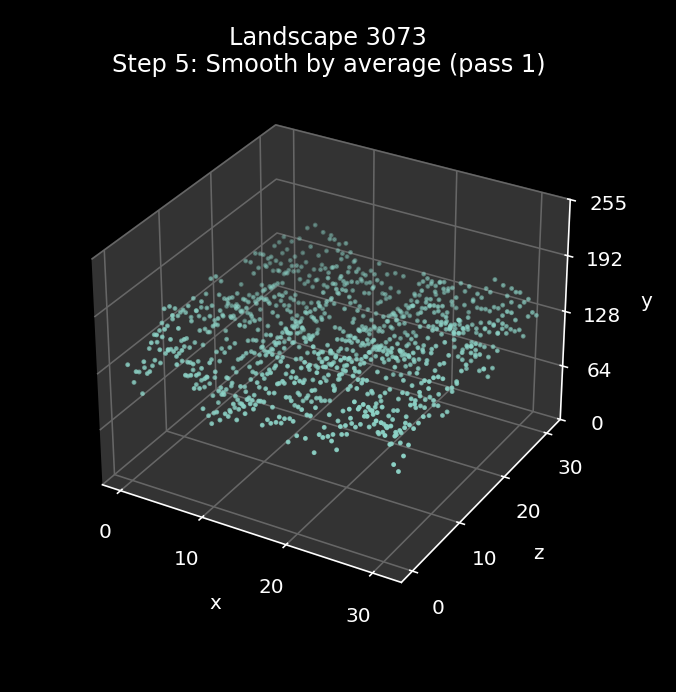
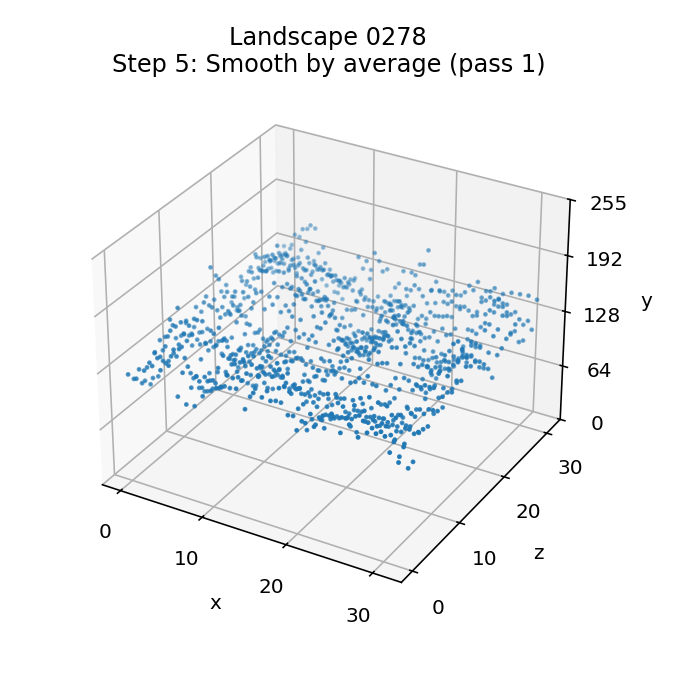
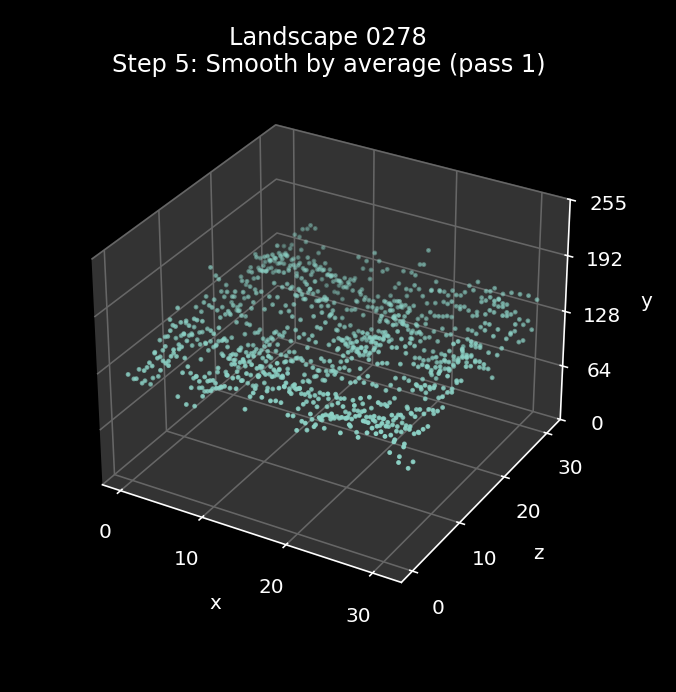
5: Smooth by averaging (pass 1)
-------------------------------
The fifth step is the first of four landscape-smoothing steps. All of these smoothing steps call the SmoothTileData routine to do the smoothing, which works through the landscape like this:
- First we step through the whole landscape of tile data, smoothing the tile data row by row, from the back row to the front row. We do this by iterating zTile from 31 to 0, and for each value of zTile we call SmoothTileCorners with bit 7 of A clear, so each call to the routine smoothes the row of tile corners at z-coordinate zTile.
- Then we step through the tile data again, but this time smoothing the tile data column by column, from the right column to the left. We do this by iterating xTile from 31 to 0, and for each value of xTile we call SmoothTileCorners with bit 7 of A set, so we smooth the column of tile corners at x-coordinate xTile.
The smoothing process is applied to each row or column in turn, by processing each byte of tile data (i.e. each tile corner) in that row or column. As the smoothing process can be applied to either a row or a column of tile data, let's call it a "strip" of tile data, to save having to say "row or column" each time.
The first step is to copy the tile data for the strip from the tileData table into the stripData table, so the first tile corner in the strip is in stripData (i.e. the left end of a row or the front end of a column) and the last tile corner is in stripData+31 (i.e. the right end of a row or the back end of a column).
We also duplicate the first three corners and append them to the end of the strip, so stripData+32 through stripData+34 contain copies of stripData through stripData+2. This allows us to calculate the average for the tile corners at the end of the strip by effectively wrapping the strip around.
Once the strip data has been copied into stripData, we jump to part 3 of SmoothTileCorners to implement the smoothing process. This part smoothes the strip by working along the strip and replacing the altitude of each tile corner with the average of that corner's altitude plus the next three corners along the strip, working along the strip from stripData to stripData+31 (so that's working along the landscape rows from left to right and columns from near to far).
Here is the effect of the smoothing process when applied to landscape 0000, with the starting landscape from step 4 on the left and the smoothed landscape on the right:
Here is the smoothing process being applied to landscape 3073:

And here is the smoothing process being applied to landscape 0278:
6: Smooth by averaging (pass 2)
-------------------------------
Thie sixth step is an exact repeat of step 5. The SmoothTileData routine contains the loop, so a single call will repeat the smoothing process.
Here is the effect of the second smoothing process when applied to landscape 0000, with the starting landscape from step 4 on the left and the smoothed landscape on the right:
Here is the second smoothing process being applied to landscape 3073:
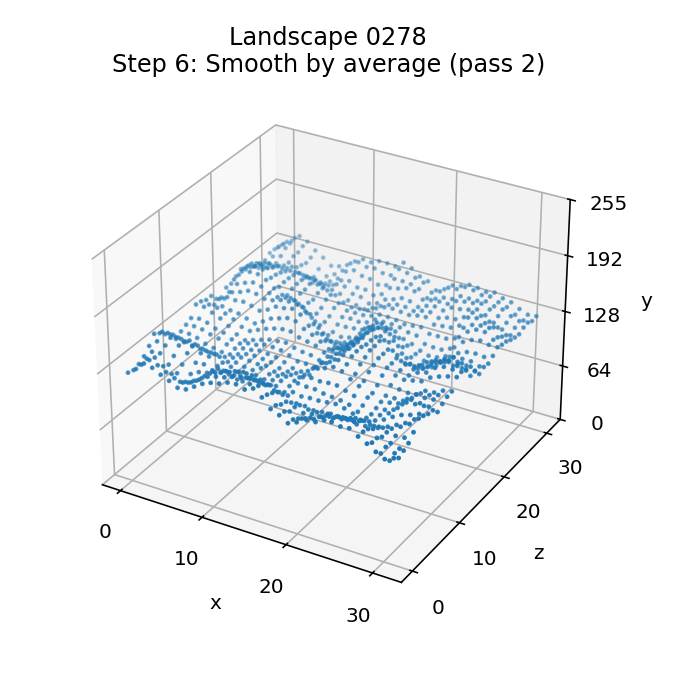
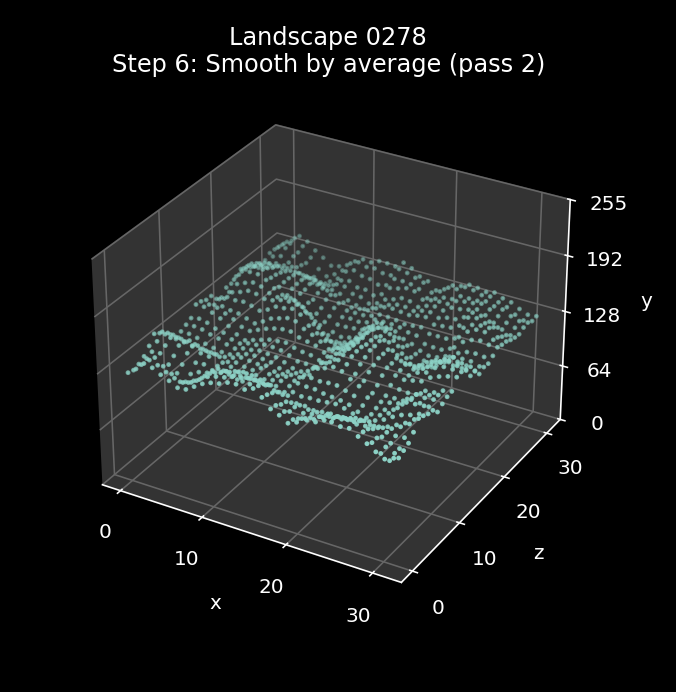
And here is the second smoothing process being applied to landscape 0278:
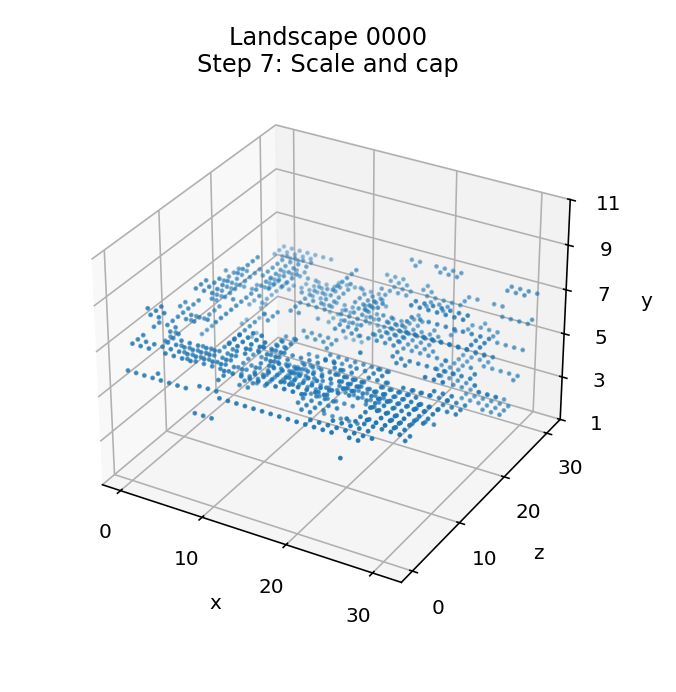
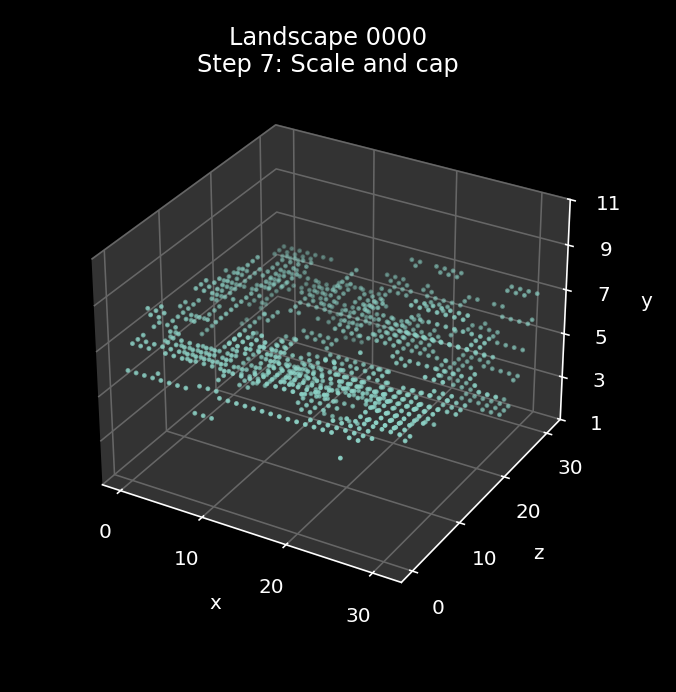
7: Scale the tile data
----------------------
The seventh step is to scale the tile data for the whole landscape by the tile data multiplier that we calculated in step 3, and cap each byte to between 1 and 11. This is done by calling ProcessTileData with A = 1.
The process is slightly involved, not least because it has to be done in bytes. The first step in the calculation is to calculate the following as a signed 16-bit number, where tileDataMultiplier is the multiplier from step 3 (in the range 14 to 36) and the tile data is potentially in the range 0 to 255 (though the smoothing process will probably have reduced this range a lot):
tileDataMultiplier * (tile data - 128) / 256
As tileDataMultiplier is in the range 14 to 36, this produces a value in the following ranges:
- -6 to +6 (for the lowest multiplier)
- -17 to +17 (for the highest multiplier)
The next step is to add 6 to this:
- 0 to +12 (for the lowest multiplier)
- -11 to +23 (for the highest multiplier)
and then cap the number so it is positive:
- 0 to 12 (for the lowest multiplier)
- 0 to 23 (for the highest multiplier)
and then add 1 more, which gives:
- 1 to 13 (for the lowest multiplier)
- 1 to 24 (for the highest multiplier)
The final step is to cap the number to a maximum of 11, giving us a number in the range 1 to 11 that we can use for the tile corner's altitude. The result is a landscape with only 11 discrete altitudes, giving it a much more stepped look than before.
This means that for the minimum value of the multiplier we only lose the very highest value in the range, so the hills and valleys tend to undulate gently. In contrast, for the maximum value of the multiplier, we lose around one-third at the top end and one-third at the bottom end, so for the higher multipliers, we get steeper valleys with flat plateaus.
Our three example landscapes have wildly different multipliers, and this is the step where they start to diverge. Landscape 0000 has a middle-of-the-road multiplier of 24, while landscape 3073 is at the top of the range with a multiplier of 36, and landscape 0278 is at the bottom of the scale with a multiplier of 14.
Here is the effect of the scaling process when applied to landscape 0000, with the starting landscape from step 4 on the left and the scaled landscape on the right:
Here is the scaling process being applied to landscape 3073, where you can see the landscape being stretched into a tortured mass of sharp peaks and deep, dark valleys:
And here is the scaling process being applied to landscape 0278, where the small multiplier creates a gently undulating landscape with flat plateaus and hardly any peaks:

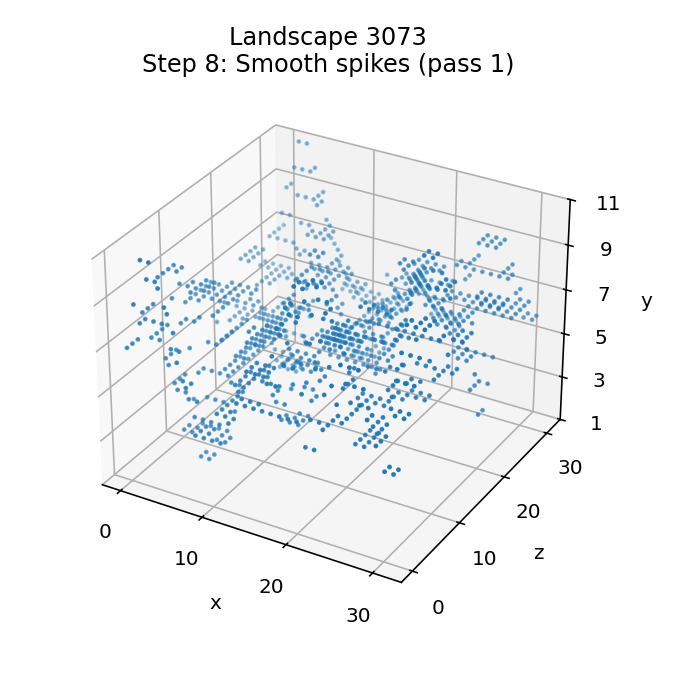
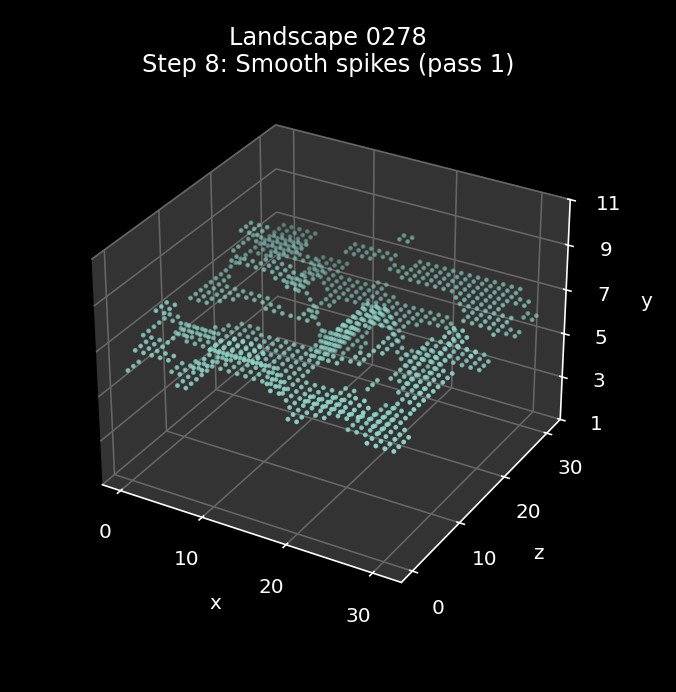
8: Smooth any spikes and troughs (pass 1)
-----------------------------------------
The eighth step takes the newly discrete landscape and smoothes it again, but using a different smoothing algorithm to steps 5 and 6; instead of averaging altitudes, we process the landscape by smoothing over any single-point spikes or troughs. The smoothing effect is applied in a similar manner, via the SmoothTileData routine, which works through the landscape and applies smoothing to strips of tile corners as before, but this time the smoothing order and algorithm are both different.
The processing loops remain the same - see step 5 for details - so data is copied one strip at a time into stripData, with the strip wrapping around at the end in the same way. And the landscape still gets smoothed in two stages, first by row (from back to front) and then by column (from right to left).
However, this time we jump to part 2 of SmoothTileCorners to implement the smoothing process, rather than part 3. This part of the routine smoothes each strip by working along it from the high coordinate to the low coordinate, so for rows that means we smooth the row from right to left (high xTile to low xTile), and for columns we smooth from back to front (high zTile to low zTile). Another difference is that we don't process the last tile corner in the strip, so for rows, xTile goes from 31 to 1, and for columns, zTile goes from 31 to 1. This means that the tile corner at (0, 0) will never change.
The algorithm works as follows. Let's say we are working along a strip of tile corners, and are processing tile corner n. Because we are moving from the high coordinate to low, this means we have already processed corner n + 1 (the "previous corner") and the next tile corner that we will process after corner n ("this corner") will be corner n - 1 (the "next corner").
We compare tile altitudes like this:
- If this = previous, do nothing.
- If this < previous and this >= next, do nothing.
- If this < previous and this < next, set this = min(previous, next).
- If this > previous and this <= next, do nothing.
- If this > previous and this > next, set this = max(previous, next).
If we just concentrate on the conditions that change the landscape, then we have:
- If next > this < previous, set this = min(previous, next).
- If next < this > previous, set this = max(previous, next).
In terms of what this is actually doing, we have the following:
- If this tile corner is higher than both its neighbours, move it down until it isn't.
- If this tile corner is lower than both its neighbours, move it up until it isn't.
So this algorithm smoothes the landscape by squeezing it into a flatter shape, moving outlier tile corners closer to the landscape's overall line.
Here is the effect of the smoothing process when applied to landscape 0000, with the starting landscape from step 4 on the left and the smoothed landscape on the right. You can see a good example of the smoothing in the bottom part of the landscape, where there's a lone tile corner way below the rest of the landscape in the left image that gets pulled up into the main body in the right:

Here is the smoothing process being applied to landscape 3073:

And here is the smoothing process being applied to landscape 0278, where the algorithm has quite an impact, smoothing those plateaus out nicely:

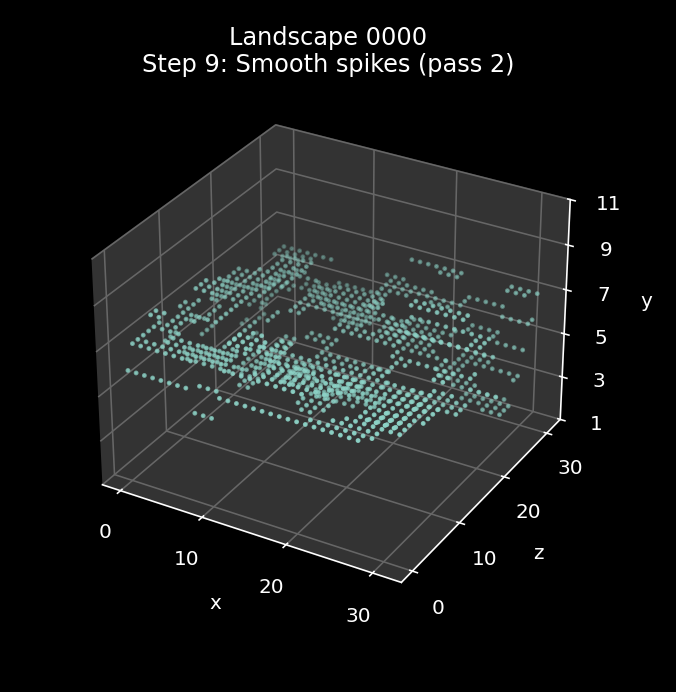
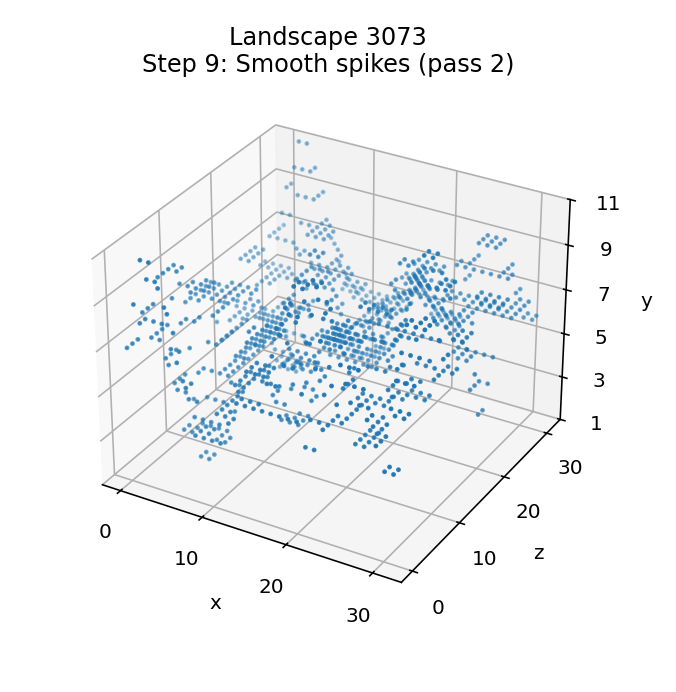
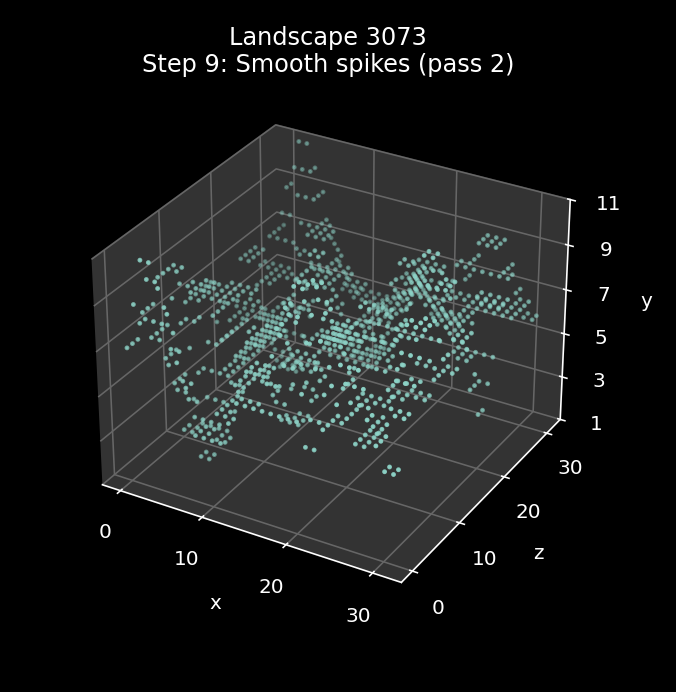
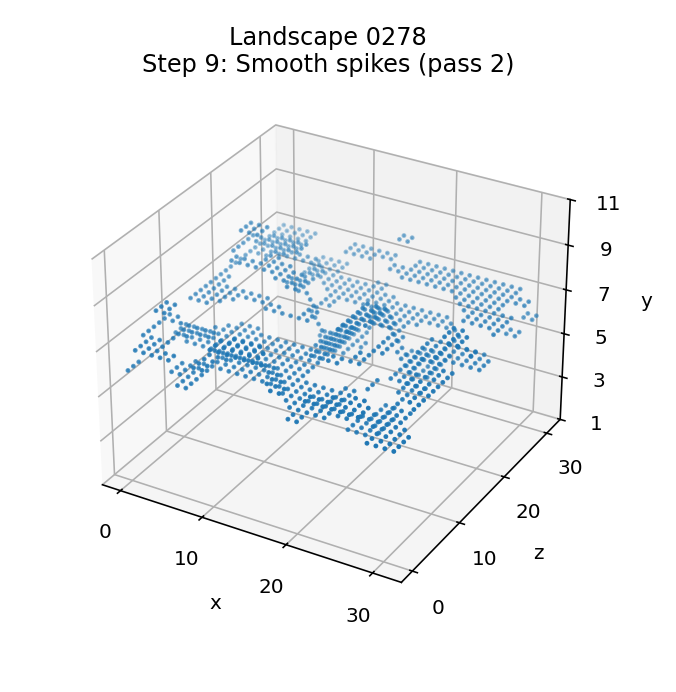
9: Smooth any spikes and troughs (pass 2)
-----------------------------------------
The sixth step is an exact repeat of step 8. The SmoothTileData routine contains the loop, so a single call will repeat the smoothing process.
The effect of this repeated smoothing process is quite hard to see, as by this point the landscape is in pretty good shape. The best way to see the differences is via the animations at the start of this article, where you can just about make out a handful of changes between the steps in landscapes 0000 and 3073 (it's pretty subtle, though). The gentle landscape in 0278 doesn't change at all in this step, as the first pass is enough to remove all spikes and troughs.
Here is the effect of the smoothing process when applied to landscape 0000, with the starting landscape from step 4 on the left and the smoothed landscape on the right:

Here is the smoothing process being applied to landscape 3073:
And here is the smoothing process being applied to landscape 0278:

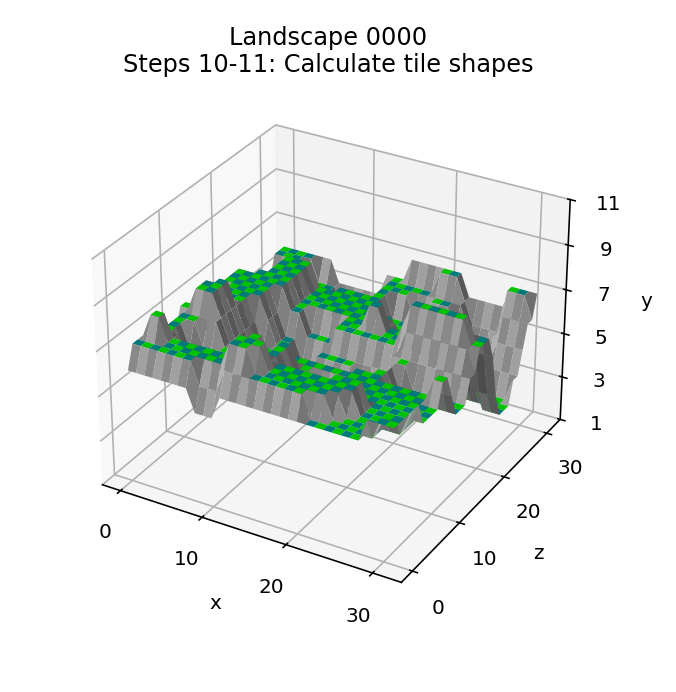
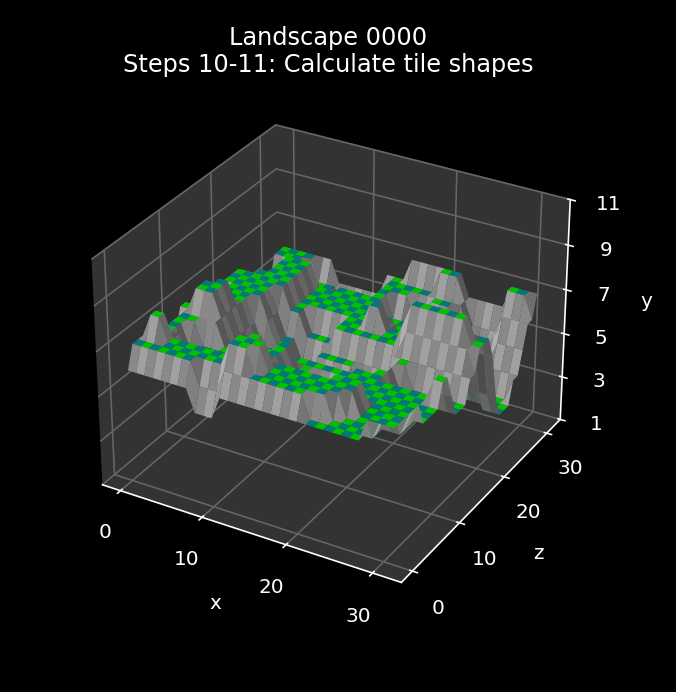
10: Calculate the tile shapes
-----------------------------
We have now generated all the altitudes for all the tile corners, and the shape of the landscape is now set. The last two steps don't affect the landscape itself, but they encode the results in a way that enables us to draw the landscape and add objects to it.
The tenth step is therefore to calculate the tile shape for each tile and insert it into the high nibble of the tile data, which we do by calling the GetTileShape routine. By this point each tile altitude is between 1 and 11, so at this stage the high nibble of each byte in the tile data is zero, so that's where we can put the tile shape, which is between 0 and 15.
So this step puts the tile shape in the high nibble and keeps the altitude in the low nibble.
See the deep dive on tile shapes for an explanation of how the tile shape is calculated.
11: Swap the tile data nibbles
------------------------------
The final step is to swap the high and low nibbles in the tile data so the altitude is in the high nibble and the tile shape is in the low nibble. This enables us to use the tile data byte to contain not only the tile altitude and tile shape, but also an object number for tiles that contain objects.
The swap is done by calling the ProcessTileData routine with A = 2.
Swapping the nibbles takes advantage of the altitude range being 0 to 11, which means that the top two bits of the altitude will never both be set (as 11 is %1011 in binary). If we swap the nibbles so that the altitude is in the top nibble and the tile shape is in the bottom nibble, then that means the top two bits will never both be set. We can therefore add a new state to the table where both bits 6 and 7 are set and an object number is stored in bits 0 to 5. This reuse removes the altitude and shape from the tile data byte, but we get around that by allocating the tile altitude to the object instead, and we can ignore the tile shape as only flat tiles can contain objects, so we know the tile shape is zero.
So this step puts the altitude in the high nibble and the tile shape in the low nibble, and the landscape is finally ready and can be drawn as the familiar in-game landscape.
Here is the effect of the tile shape process when applied to landscape 0000, with the starting landscape from step 4 on the left and the tile-based landscape on the right:
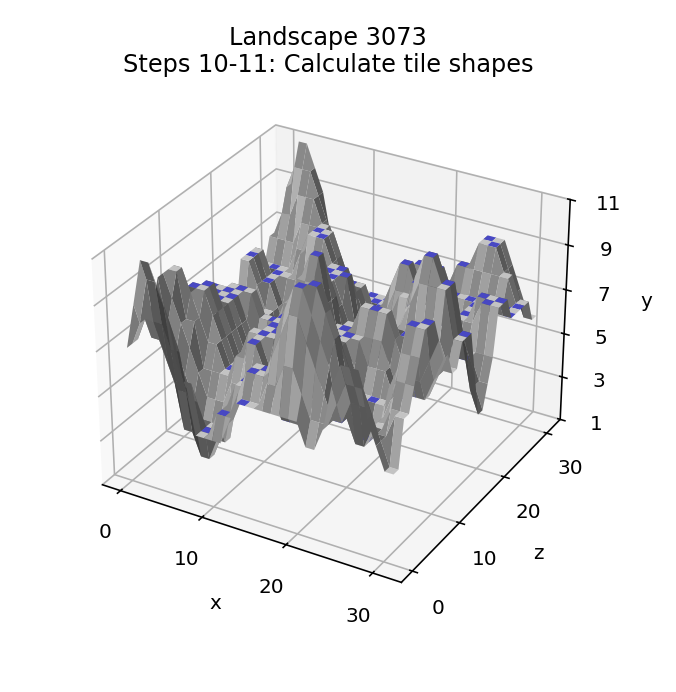
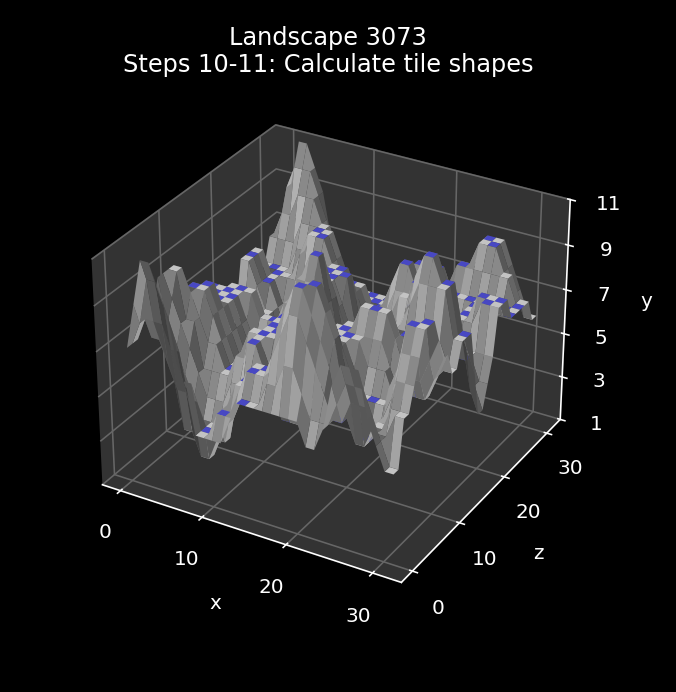
Here is the tile shape process being applied to landscape 3073:
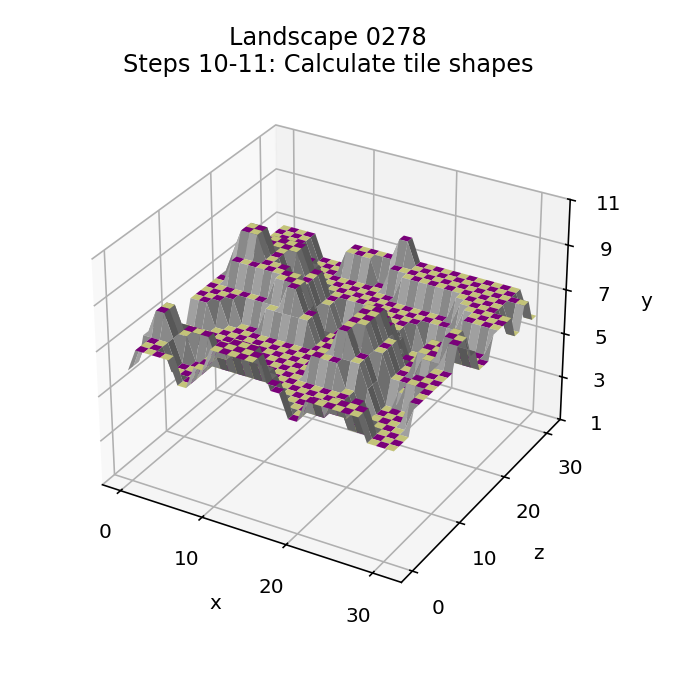
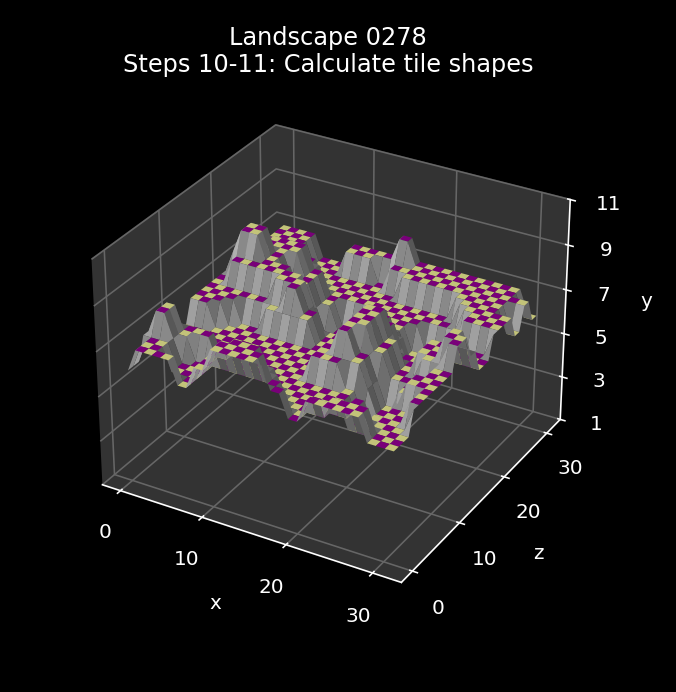
And here is the tile shape process being applied to landscape 0278:
Next steps
----------
The landscape is generated, but there is more work to do. The next step is to add enemies and objects, as described in the deep dive on adding enemies and trees to the landscape, so the landscape can be played.
And then we need to generate the landscape's secret code, either to display it on-screen (if the player has just beaten the Sentinel), or check it against the secret code that the player has entered (if we are about to play a new landscape) - see the deep dive on the landscape secret code for details.
There is one more dimension to this already complex process, and that's the slew of anti-cracker code that is sprinkled throughout the landscape generation process. I briefly mentioned the cracker seed routines above, but I've intentionally ignored the rest - this process is complicated enough without explaining all the obfuscations and traps. If the game thinks that the code has been hacked, it can either jump back to the title screen, either immediately or in the middle of a game, or more cunningly, it can corrupt the landscape secret code that's shown on-screen when the player wins. For more details, see the deep dive on the anti-cracker checks.
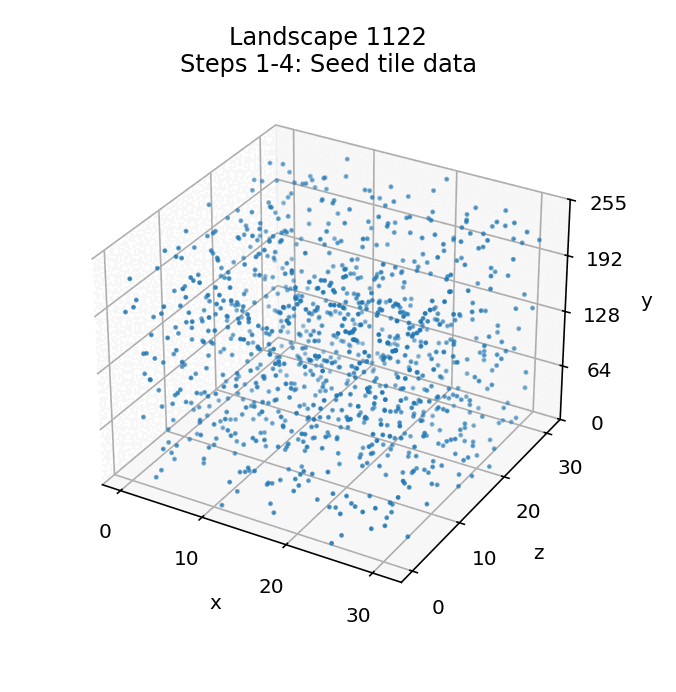
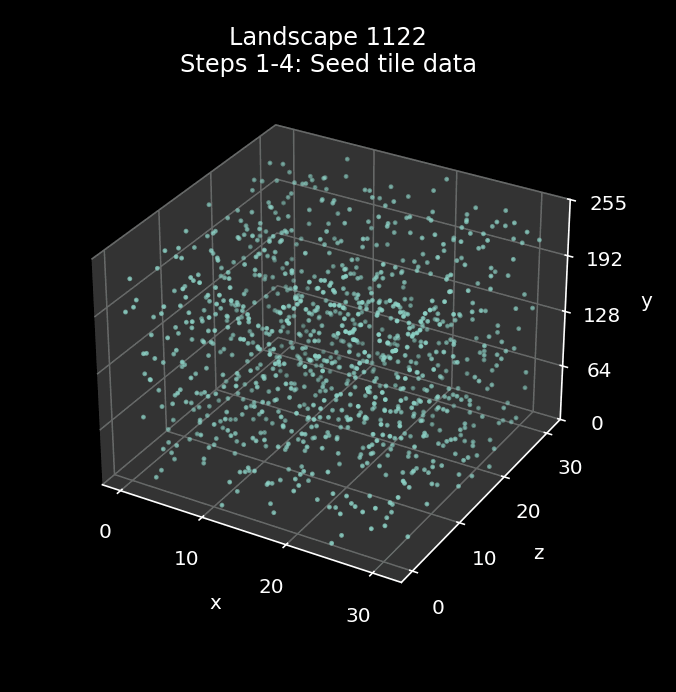
And, just because they're things of beauty, here are two more landscapes being built. Here's landscape 1122, which is famous for having a starting position where you can't see any other tiles, and therefore have no choice but to hyperspace in order to start the game:
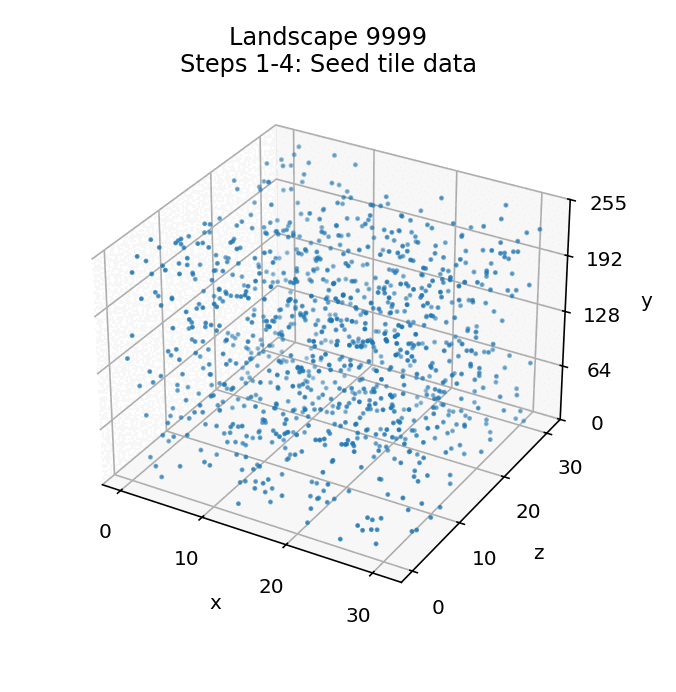
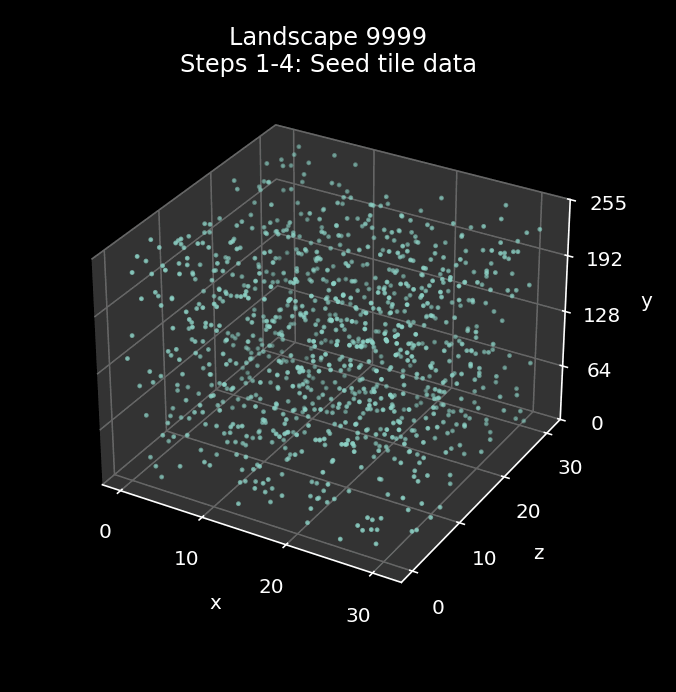
And here is landscape 9999, which might have the ultimate landscape number, but it doesn't look that bad, in the great scheme of things:
And that's how The Sentinel builds 10,000 landscapes from nothing more than a set of seed numbers and a few smoothing and scaling algorithms... it's very clever stuff.