When I was in eighth grade, I made a discovery that I've been thinking about ever since: you can just buy glass, and it's really not that expensive.
Ever since this discovery, I've wanted to make something out of glass panes. So when my partner Kyle asked for a whiteboard in our apartment, I jumped on the opportunity to make it myself.
We decided to make the whiteboard 36" x 60" (3' x 5'), out of two panes of 36" x 30" glass. I got each pane for $26, so the materials cost for this project was only $52. This might also be a good time to point out that this is far cheaper than a similar whiteboard of this size, making this one of my few DIY projects that ended up being cheaper than buying the product off the shelf. A low-quality Amazon Basics 36" x 48" whiteboard costs $68 at time of writing, and a 36" x 48" glass whiteboard costs over $100. (And that's missing a whole foot of height!)
So now we have to mount the glass to the wall. Because this glass is pretty thin (3/32"), we decided to mount the glass directly on the wall instead of using standoffs.
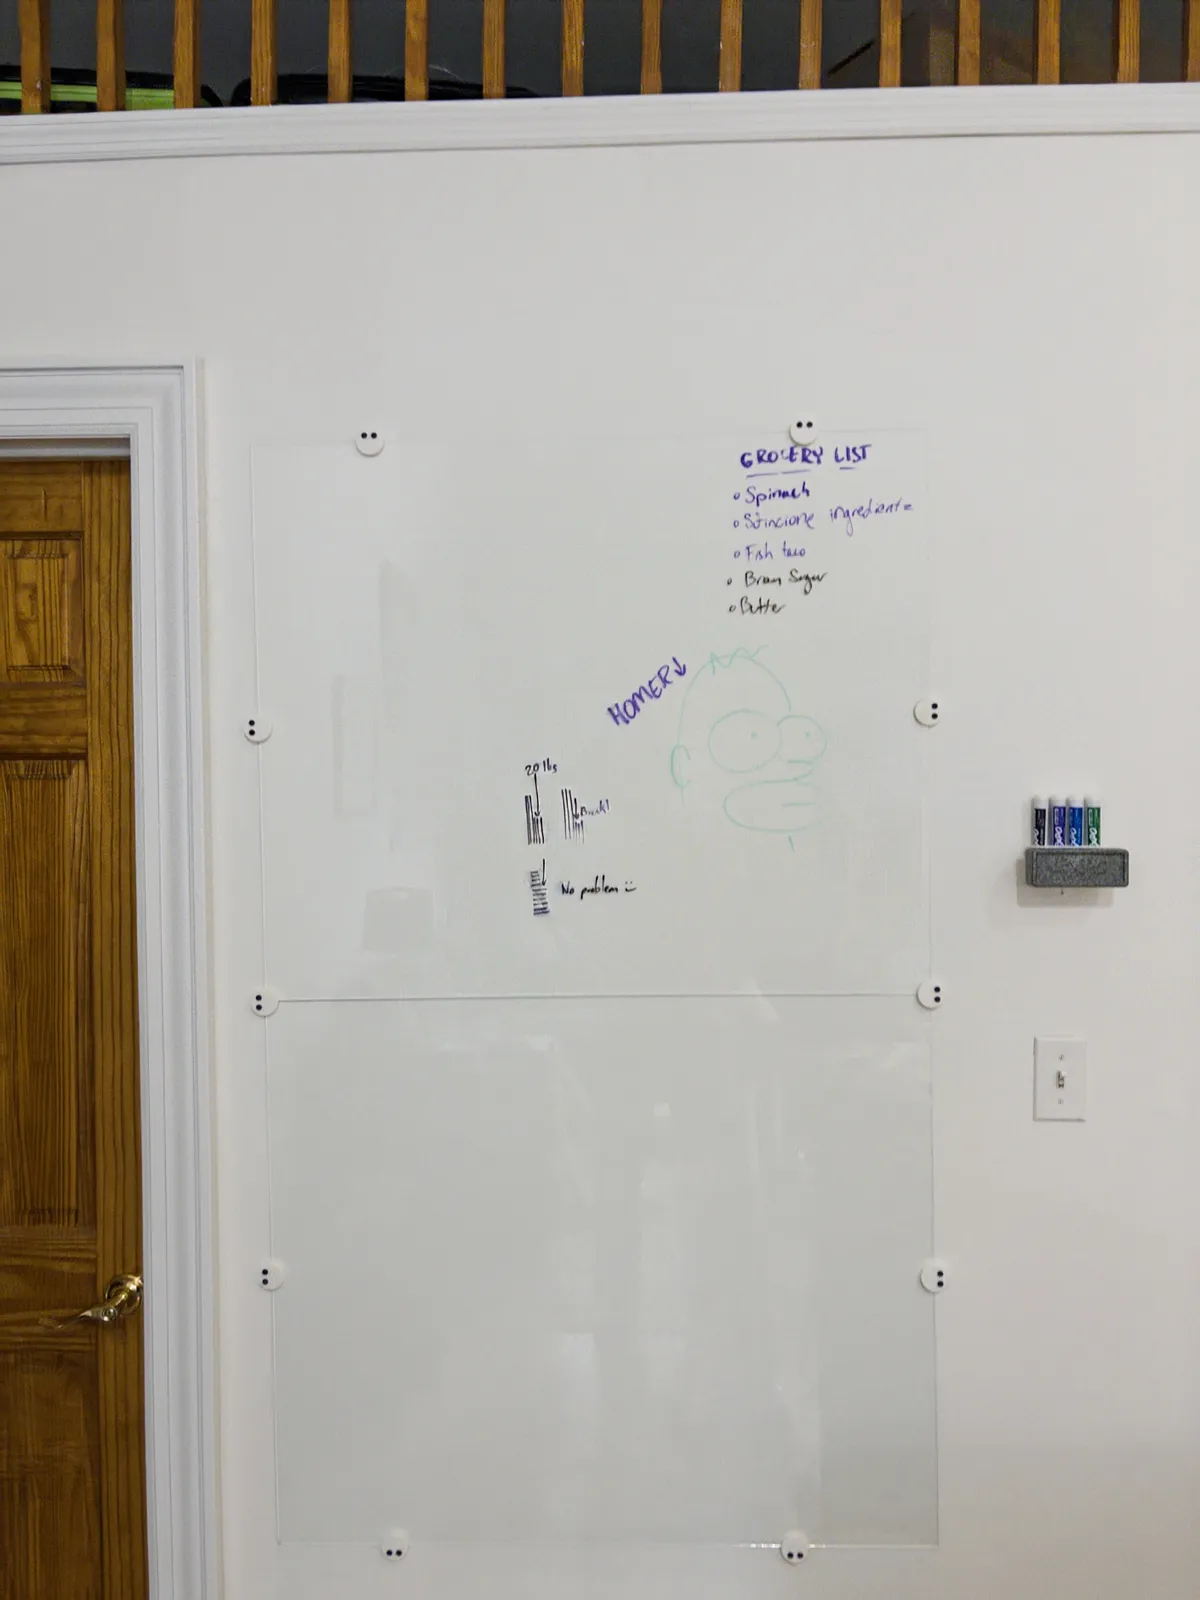
In order to mount the glass directly to the wall, I decided to make something akin to mirror clips, which I designed and print myself. Here's the final whiteboard for reference, and then we'll talk about what went into making these.
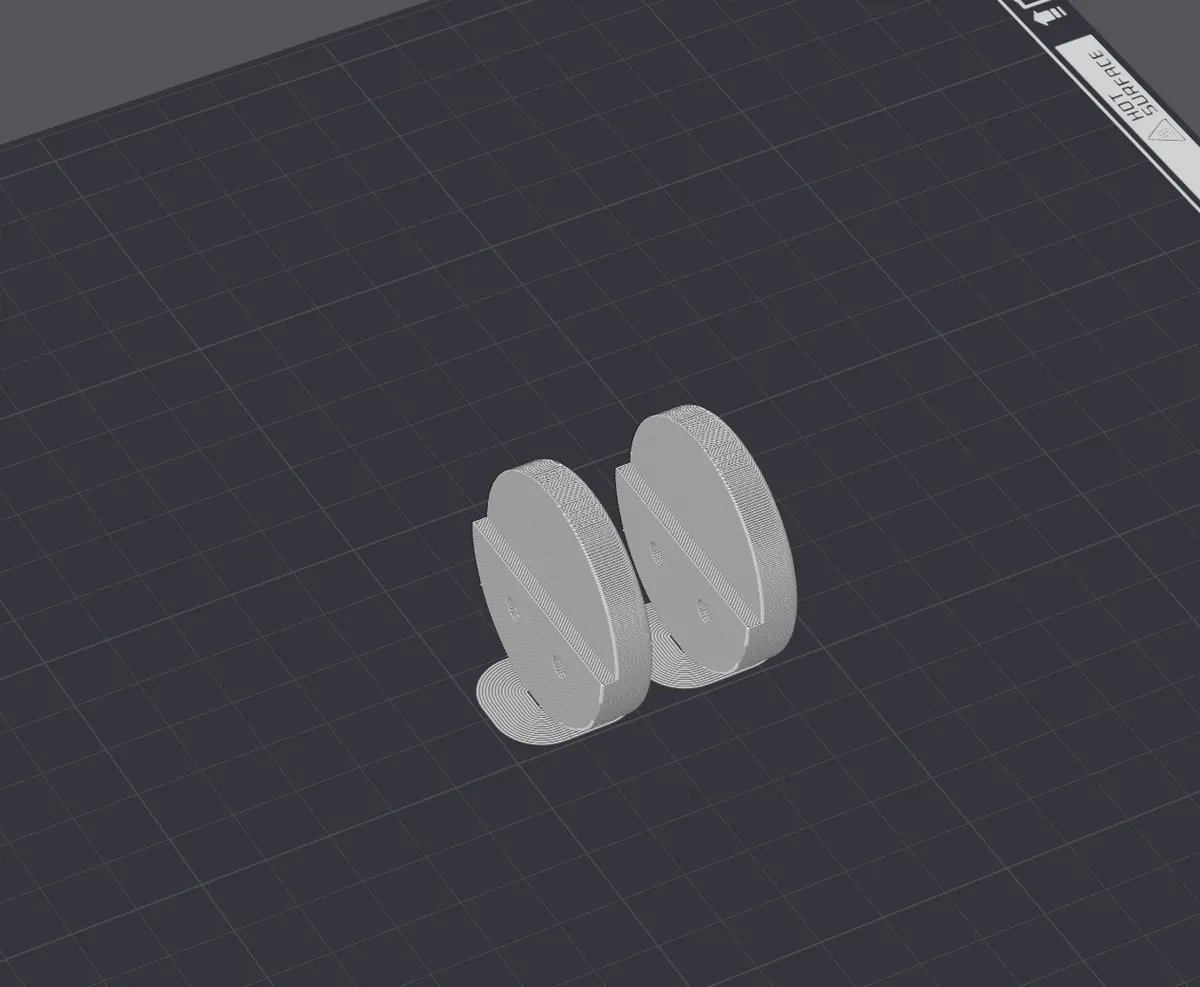
Here's the CAD (Onshape) for the clips. There are two holes for 1" x #6 drywall screws, and an overhang with a 3/32" gap for the glass.
As you can probably tell, the clips at the bottom of the whiteboard take on all of the weight of the glass (around 20 pounds), while the clips on the top and sides just stop the glass from falling outwards. Thus, special attention needed to be given to the bottom clips to make sure they were strong enough to hold everything up. I printed the side and top clips using fairly standard settings (PLA Basic, 3 wall loops, 35% infill, adaptive cubic):

However, this setup wouldn't work for the bottom clips. 3D printed parts are built by putting layers of plastic on top of each other, and the adhesion between layers is not very strong. If you put force on a part in parallel to the layers, you'll likely push the layers past each other and the part will fail, vs. perpendicular where the layers will just squish together. Here's a diagram of this, drawn on the whiteboard:
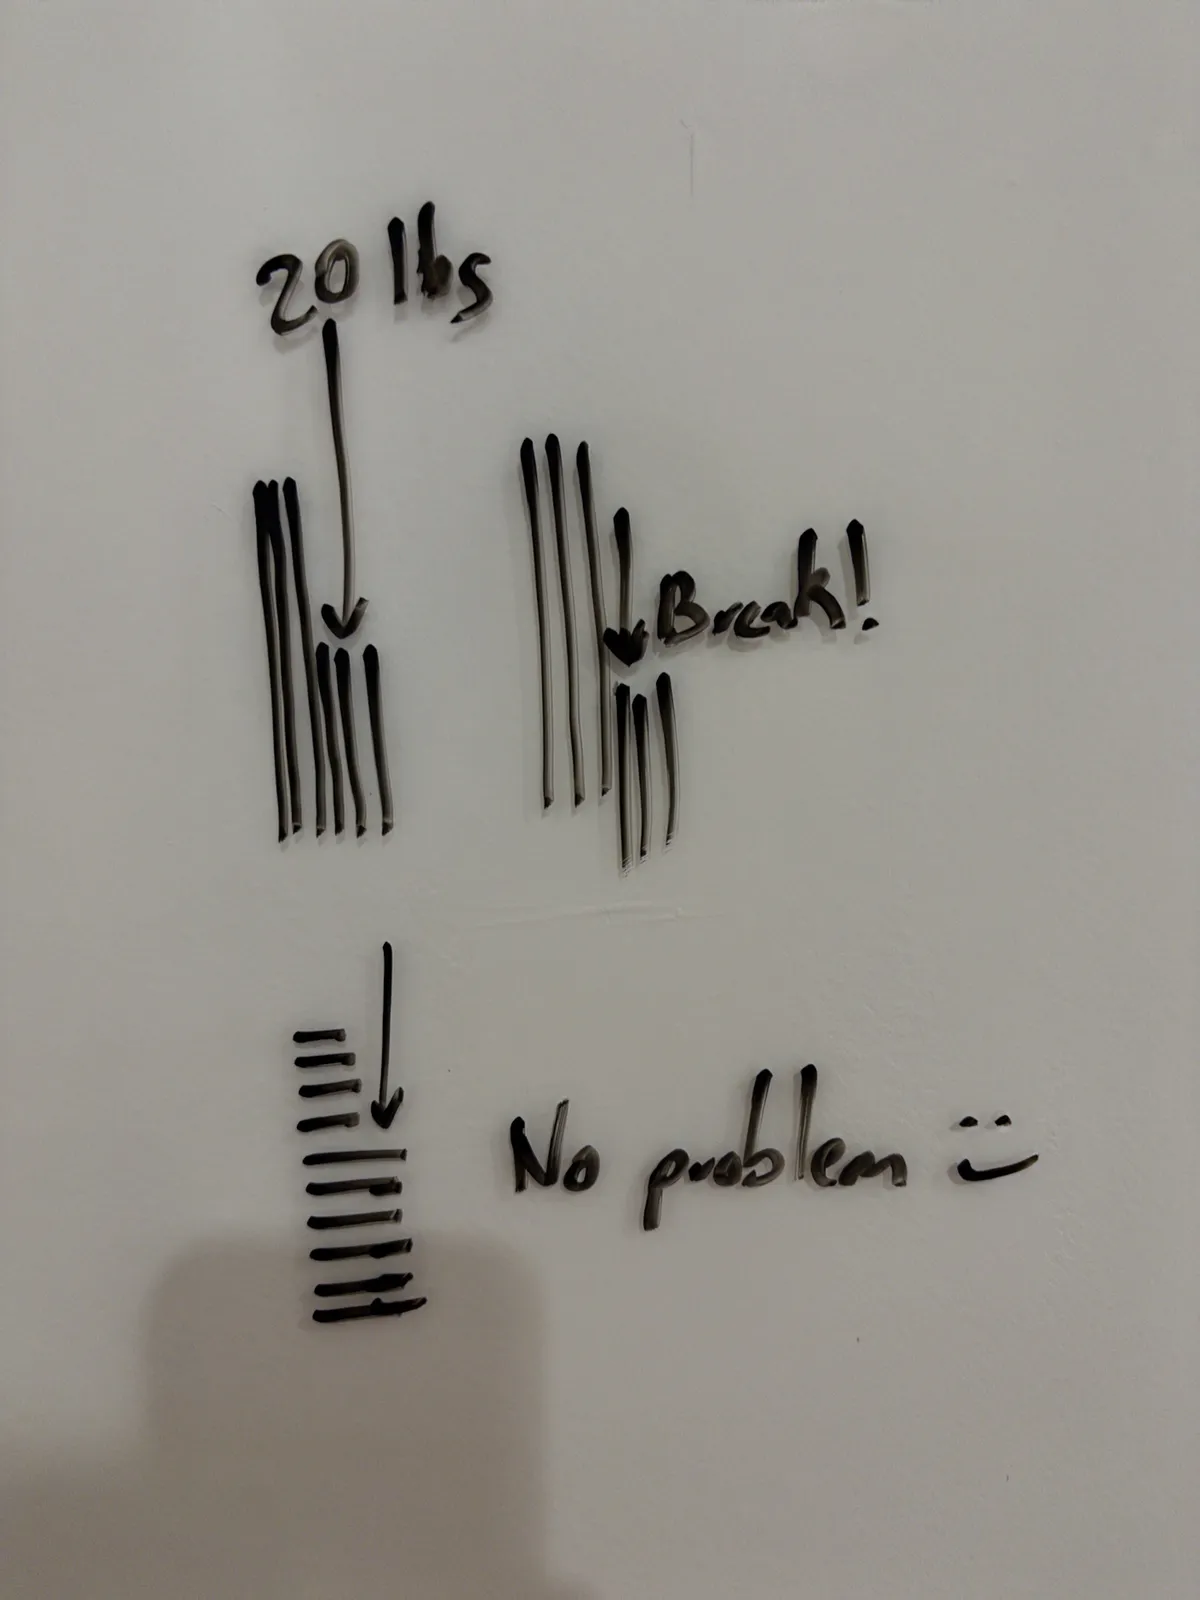
In order to get the part's layers to look like the bottom diagram, I printed the bottom clips vertically (PLA Basic, 4 wall loops, 50% infill, triangles):
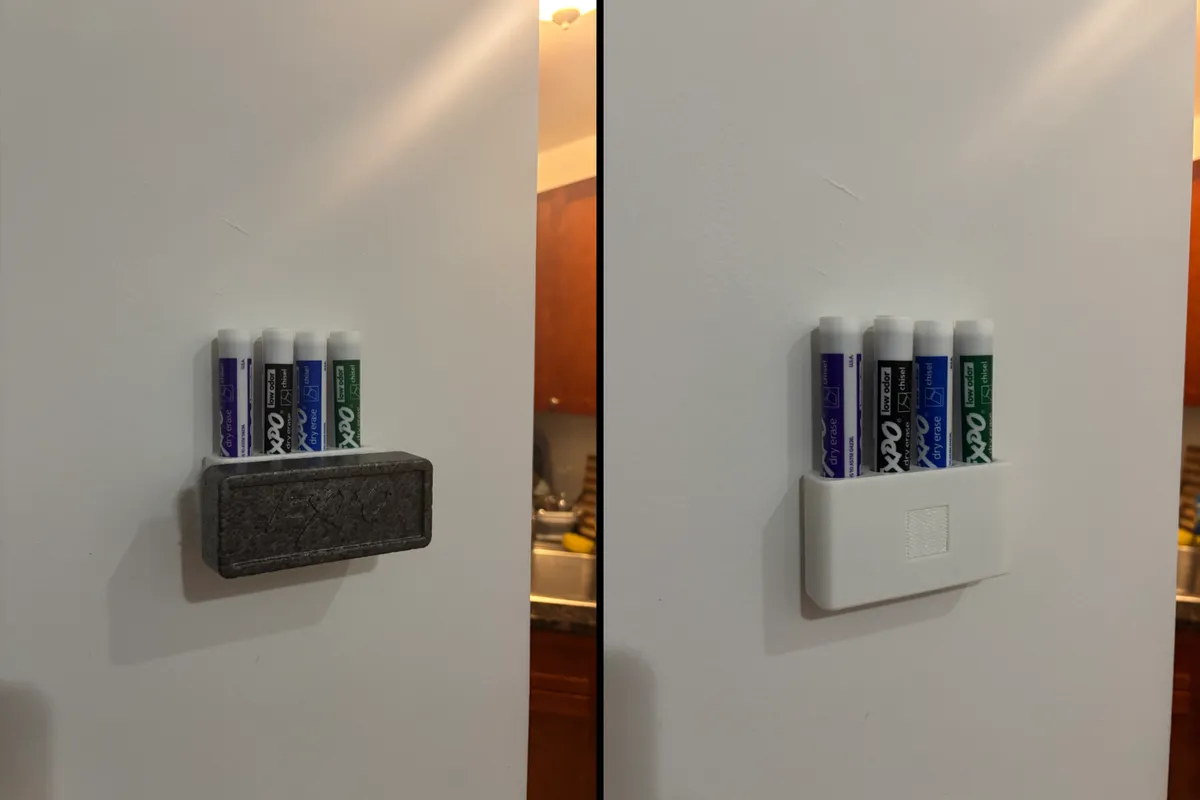
I also designed a small holder (Onshape) for Expo markers and an eraser. The holder has an inlaid command strip on the back to attach the holder to the wall, and on the front in order to hook onto the eraser. This allows the eraser to attach onto the holder as if it were floating. It's also designed to hold markers cap-down so they last longer.
A word of warning: this whiteboard definitely isn't perfect. The glass is very thin, which means it is quite fragile -- not a problem for use, but it definitely made transporting the glass on the subway a little scary. The glass also bows out about 1/16" in the center -- again, not really a problem for use, it pushes up against the wall just fine when you write, but it does feel a little sketchy if you're not used to it.
So that's the whiteboard! It's been up for a day and seems to be holding up quite well, and we're already getting good use out of it.