I wanted home security cameras. Nothing fancy—just a way to keep an eye on my front door and backyard while I was away.
But there was one non-negotiable: I couldn’t let a big tech company have free rein over my video streams.
No Ring (owned by Amazon), no Nest (owned by Google), no Apple, no Microsoft. Not after hearing how easily footage gets shared without consent or even the owner’s knowledge. For me, home security means privacy is a top priority.
That first requirement about data sovereignty immediately took a big bite out of the convenience of plug-and-play cameras. I could only trust something I pieced together myself. With that realization, these questions emerged:
- Which cameras support self-hosting?
- What features do I truly need? Like live viewing, recording, notifications, and authentication?
- What software manages all that?
- How can I ensure I can access the cameras reliably?
- How do I lock it down for maximum security?
- How can I do this on a budget?
- How do I avoid this turning into a forever project where I’m fighting with half-broken open source software?
It was a comprehensive system I wanted, and for that, I would have to do some research and a lot of trial and error.
The Cameras
I initially started with a cheap, no-name camera found on Amazon like most people would. I quickly realized, after plugging it in, though there was no RTSP support (mistakenly thinking there was at the time of purchase.) The only way to access the camera stream was through their proprietary mobile app, subverting my primary goal of privacy.
RTSP was the open protocol you would need to directly access the camera footage in real time.
Going back to the drawing board, I tried an Reolink doorbell camera.
With the Reolink camera and their app on my desktop (and not my phone), I was able to setup the device and verify that RTSP was available. Half of the battle was won. Now I needed something to manage the feeds. Researching Network Video Recorders, or NVRs, was the next task.
The Software
I tried Shinobi, an open-source option that looked promising. But after hours of wrestling with installation on a Raspberry Pi, I hit a wall.
One rule I’ve learned about using open source projects is that you have to set a realistic limit for how many hours you’ll invest before you give up and try something else. The installation and configuration coming straight from a project’s documentation has to work flawlessly or it’s a dealbreaker.
I could not handle another hour messing with Shinobi, so I made a huge compromise in purchasing a license for Blue Iris. This was not ideal—the long term solution was always Linux-based—but I was anxious to have something functioning within an hour or two.
Although the Blue Iris user interface was not intuitive, it did work. Their built-in web server and authentication were easy to set up and it ran on my spare Windows laptop.
Satisfied that I had a working base, I turned to the next piece of the puzzle: my home network.
The Home Network
Thankfully, my home connection was fiber optic which had high upload speeds—essential for streaming camera feeds remotely without lag or buffering. That meant I could host everything at home and still access it smoothly from a remote device.
But exposing the Windows machine directly to the internet? Absolutely not. Instead, I used the Raspberry Pi as a secure gateway. Apache ran as a reverse proxy to Blue Iris, handling TLS connections and shielding the Windows machine from direct exposure. (I wouldn’t even attempt to set up a TLS certificate on Windows. If I was going to use the OS at all, it would be as little as possible.)
Three key router settings made this reliable and secure:
- Dynamic DNS (DDNS): My home IP address wasn’t static, so I signed up for a free DDNS service and use the router’s built-in application to update the domain’s IP address whenever it changed.
- Port forwarding: Incoming traffic on ports 80 and 443 were forwarded to the Pi, so I could reach the Blue Iris interface from anywhere.
- Camera lockdown: Most importantly, I used my router’s advanced firewall rules to block the camera’s outgoing traffic from reaching the WAN. The camera could reach the Blue Iris server, but not phone home to the manufacturer.
Finally, I had something that worked. I could stream live video from outside the home.
The Problems
I liked the Reolink doorbell so much that I added two of their indoor cameras to the setup. Immediately, Blue Iris began maxing out the CPU on the laptop, no matter how I tweaked the settings.
In for a penny, in for a pound, I just upgraded the machine. I bought a dedicated mid-tier Windows 10 machine to host Blue Iris. Even with the new machine, Blue Iris was too resource-intensive for consumer-grade hardware. And at this point I was heart broken.
But that wasn’t the only issue. My house was prone to overnight micro-outages. One second blips in the grid were enough to shut down every device on the network. The cheap UPS, which was supposed to protecting the network hardware, was failing at its one and only job. After each outage, I had to manually power-cycle the modem, the router, the Pi, and desktop machine to get the system back online.
At this point, I was second guessing my entire approach.
The Solution
Starting with the simplest fix: I bit the bullet and replaced the faulty UPS. Instantly, the power issue was solved. The micro-outages no longer interrupted the system.
Then came the harder decision to shut down the Windows PC permanently. I cut my losses on the costs of Blue Iris and the brand new Windows machine I had no other use for.
With Blue Iris out of the picture, I needed a way to record footage. I added microSD cards to each Reolink camera. It was not as robust as NVR software, but it served as a reliable stopgap.
Next came the issue of remote access. In the interest of keeping things lean, I added an extra port forward on the router, SSH to the Raspberry Pi, preparing the way for a secure tunnel.
I learned an important detail that to use the Reolink desktop app you need to access the management port 9000 and not the RTSP port 554.
After some tinkering, I reduced it to a single command which tunnels all three cameras through the Raspberry Pi:
ssh -v -N \
  -L 127.0.0.1:9019:192.168.10.19:9000 \
  -L 127.0.0.1:9021:192.168.10.21:9000 \
  -L 127.0.0.1:9022:192.168.10.22:9000 \
  example.home.network.ddns.com
The 192.168 addresses are the cameras—local neighbors to the Raspberry Pi. The 127.0.0.1 is my local Mac and the 9019, 9021, and 9022 are arbitrary ports chosen to uniquely identify each camera.
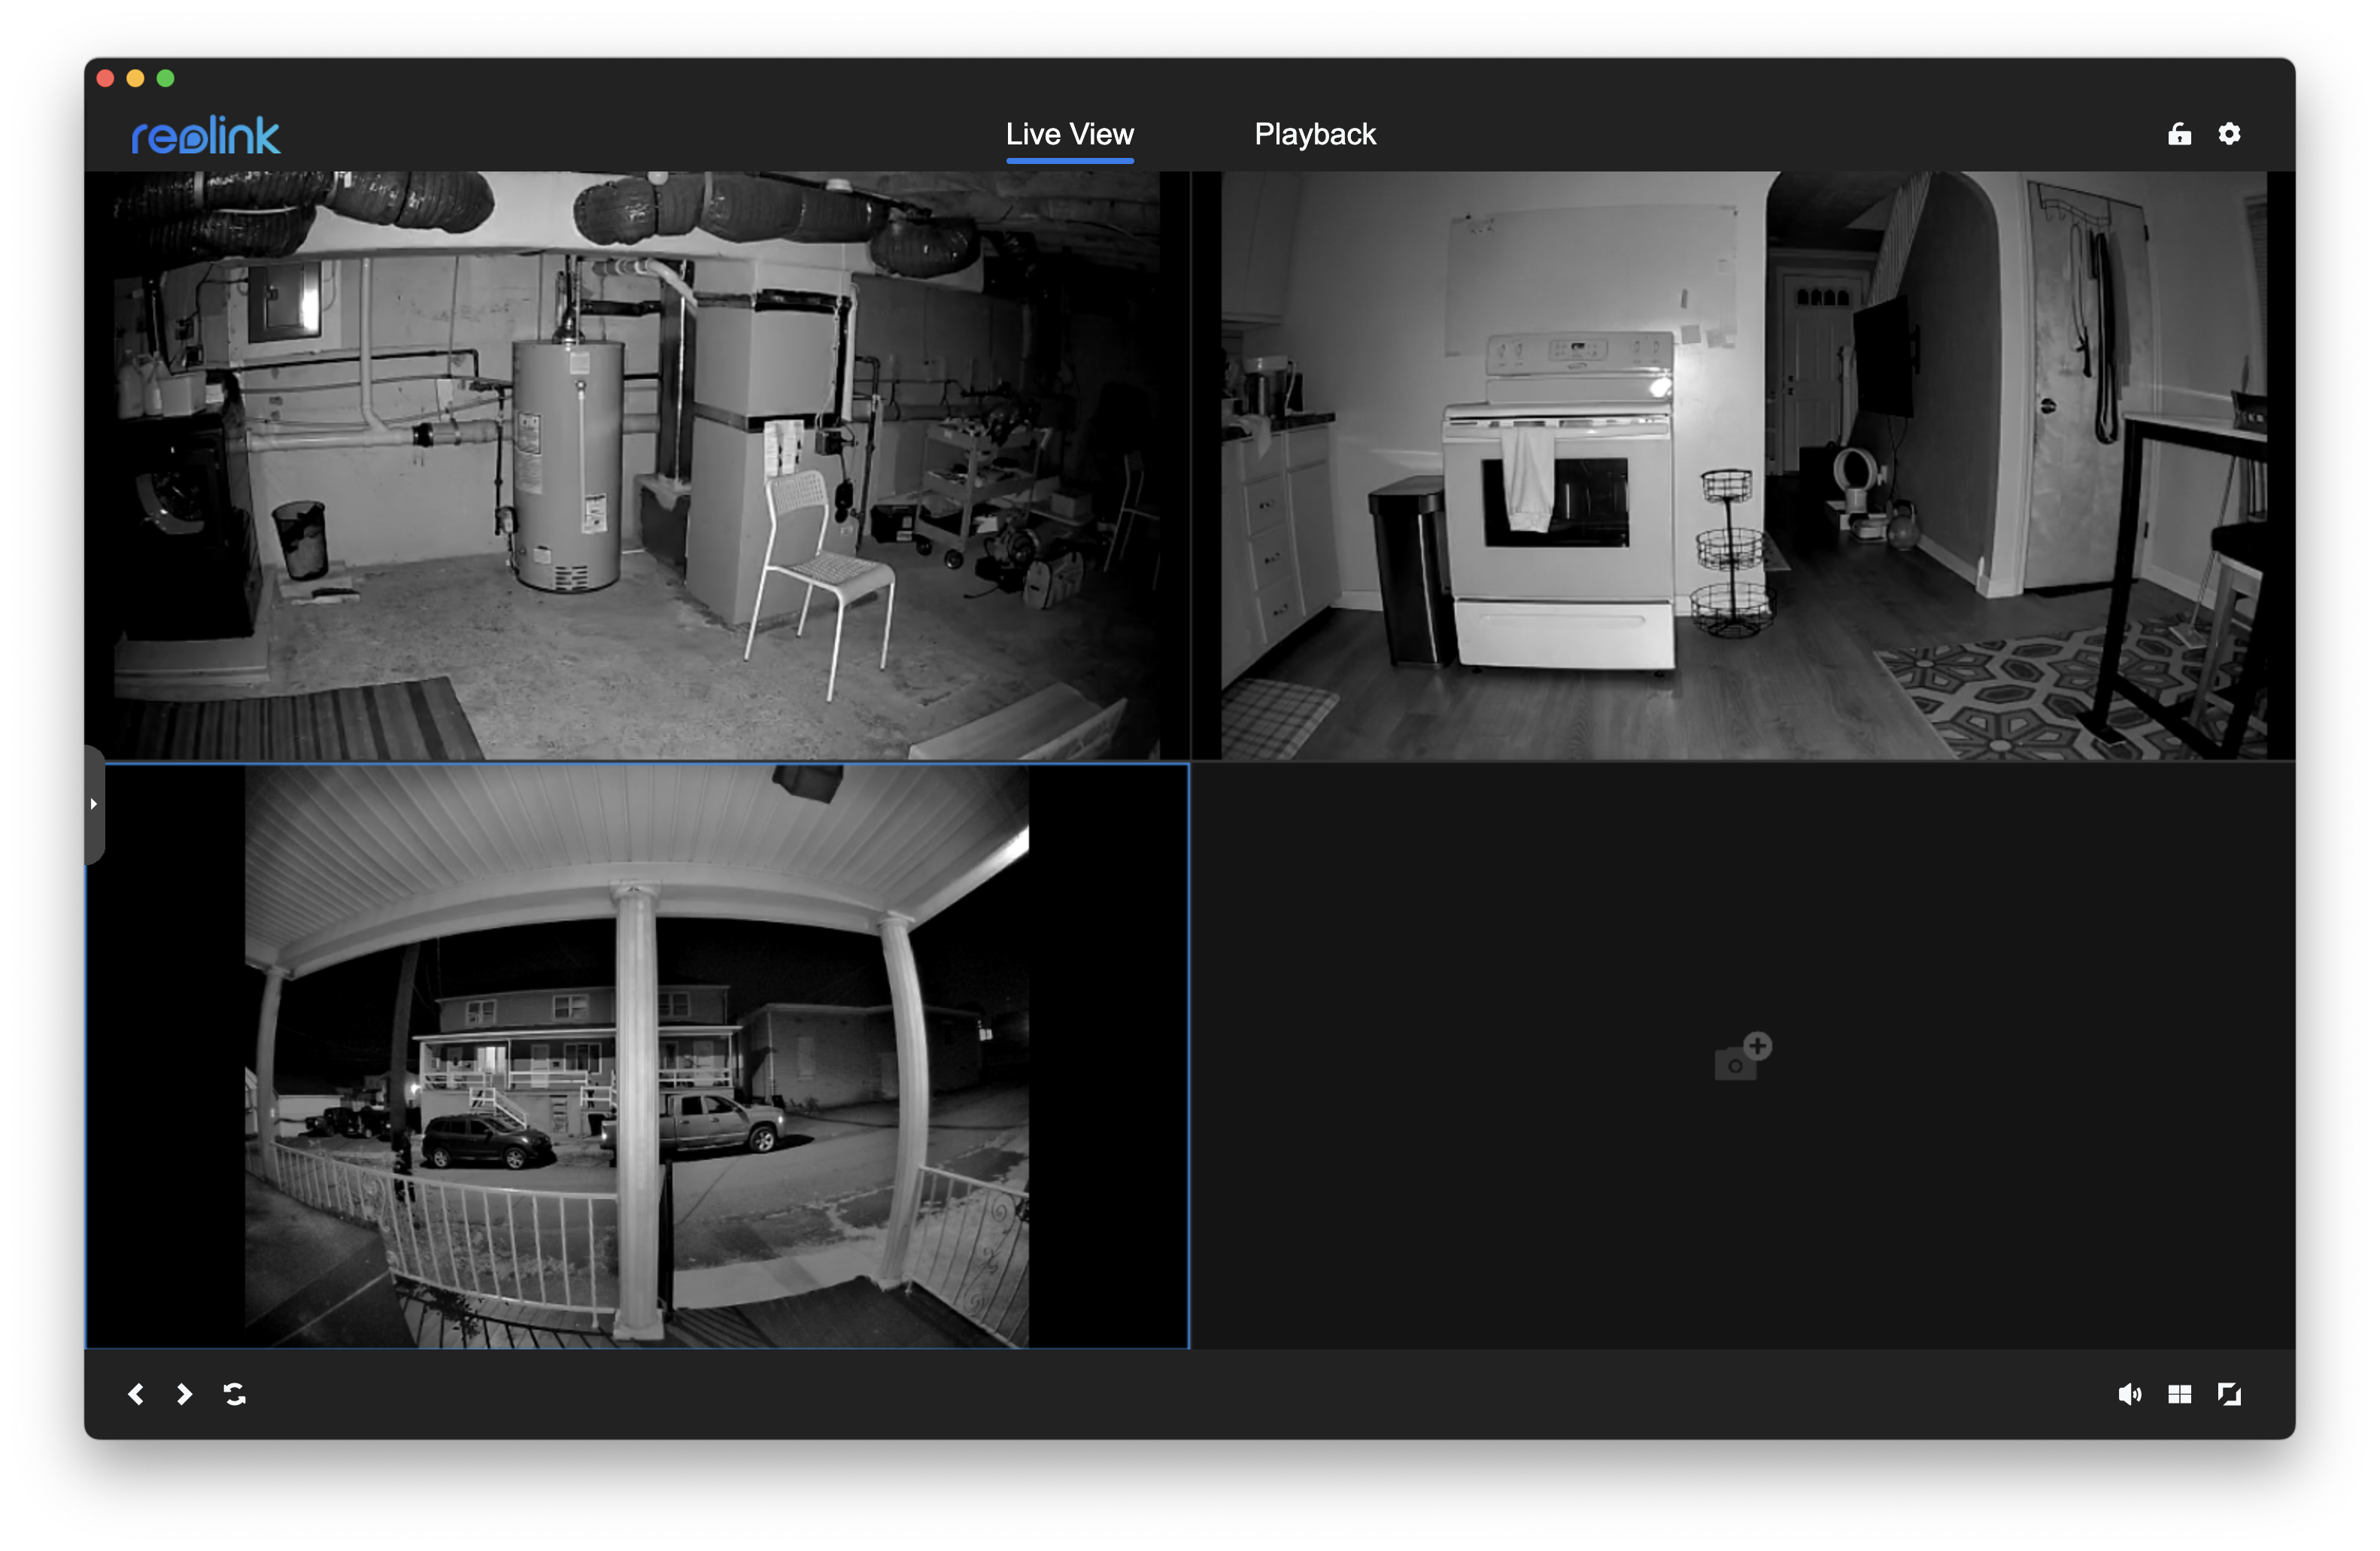
With this tunnel command active, I added the devices to the Reolink app, one at a time, specifying the 127.0.0.1 IP and port.

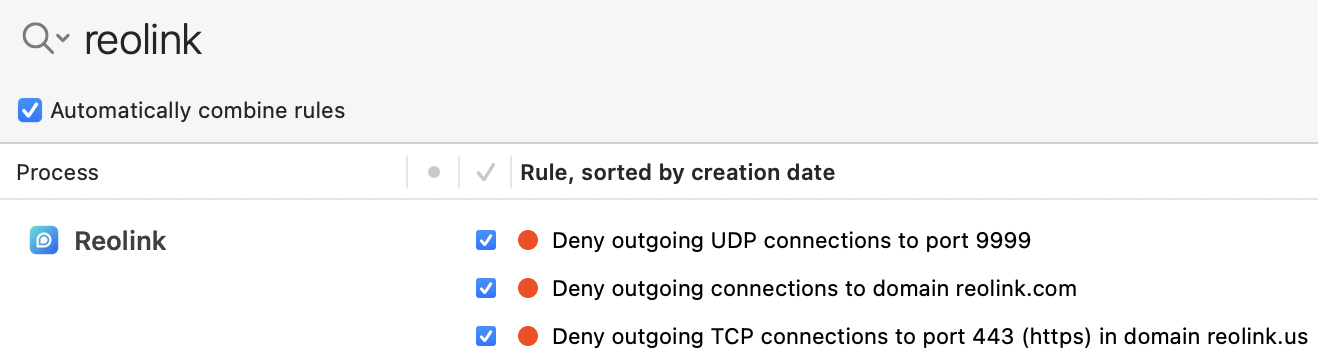
The final touch was to use Little Snitch (an application firewall) to block all outgoing traffic from the Reolink app to the web.
It worked. The video quality was sharper than it had ever been through Blue Iris and there was no company in between me and the camera feeds.
Was this the most elegant solution? Certainly not.
Could I have used a VPN, Wireguard, or Tailscale? Sure, there are many ways to skin a cat.
But SSH tunnels work just fine, don’t require additional software, and don’t require a third-party login.
Sometimes, impatience is your friend.
Known issues and room for improvement
I’ve reached a stable milestone. The cameras work and I can access it reliably.
So far, this is my wishlist:
- Playback is clunky in the Reolink app.
- No long-term archival. Recordings are stuck on microSD cards that get overwritten quickly.
- No user authentication. Currently, it’s not possible to create a separate login for a friend.
- No smart alerts. It would be great to get emails when there are significant events (such as people detection.)
The system is far from finished. But I sleep well knowing no one else is watching.