The World's Easiest GPT-like Voice Assistant uses an open-source Large Language Model (LLM) to respond to verbal requests, and it runs 100% locally on a Raspberry Pi.
![]()
The World's Easiest GPT-like Voice Assistant uses an open-source Large Language Model (LLM) to respond to verbal requests, and it runs 100% locally on a Raspberry Pi.
My ChatGPT-powered voice assistant has received a lot of interest, with many requests being made for a step-by-step installation guide. I never got around to writing up the guide, and now the methods used are a bit dated and technology has advanced. As such, I have decided to build an updated LLM-based voice assistant, and this time, also provide full instructions.
This time around, the voice assistant runs fully locally on a Raspberry Pi 4 — no Internet connectivity or cloud-based services are needed. It is also very easy to set up, so I named it the World's Easiest GPT-like Voice Assistant, which is almost certainly not true. But it is at least close to the truth, and it gets the point across in few words, so please go easy on me. :)
How It Works
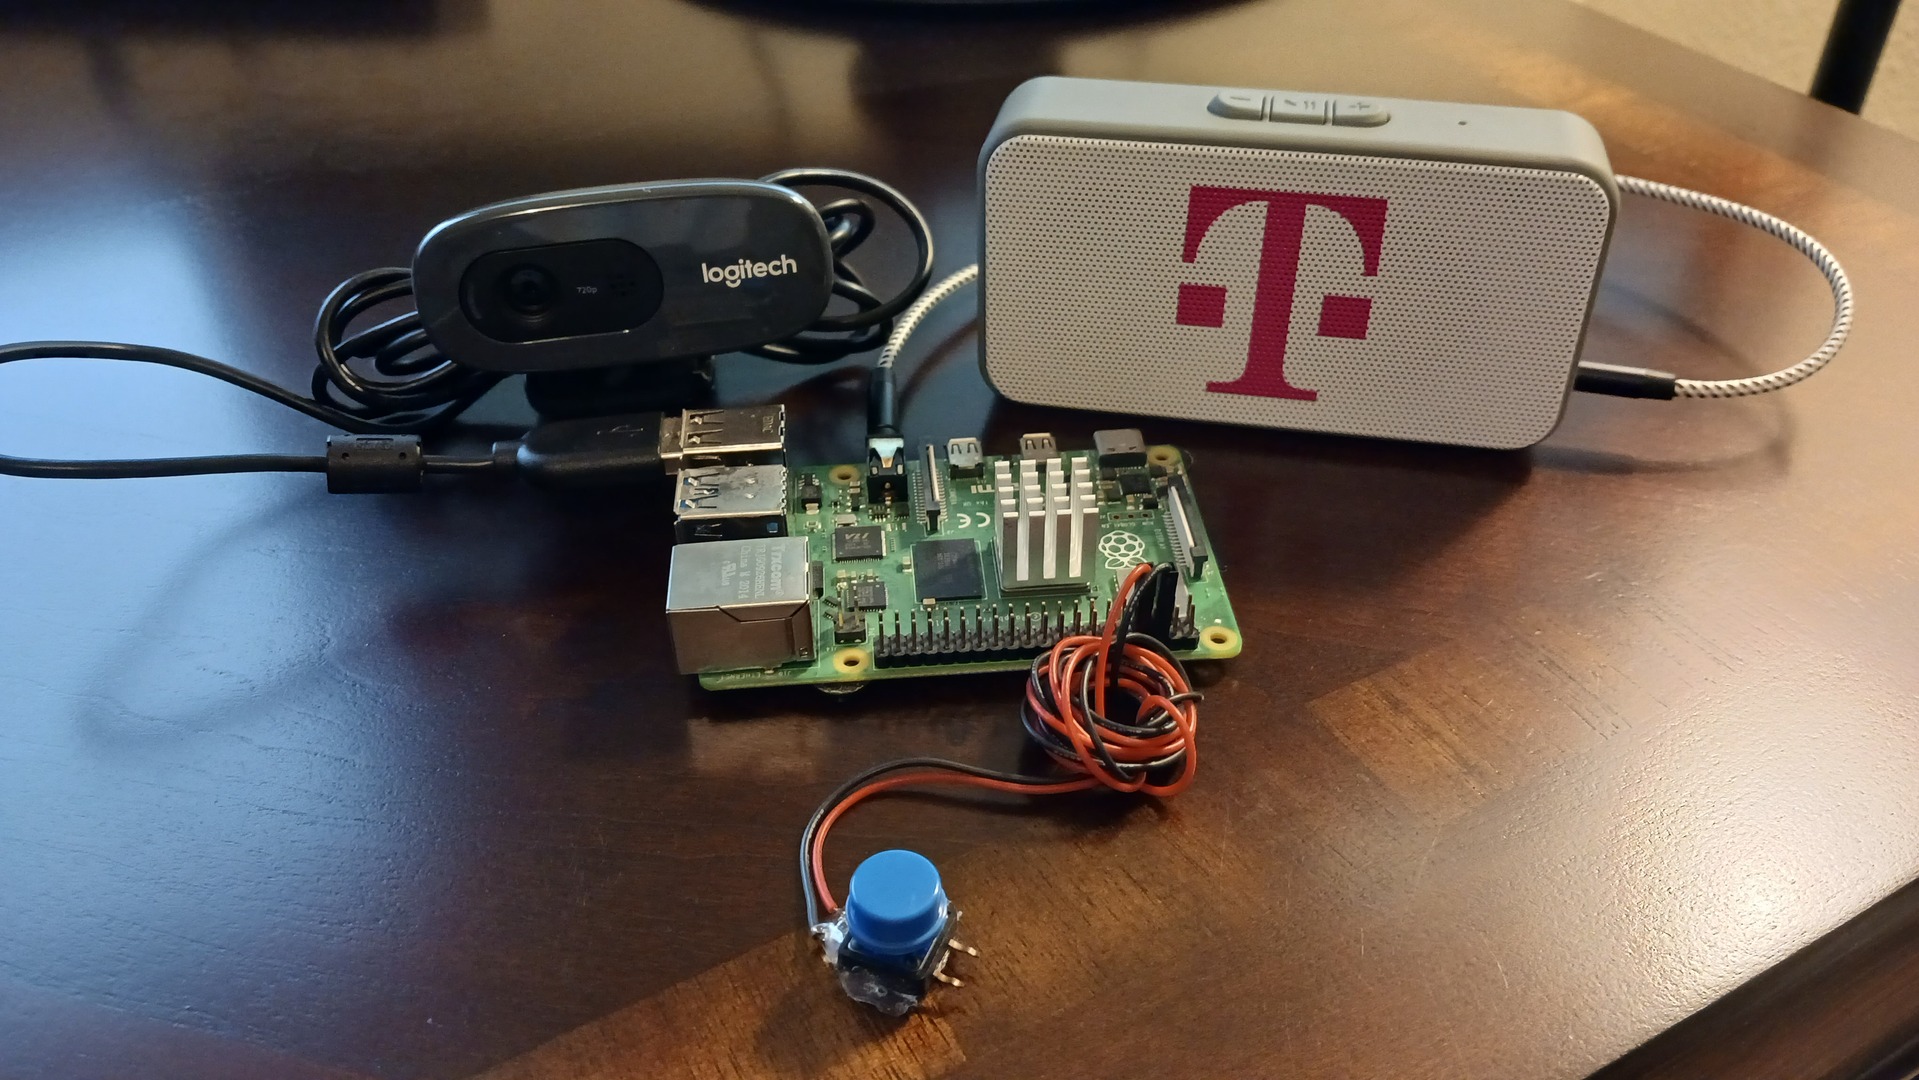
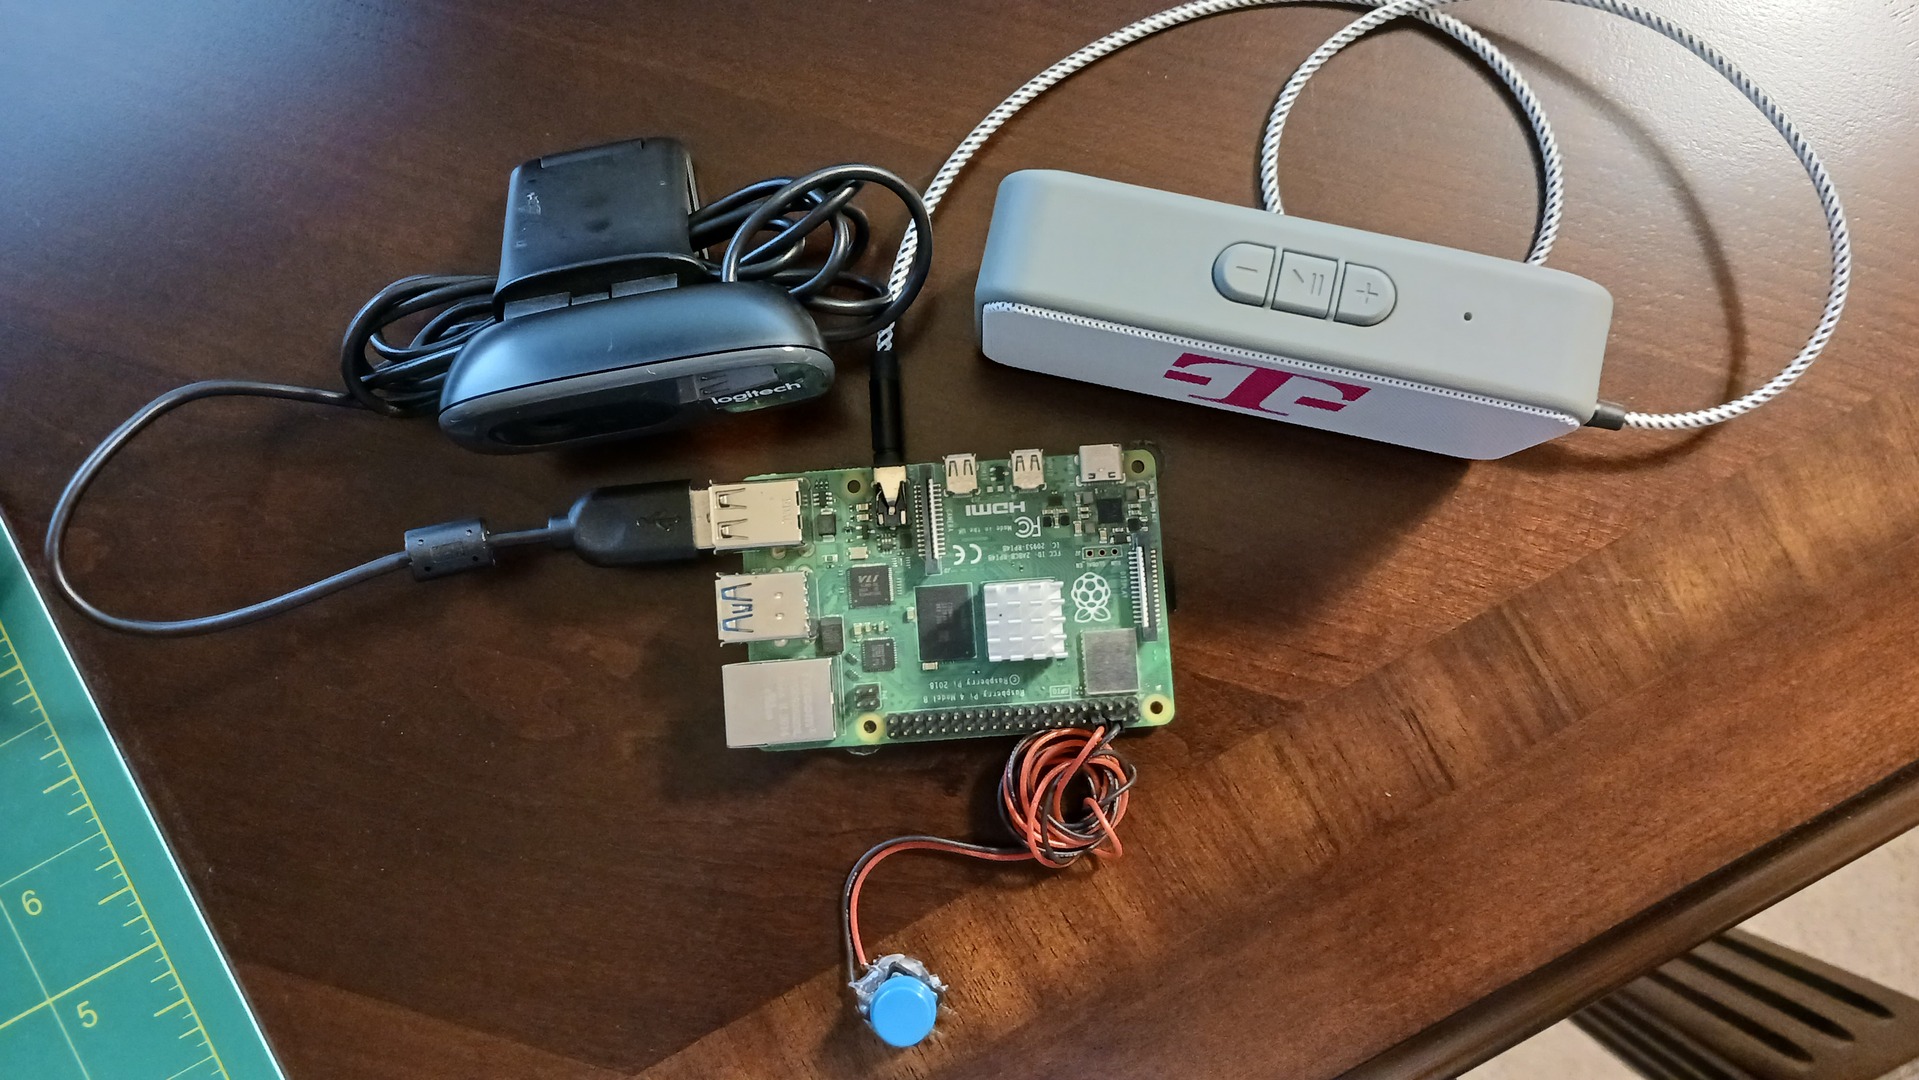
On pressing a pushbutton, audio will be recorded through a USB microphone. That audio will be forwarded into the Whisper automatic speech recognition software, which generates a transcript of the audio. The transcript is used to prompt a TinyLlama-1.1B (1.1 billion parameter) LLM that has been packaged up as a llamafile. If you are not familiar with llamafile yet, it is well worth checking out. They are entirely self-contained LLM-based chatbot executables that run on multiple hardware architectures and operating systems.
The response from the LLM is then forwarded into the free and open-source eSpeak speech synthesizer to produce audio that is played on a speaker connected to the Raspberry Pi.
After setup is complete, the Raspberry Pi can be completely disconnected from the Internet. Everything runs 100% locally, keeping your conversations private. There is a price to pay for this, however. A brief request can easily take 15 seconds of processing (on a Pi 4) before the response is ready. And, of course, if you make a complicated request, or ask for a lengthy story to be generated, it will take longer yet.
Instructions
- Write Ubuntu Server 22.04.3 LTS (64-bit) to an SD card with the Raspberry Pi Imager software.
- Raspberry Pi OS is incompatible with llamafile, unless you are using a Raspberry Pi 5 or build a custom kernel.
On the Raspberry Pi:
sudo apt update
sudo apt install ffmpeg
sudo apt install espeak
sudo apt install python3-pip
sudo apt install python3-pyaudio
pip3 install openai openai-whisper RPi.GPIO pyaudio

git clone https://github.com/nickbild/local_llm_assistant
cd local_llm_assistant
wget https://huggingface.co/jartine/TinyLlama-1.1B-Chat-v1.0-GGUF/resolve/main/TinyLlama-1.1B-Chat-v1.0.Q5_K_M.llamafile?download=true
mv TinyLlama-1.1B-Chat-v1.0.Q5_K_M.llamafile?download=true TinyLlama-1.1B-Chat-v1.0.Q5_K_M.llamafile
chmod 755 TinyLlama-1.1B-Chat-v1.0.Q5_K_M.llamafile
- Plug a speaker into the headphone jack
- Plug in a USB microphone
- Wire a pushbutton to pins 6 and 8 (BOARD numbering scheme)
Start up the LLM with:
./TinyLlama-1.1B-Chat-v1.0.Q5_K_M.llamafile
Then, in a different window, start the voice assistant software:
python3 chatbot.py
Wait a few seconds until you see the "Ready..." message, then press the button when you want to talk. When you see the "recording" message, speak your request. After the LLM completes its work, the response will be spoken through the speaker.
NOTE: The first time that you run this script, the speech-to-text model will need to be downloaded, so have patience. It will be cached locally for future runs.
Media
Bill of Materials
- 1 x Raspberry Pi 4 (a Pi 5 should also work great, but has not been tested)
- 1 x USB microphone (I'm using a webcam's microphone)
- 1 x Speaker with TRS plug input
- 1 x Pushbutton
About the Author
Discussions
Become a Hackaday.io Member
Create an account to leave a comment. Already have an account? Log In.
![]()
MagicBill wrote 03/11/2024 at 12:49
Wonderful article! I'm interested in building one and play around with it. The speaker with the TRS input, is it an amplified speaker with stereo sound? If not amplified would 8 ohm speakers work (some systems use 4 ohms)? Finally, a 3-D printed case would integrate everything into a compact unit. I'm thinking of combinig the Pi, speaker(s), and button and microphone into one case.

Nick Bild wrote 03/11/2024 at 12:53
I used a commercial amplified speaker (the rectangular box with the "T" on the front is my speaker). I'm not sure how deviations from this plan would work, so you'd have to experiment. Sound like a cool project. Have fun!
![]()
MagicBill wrote 03/11/2024 at 15:26
Nick, I would use a stereo amplifer and 8 ohm speakers. A splitter could supply power to the Pi and to the amp. Thank you for your inspiration. God bless, MagicBill