Django Redis Panel
![]()

A Django Admin panel for browsing, inspecting, and managing Redis keys. No postgres/mysql models or changes required.
Docs
https://yassi.github.io/dj-redis-panel/
Features
- Browse Redis Keys: Search and filter Redis keys with pattern matching
- Instance Overview: Monitor Redis instance metrics and database statistics
- Key Management: View, edit, and delete Redis keys with support for all data types
- Feature Toggles: Granular control over operations (delete, edit, TTL updates)
- Pagination: Both traditional page-based and cursor-based pagination support
- Django Admin Integration: Seamless integration with Django admin styling and dark mode
- Permission Control: Respects Django admin permissions and staff-only access
- Multiple Instances: Support for multiple Redis instances with different configurations
Supported Redis Data Types
- String: View and edit string values, including binary data
- List: Browse list items with pagination
- Set: View set members
- Hash: Display hash fields and values in a table format
- Sorted Set: Show sorted set members with scores
Binary Data Support
Django Redis Panel provides full support for displaying and editing arbitrary byte strings:
- Safe Display: Binary data is displayed as bytes literals (e.g.,
b'\x80\x04\x95...') when it can't be decoded as text - Editable: You can edit binary data directly using the bytes literal format (
b'...'orb"...") - Round-trip Safe: Binary data maintains integrity through view/edit cycles
- Multiple Formats: Handles both single-quoted (
b'...') and double-quoted (b"...") bytes literals
Project Structure
dj-redis-panel/
├── dj_redis_panel/          # Main package
│   ├── templates/           # Django templates
│   ├── redis_utils.py       # Redis utilities
│   ├── views.py            # Django views
│   └── urls.py             # URL patterns
├── example_project/         # Example Django project
├── tests/                   # Test suite
├── images/                  # Screenshots for README
└── requirements.txt         # Development dependencies
Requirements
- Python 3.9+
- Django 4.2+
- Redis 4.0+
- redis-py 4.0+
Screenshots
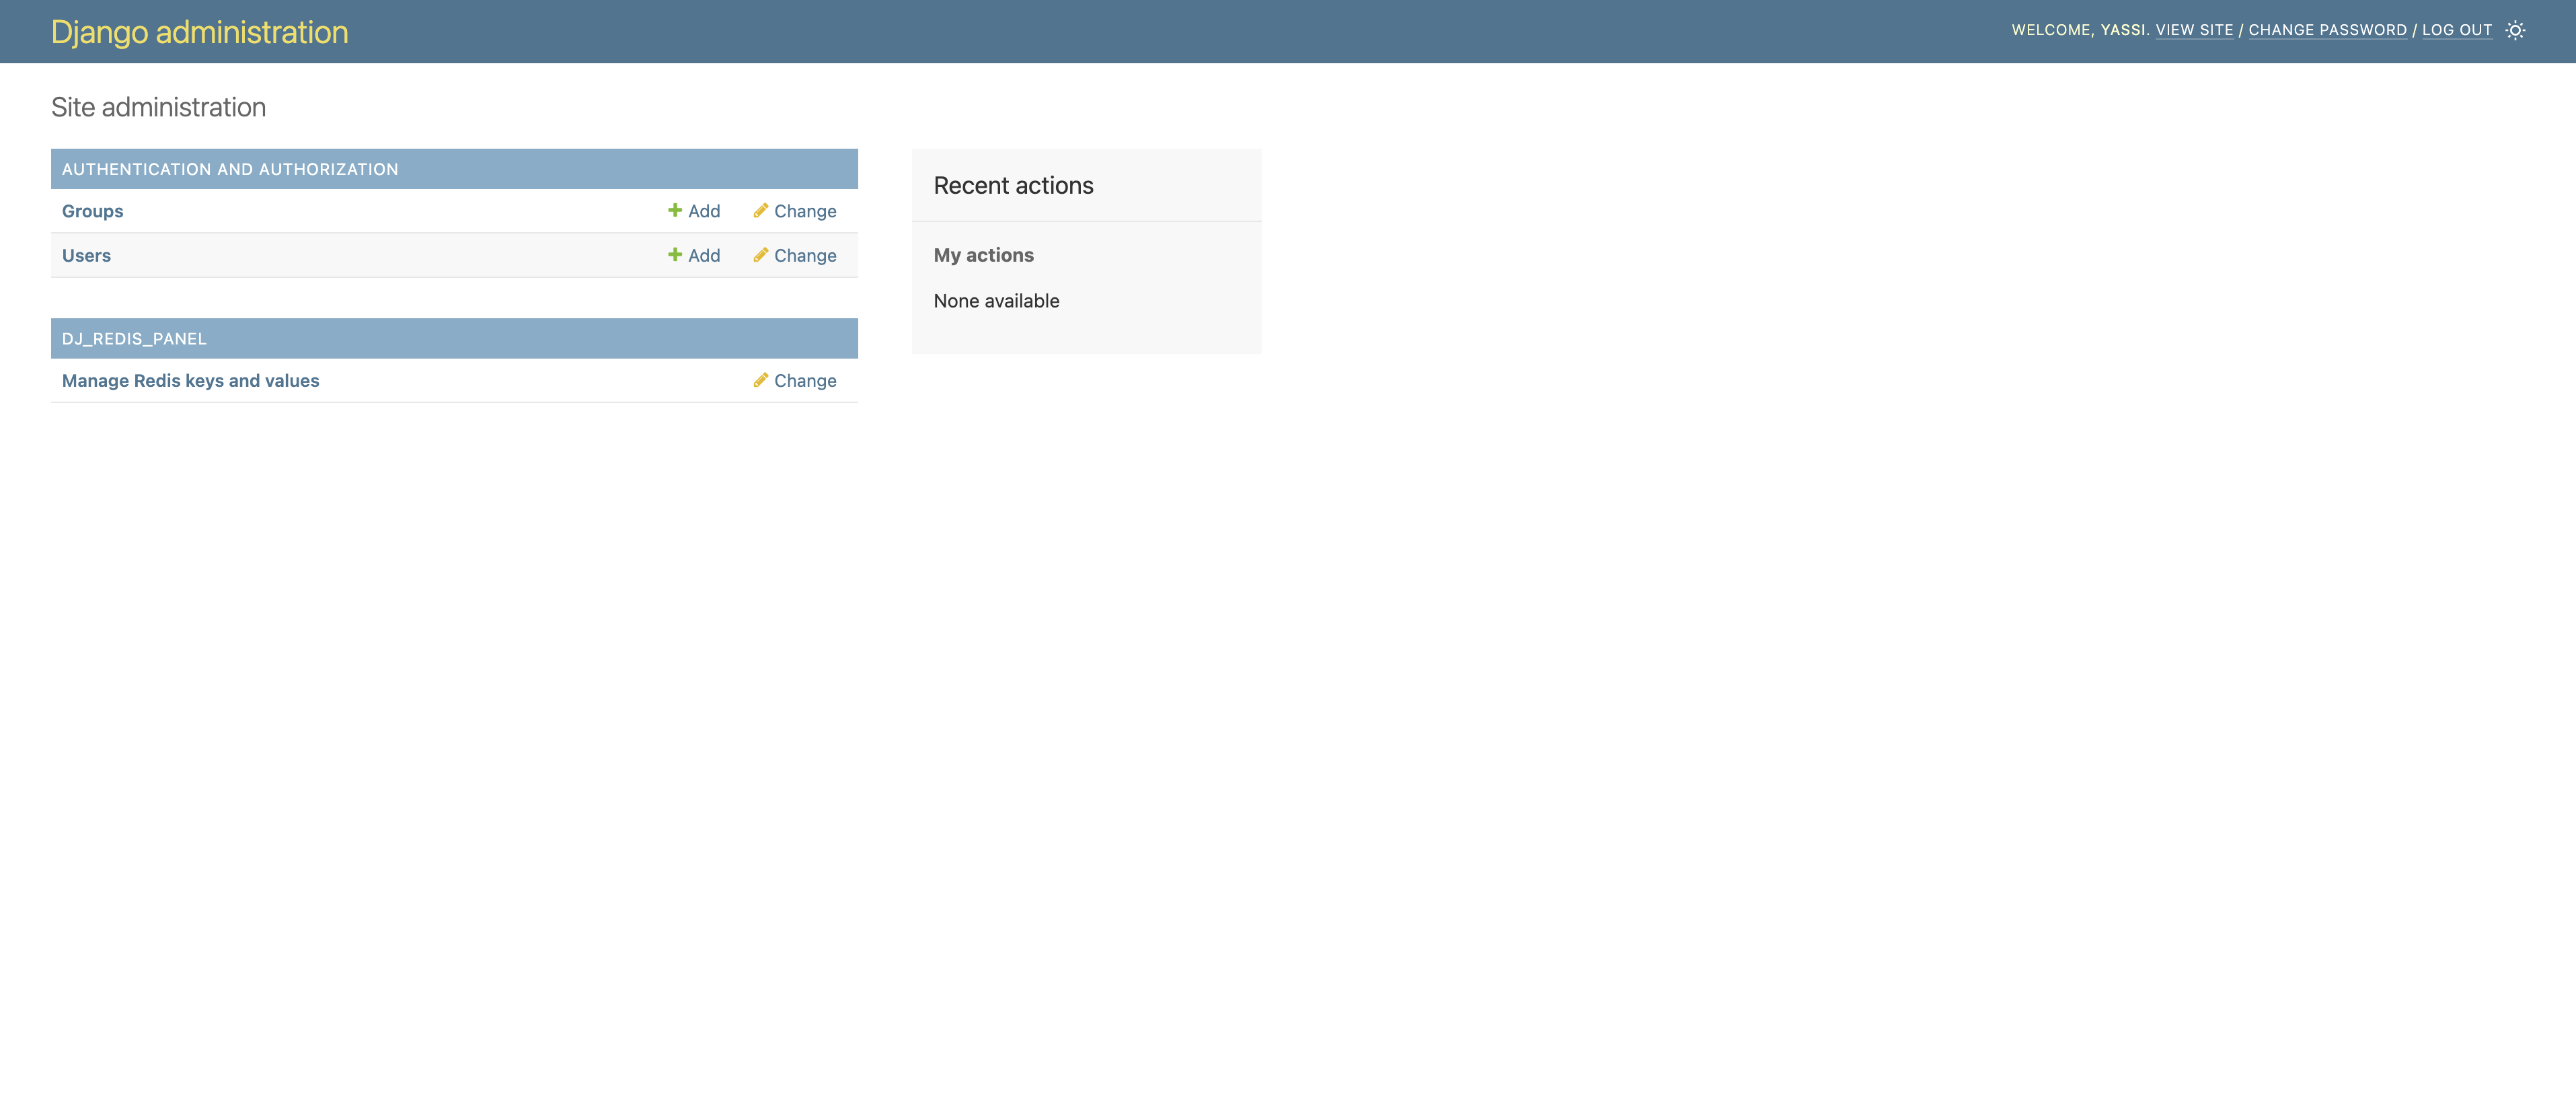
Django Admin Integration
Seamlessly integrated into your Django admin interface. A new section for dj-redis-panel will appear in the same places where your models appear.
NOTE: This application does not actually introduce any model or migrations.
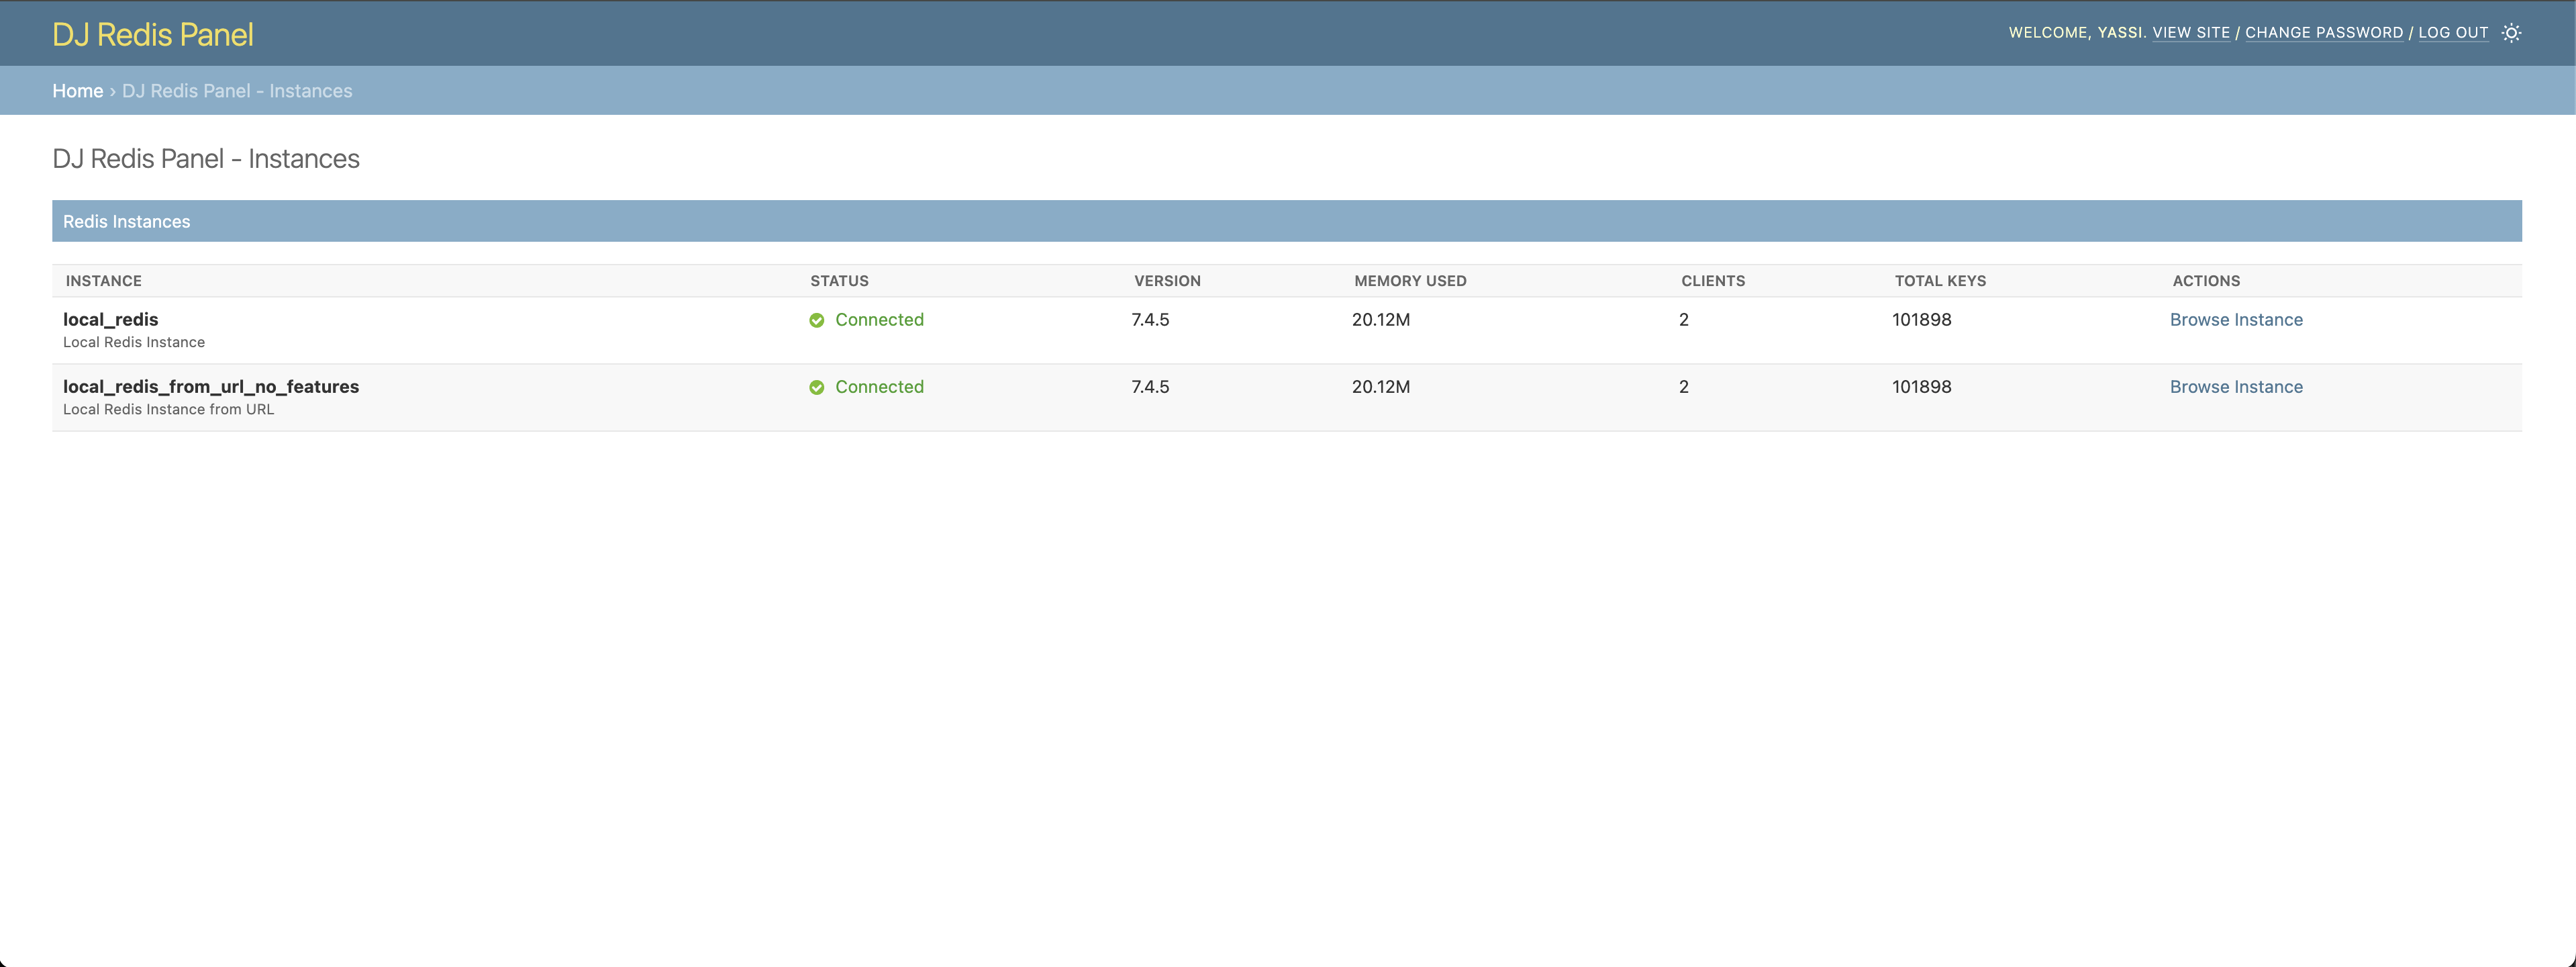
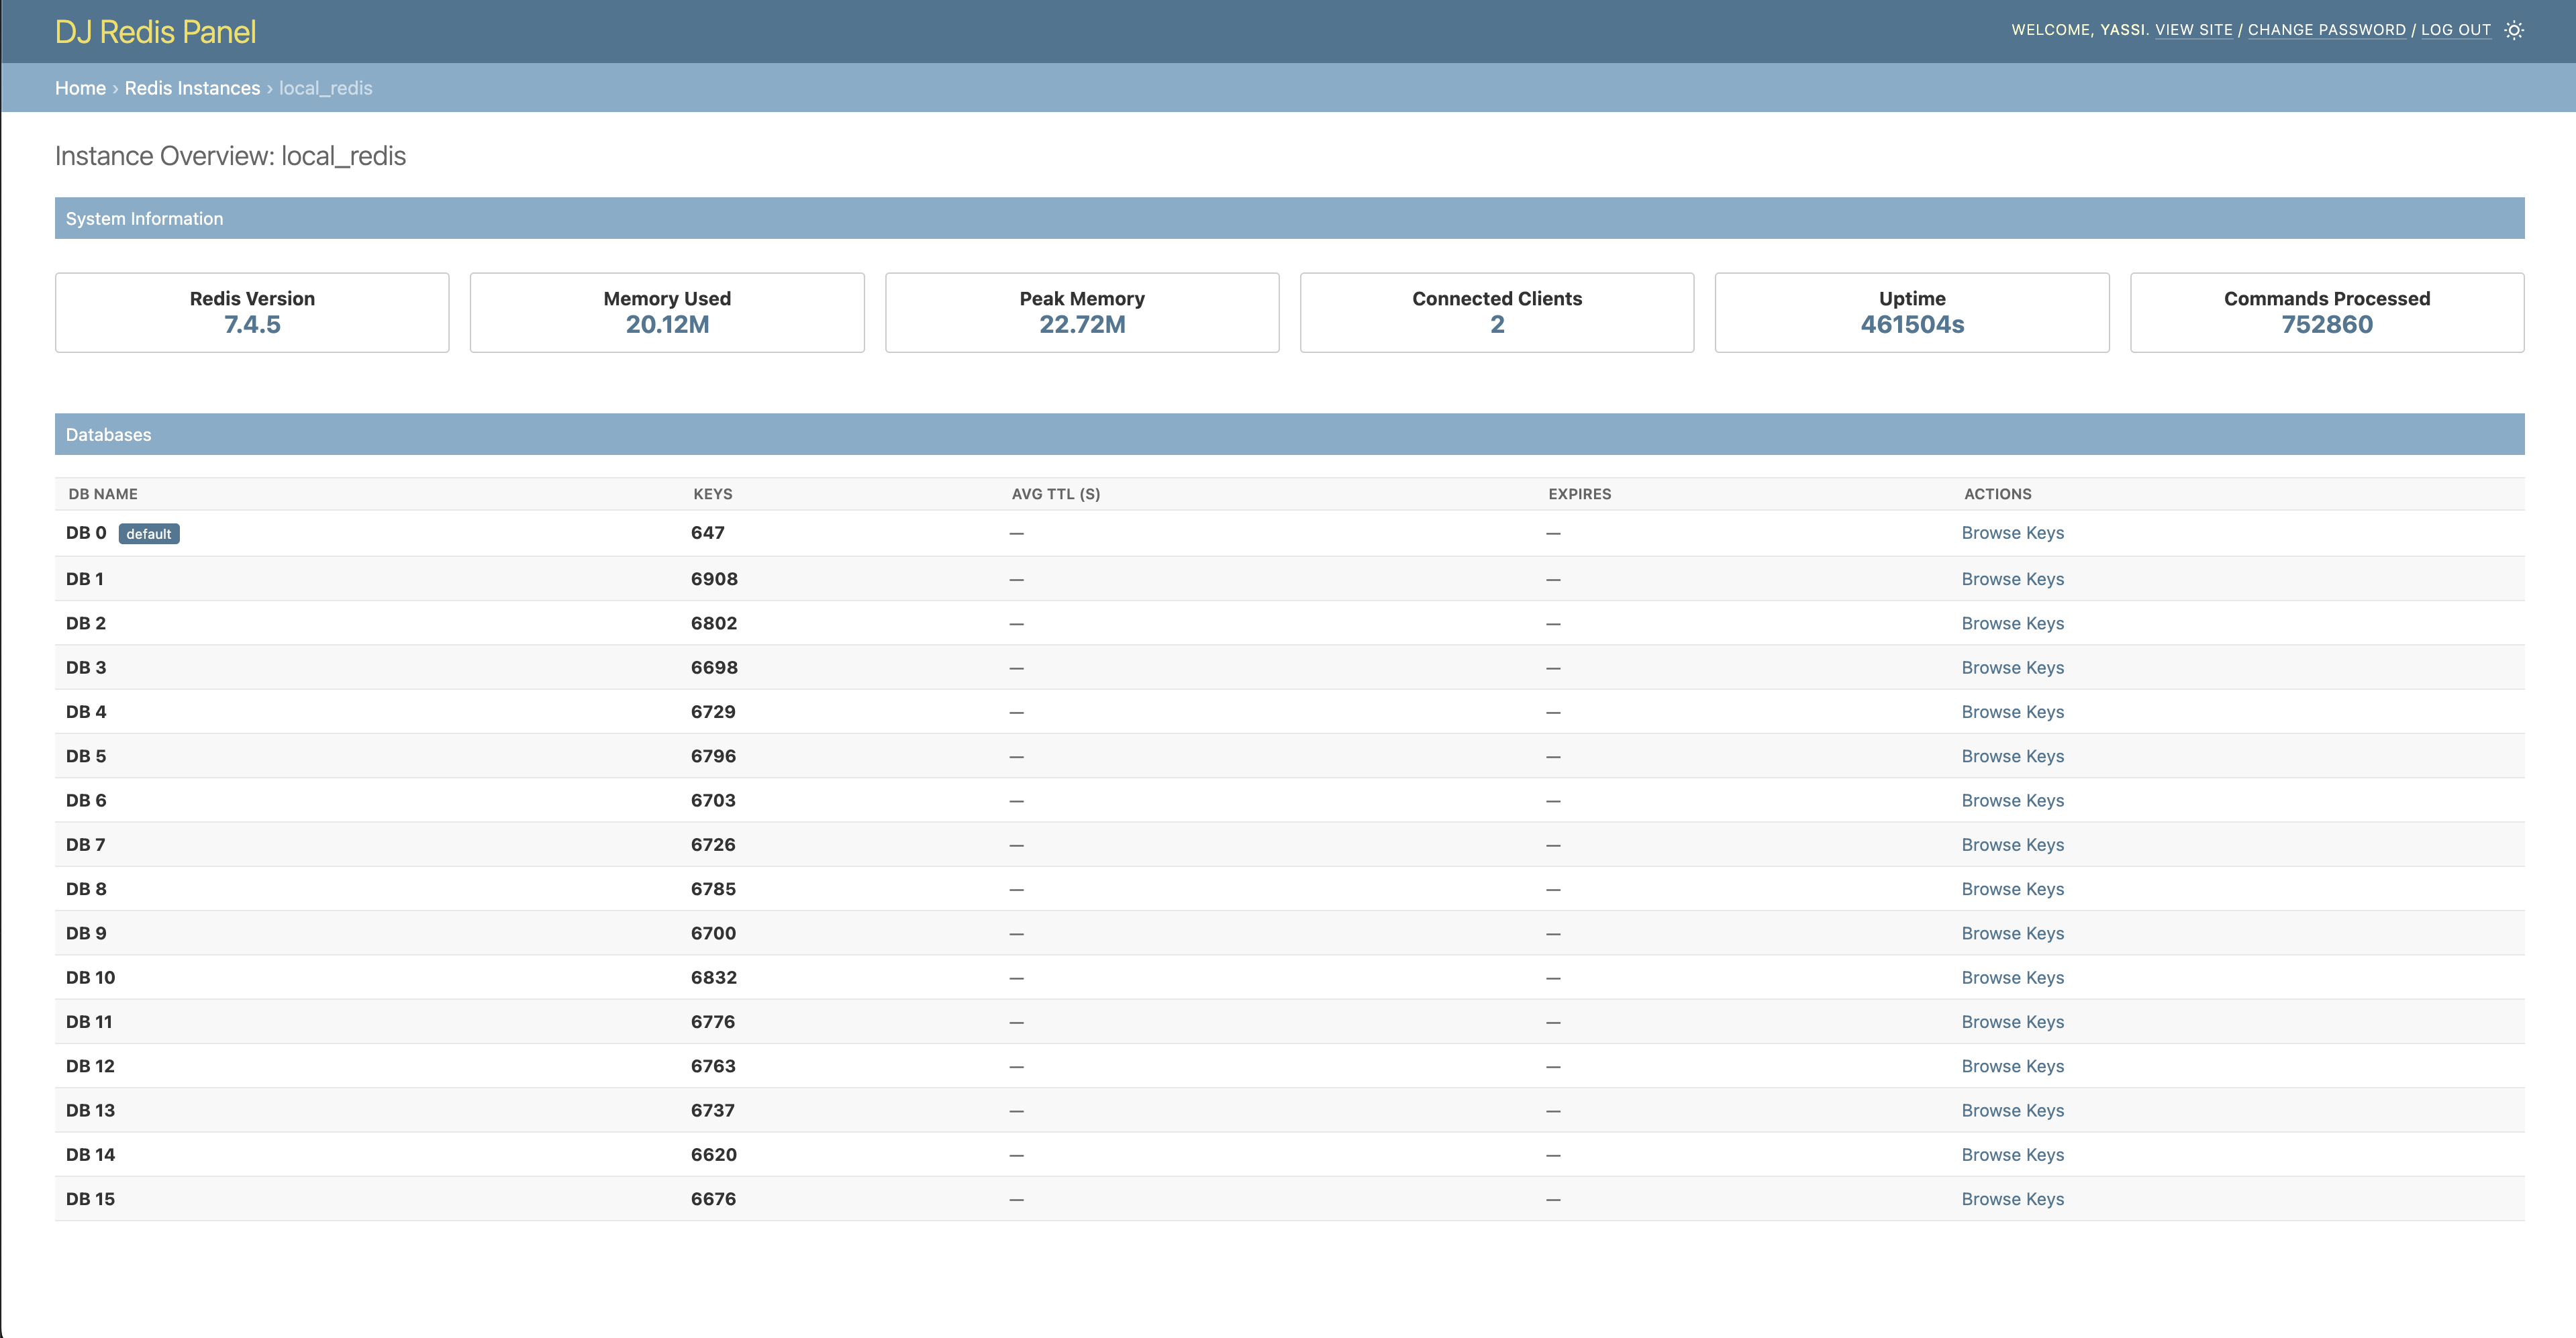
Instance Overview
Monitor your Redis instances with detailed metrics and database information.
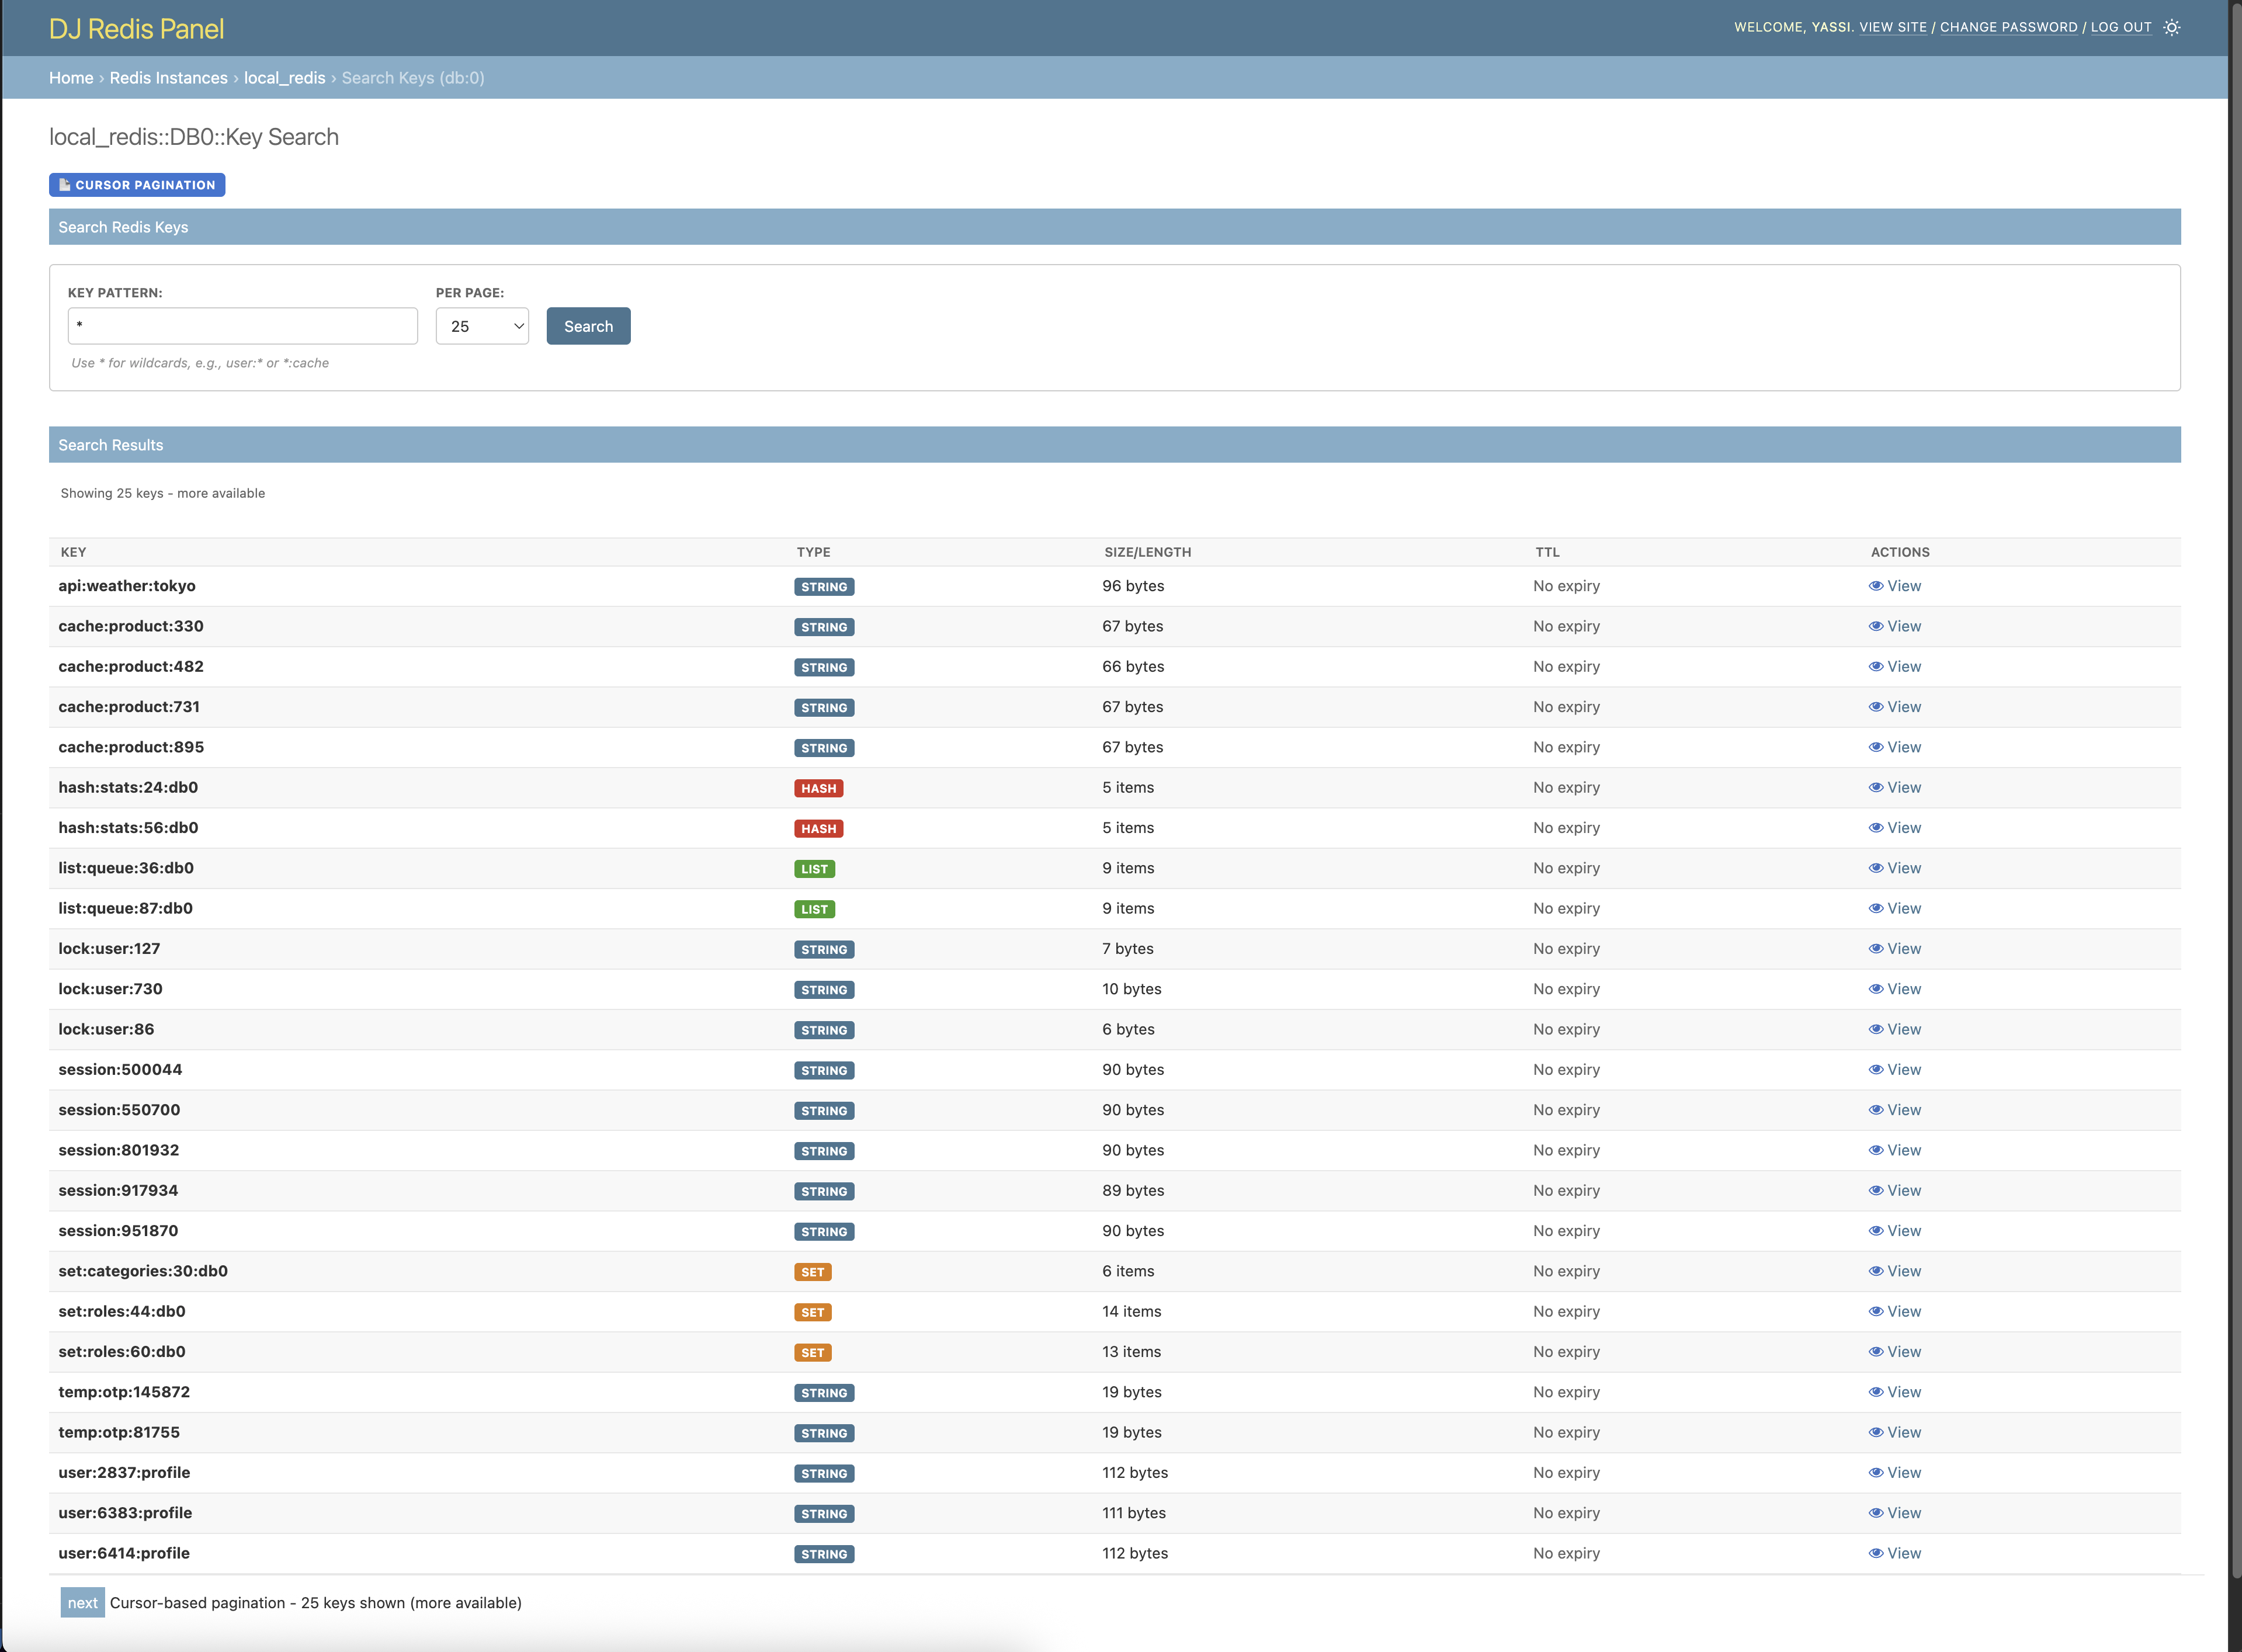
Key Search - Page-based Pagination
Search for keys with traditional page-based navigation.

Key Search - Cursor-based Pagination
Efficient cursor-based pagination for large datasets.
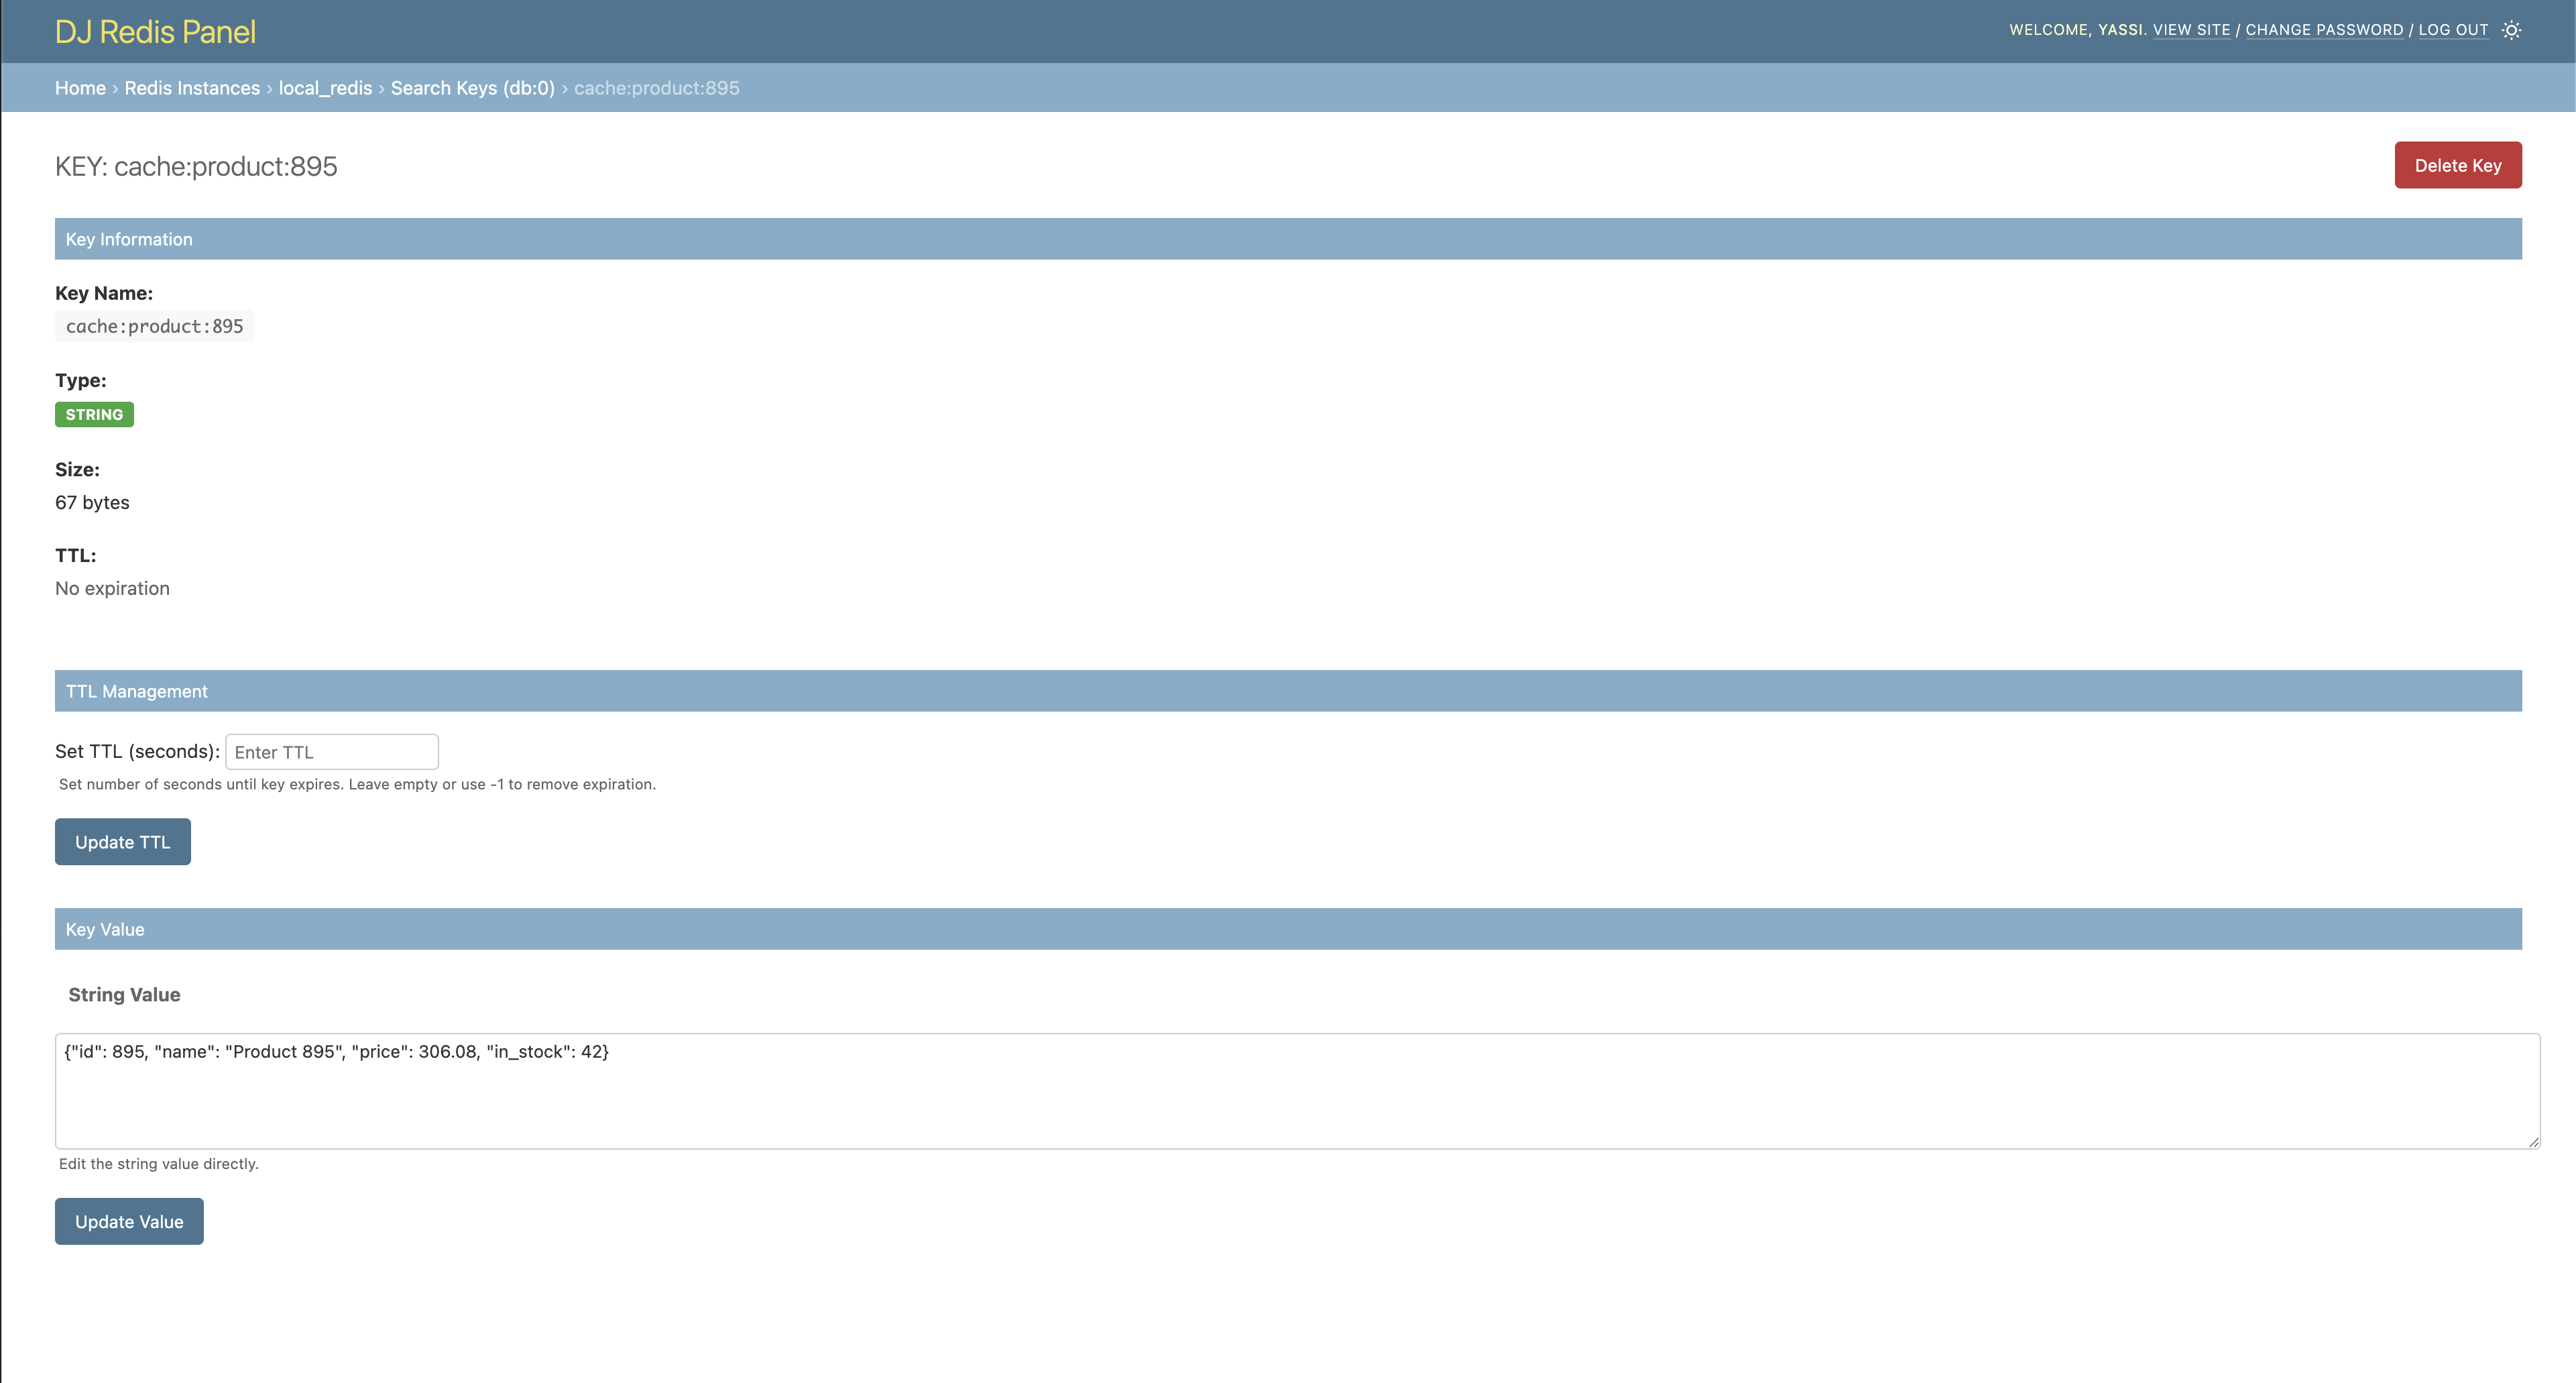
Key Detail - String Values
View and edit string key values with TTL management.
Key Detail - Other data structures
Browse keys with more complex data structures such as hashes, lists, etc.

Installation
1. Install the Package
pip install dj-redis-panel
2. Add to Django Settings
Add dj_redis_panel to your INSTALLED_APPS:
INSTALLED_APPS = [
    'django.contrib.admin',
    'django.contrib.auth',
    'django.contrib.contenttypes',
    'django.contrib.sessions',
    'django.contrib.messages',
    'django.contrib.staticfiles',
    'dj_redis_panel',  # Add this line
    # ... your other apps
]
3. Configure Redis Instances
Add the Django Redis Panel configuration to your Django settings:
DJ_REDIS_PANEL_SETTINGS = {
    # Global feature flags (can be overridden per instance)
    "ALLOW_KEY_DELETE": False,
    "ALLOW_KEY_EDIT": True,
    "ALLOW_TTL_UPDATE": True,
    "CURSOR_PAGINATED_SCAN": False,
    "CURSOR_PAGINATED_COLLECTIONS": False,

    # Limits for page-based pagination (only applies when CURSOR_PAGINATED_SCAN is False)
    "MAX_KEYS_PAGINATED_SCAN": 100000,  # Maximum keys to collect in memory
    "MAX_SCAN_ITERATIONS": 2000,  # Maximum Redis SCAN iterations

    "INSTANCES": {
        "default": {
            "description": "Default Redis Instance",
            "host": "127.0.0.1",
            "port": 6379,
            # Optional: override global settings for this instance
            "features": {
                "ALLOW_KEY_DELETE": True,
                "CURSOR_PAGINATED_SCAN": True,
            },
        },
        "other_instance": {
            "description": "Cache Redis Instance",
            "url": "rediss://127.0.0.1:6379",
        },
    }
}
4. Include URLs
Add the Redis Panel URLs to your main urls.py:
from django.contrib import admin
from django.urls import path, include

urlpatterns = [
    path('admin/redis/', include('dj_redis_panel.urls')),  # Add this line
    path('admin/', admin.site.urls),
]
5. Run Migrations and Create Superuser
python manage.py migrate
python manage.py createsuperuser  # If you don't have an admin user
6. Access the Panel
-
Start your Django development server:
python manage.py runserver
-
Navigate to the Django admin at
http://127.0.0.1:8000/admin/ -
Look for the "DJ_REDIS_PANEL" section in the admin interface
-
Click "Manage Redis keys and values" to start browsing your Redis instances
Configuration Options
The following options are set globally but can also be configured on a per instance basis: Note that settings using all caps are feature flags meant to affect how dj-redis-panel operates. settings using lower case names are actually settings that can be passed directly into the underlying redis client (redis-py)
| Setting | Default | Description |
|---|---|---|
ALLOW_KEY_DELETE |
False |
Allow deletion of Redis keys |
ALLOW_KEY_EDIT |
True |
Allow editing of key values |
ALLOW_TTL_UPDATE |
True |
Allow updating key TTL (expiration) |
CURSOR_PAGINATED_SCAN |
False |
Use cursor-based pagination instead of page-based |
CURSOR_PAGINATED_COLLECTIONS |
False |
Use cursor based pagination for key values like lists and hashs |
MAX_KEYS_PAGINATED_SCAN |
100000 |
Maximum number of keys to collect during page-based pagination. Only applies when CURSOR_PAGINATED_SCAN is False. Prevents memory issues with large datasets. |
MAX_SCAN_ITERATIONS |
2000 |
Maximum number of Redis SCAN iterations during page-based pagination. Only applies when CURSOR_PAGINATED_SCAN is False. Prevents infinite loops and excessive operations. |
encoder |
"utf-8" |
Encoding to use for decoding/encoding Redis values |
socket_timeout |
5.0 | timeout for redis opertation after established connection |
socket_connect_timeout |
3.0 | timeout for initial connection to redis instance |
type |
single |
choose between cluster and standalone client types |
Important Notes on Pagination Settings
For databases with more than 100,000 keys, it's strongly recommended to use cursor-based pagination (CURSOR_PAGINATED_SCAN: True) instead of increasing MAX_KEYS_PAGINATED_SCAN. Cursor-based pagination:
- Doesn't load all keys into memory at once
- Is more efficient for large datasets
- Provides better performance and stability
Page-based pagination (when CURSOR_PAGINATED_SCAN is False) scans all matching keys into memory before paginating, which can cause:
- High memory usage with large key counts
- Slower response times
- Potential timeouts
The MAX_KEYS_PAGINATED_SCAN and MAX_SCAN_ITERATIONS settings are safety limits to prevent these issues. If you're hitting these limits, switch to cursor-based pagination instead of increasing them.
Instance Configuration
Each Redis instance can be configured with:
Connection via Host/Port:
Almost certainly the most common scenario when testing your application locally
"instance_name": {
    "description": "Human-readable description",
    "host": "127.0.0.1",
    "port": 6379,
    "socket_timeout": 1.0, # Optional: will use sane default
    "socket_connect_timeout": 1.0, # Optional: will use sane default
    "password": "password",     # Optional
    "features": {               # Optional: override global settings
        "ALLOW_KEY_DELETE": True,
    },
    # Optional: override pagination limits for this instance
    "MAX_KEYS_PAGINATED_SCAN": 200000,
    "MAX_SCAN_ITERATIONS": 5000,
}
Connection via URL:
Likely the most common scenario for most users - connecting to a standalone redis host with a single url
"instance_name": {
    "description": "Human-readable description",
    "url": "redis://user:password@host:port",
    "socket_timeout": 1.0, # Optional: will use sane default
    "socket_connect_timeout": 1.0, # Optional: will use sane default
    "features": {               # Optional: override global settings
        "CURSOR_PAGINATED_SCAN": True,
    },
}
Connection to cluster via url:
If your redis instance is operated as a cluster and you only have a url to connect with,
you can connect using the type:cluster option like below. This type of situation is most
common with managed redis services (e.g. redis from aws, digital ocean, etc.)
"instance_name": {
    "description": "Human-readable description",
    "url": "redis://user:password@host:port",
    "socket_timeout": 1.0, # Optional: will use sane default
    "socket_connect_timeout": 1.0, # Optional: will use sane default
    "type": "cluster", # Optional: Connect using cluster client
    "features": {               # Optional: override global settings
        "CURSOR_PAGINATED_SCAN": True,
    },
}
Connection to cluster with known nodes:
If you are running your own redis cluster and know the predefined hosts that compose your cluster, you can connect using the hostnames and ports of these nodes. This is almost certainly the least likely use case.
"instance_name": {
    "description": "Human-readable description",
    "url": "redis://user:password@host:port",
    "socket_timeout": 1.0, # Optional: will use sane default
    "socket_connect_timeout": 1.0, # Optional: will use sane default
    "type": "cluster",
    "startup_nodes": [
        {"host": "127.0.0.1", "port": 6379},
        {"host": "127.0.0.1", "port": 6379},
        {"host": "127.0.0.1", "port": 6379},
    ],
    "features": {               # Optional: override global settings
        "CURSOR_PAGINATED_SCAN": True,
    },
}
License
This project is licensed under the MIT License. See the LICENSE file for details.
Development Setup
If you want to contribute to this project or set it up for local development:
Prerequisites
- Python 3.9 or higher
- Redis server running locally
- Git
- Autoconf
1. Clone the Repository
git clone https://github.com/yassi/dj-redis-panel.git
cd dj-redis-panel
2. Create Virtual Environment
python -m venv venv
source venv/bin/activate  # On Windows: venv\Scripts\activate
3. Install dj-redis-panel inside of your virtualenv
A make file is included in the repository root with multiple commands for building and maintaining this project. The best approach is to start by using one of the package installation commands found below:
# Install all dependencies and dj-redis-panel into your current env
make install
4. Set Up Example Project
The repository includes an example Django project for development and testing:
cd example_project
python manage.py migrate
python manage.py createsuperuser
5. Populate Test Data (Optional)
An optional CLI tool for populating redis keys automatically is included in the example django project in this code base.
python manage.py populate_redis
This command will populate your Redis instance with sample data for testing.
6. Run the Development Server
python manage.py runserver
Visit http://127.0.0.1:8000/admin/ to access the Django admin with Redis Panel.
7. Running Tests
The project includes a comprehensive test suite. You can run them by using make or by invoking pytest directly:
# build and install all dev dependencies and run all tests inside of docker container
make test

# Additionally generate coverage reports in multiple formats
make test_coverage
Note: Tests require a running Redis server on 127.0.0.1:6379. The tests use databases 13, 14, and 15 for isolation and automatically clean up after each test.
8. Dockerized Redis
Test for this project (as well as any active development) require an active redis installation. Although not required, a docker-compose file is included to allow for easy creation of local redis instances.
# Start Redis on localhost and the usual port 6379
docker-compose up redis -d
9. SSL/TLS Cluster Testing (Optional)
The project supports testing with SSL-enabled Redis clusters to validate compatibility with managed services like AWS ElastiCache.
Default behavior: The Redis cluster runs without SSL - no certificates needed.
To test SSL/TLS connections:
# 1. Generate SSL certificates (one-time setup)
make generate_ssl_certs

# 2. Start SSL-enabled cluster (alongside non-SSL cluster)
make docker_up_all

# 3. Verify SSL connection works
docker compose exec redis-node-0-ssl redis-cli -c -p 6380 --tls --insecure cluster info
The SSL cluster adds a redis-cluster-ssl instance in Django admin that uses the rediss:// protocol, simulating ElastiCache SSL connections.
Port Mappings:
- Non-SSL Cluster:
localhost:9000-9002 - SSL Cluster (non-SSL):
localhost:9100-9102 - SSL Cluster (TLS):
localhost:9110-9112
Available Commands:
make docker_up- Start non-SSL cluster onlymake docker_up_ssl- Start SSL cluster onlymake docker_up_all- Start both clustersmake docker_down- Stop all clusters
For detailed SSL setup instructions, see docs/ssl-cluster-setup.md.