🎵 VS Code Music Visualizer
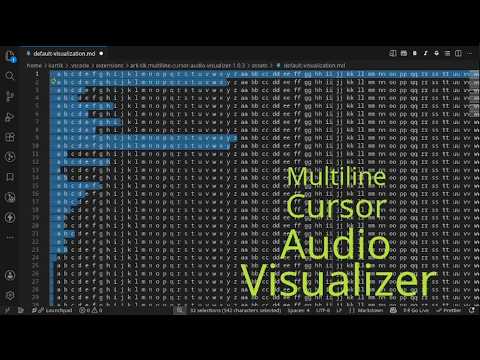
Transform your code editor into a real-time music visualizer using multiline cursors. Watch code dance to music as frequency analysis drives dynamic cursor positioning.
Installation
- Open VS Code Extensions (
Ctrl+Shift+X/Cmd+Shift+X) - Search "Multiline Cursor Audio Visualizer"
- Click Install
Gallery & Usage
Demo video (youtube)
MacOs tutorial video (youtube)
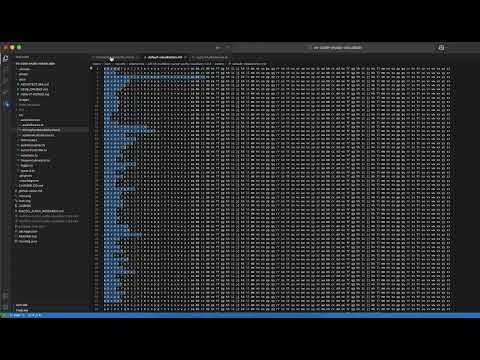
Real-time cursor movement responding to audio frequencies - each cursor represents a frequency band positioned by amplitude.
Available Commands
 Access via Command Palette (
Ctrl+Shift+P):
- Audio Visualizer: Start (Microphone) - Captures microphone input for live performance visualization
- Audio Visualizer: Start (System Audio) - Captures computer audio output for music visualization
- Audio Visualizer: Stop - Stops the visualization
- Audio Visualizer: Configure - Opens extension settings
Configuration Settings
 Customize through VS Code settings:
- Sensitivity (0.1-5.0) - Audio response strength
- Update Rate (30-120 FPS) - Visualization refresh rate
- Cursor Count (8-256) - Number of frequency bands
- Auto Configure - Matches cursor count to visible lines
- Smoothing (0.0-1.0) - Movement fluidity
- Debug Logging - Troubleshooting output
How to start the visualizer
1. Microphone Input Mode
MacOS/Linux
- Open any text file in VSCode
- Open command palette (Cmd/Ctrl + Shift + P)
- Run "Audio Visualizer: Start (Microphone)"
- Start speaking/playing music - cursors respond instantly
2. System Audio Input Mode
Linux
I've tested in Linux with pulse audio sound driver. I think others (Pipewire, ALSA, Jack) should work fine too, if not let me know. (Extension detects PulseAudio monitor devices automatically)
- Open any text file in VSCode
- Open command palette (Cmd/Ctrl + Shift + P)
- Run "Audio Visualizer: Start (System Audio)"
- Play music - cursors respond to system audio
MacOS
In MacOS capturing/routing system audio for processing in VSCode requires additional configuration:
Step 1: Create Multi-Output Device

- Open Audio MIDI Setup (
/Applications/Utilities/) - Click + → Create Multi-Output Device
Step 2: Configure Device

- Check Built-in Output
- Check BlackHole 2ch (Download BlackHole)
- Enable Drift Correction for Built-in Output only
Step 3: Select Audio Output

- Open System Settings → Sound
- Select your new Multi-Output Device
Step 4: Start Visualization
- Run "Audio Visualizer: Start (System Audio)"
- Play music - cursors respond to system audio
⚠️ Note⚠️ : When Multi-Output Device is selected, volume controls are disabled. Switch back to Built-in Output for normal volume control.
Use Cases
- 🖥️ Dual Monitor Setup: Open visualizer in separate VS Code window on second monitor for ambient visual experience
- 🎵 Music Visualization: Use system audio mode to create live music visuals while working
- 🎙️ Live Streaming: Use microphone mode during coding streams for interactive audio visualization
- 🎤 Presentations: Demonstrate with live audio visualization effects
Troubleshooting
No Audio Detected:
- Check microphone permissions for VS Code
- Try microphone mode first to verify extension works
- Enable debug logging in settings
Performance Issues:
- Lower update rate to 30 FPS
- Reduce cursor count
- Disable debug logging
Documentation
For curious developers and contributors:
- 📖 How It Works - Audio processing and FFT explained
- 🏗️ Architecture - Technical architecture overview
- 🔧 Development - Build from source and contribute
Made with ❤️ for VS Code community • MIT License