While our guide “What is Nano Banana” covers the detailed background, this comprehensive nano banana tutorial shows you how to actually use Nano Banana to work its magic. Whether you’re a content creator, marketer, or simply love experimenting with AI, this nano banana tutorial guide will help you master all the essential techniques.
Getting Started with Nano Banana: Your First Steps in Our Nano Banana Tutorial
Let’s get you set up with Nano Banana in this beginner-friendly guide. Google has made this powerful AI image editing tool accessible through multiple platforms, ensuring you can start immediately.
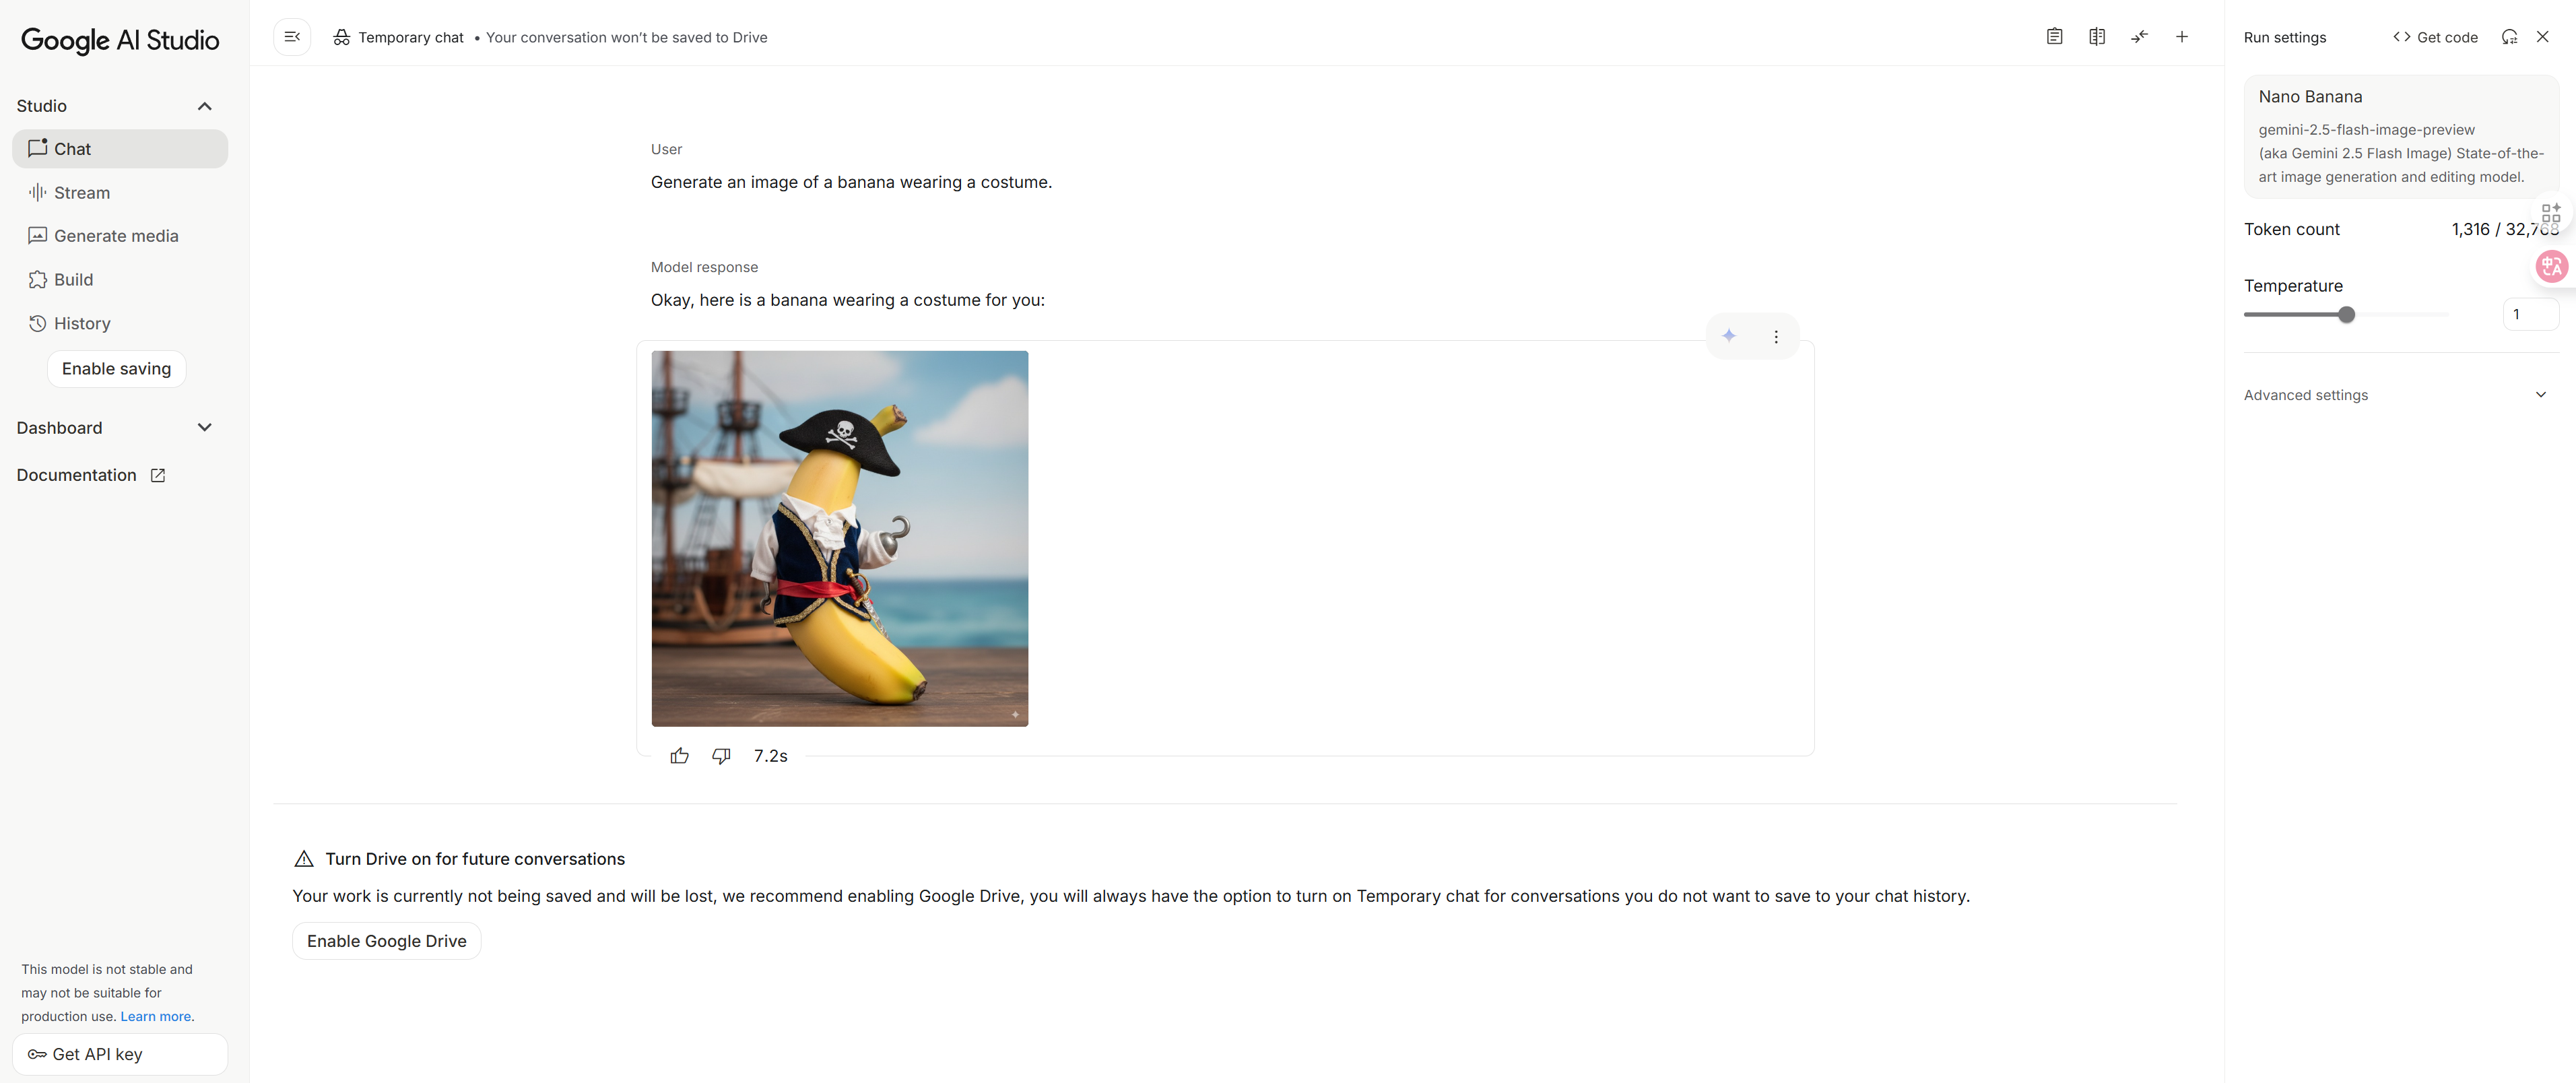
Primary Access Method: Google AI Studio
The easiest way to try Nano Banana is through the Google AI Studio website:
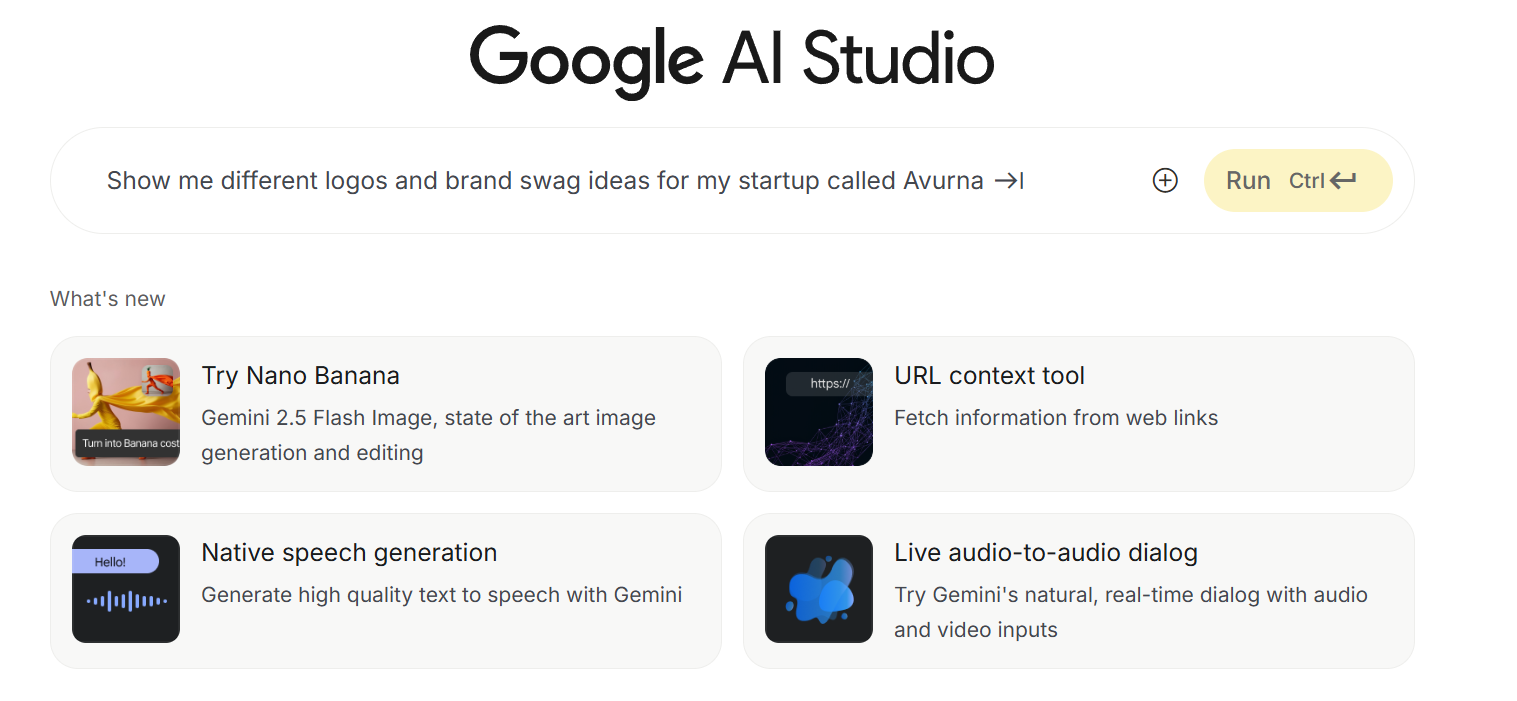
- Visit aistudio.google.com, where the Nano Banana model loads by default.
- Enter your prompt or upload an image.
- Click the “Run” button to generate results.
Alternative Access Methods
Another way to try Nano Banana is through the Gemini website:
- Navigate to Gemini: Open gemini.google.com in your browser
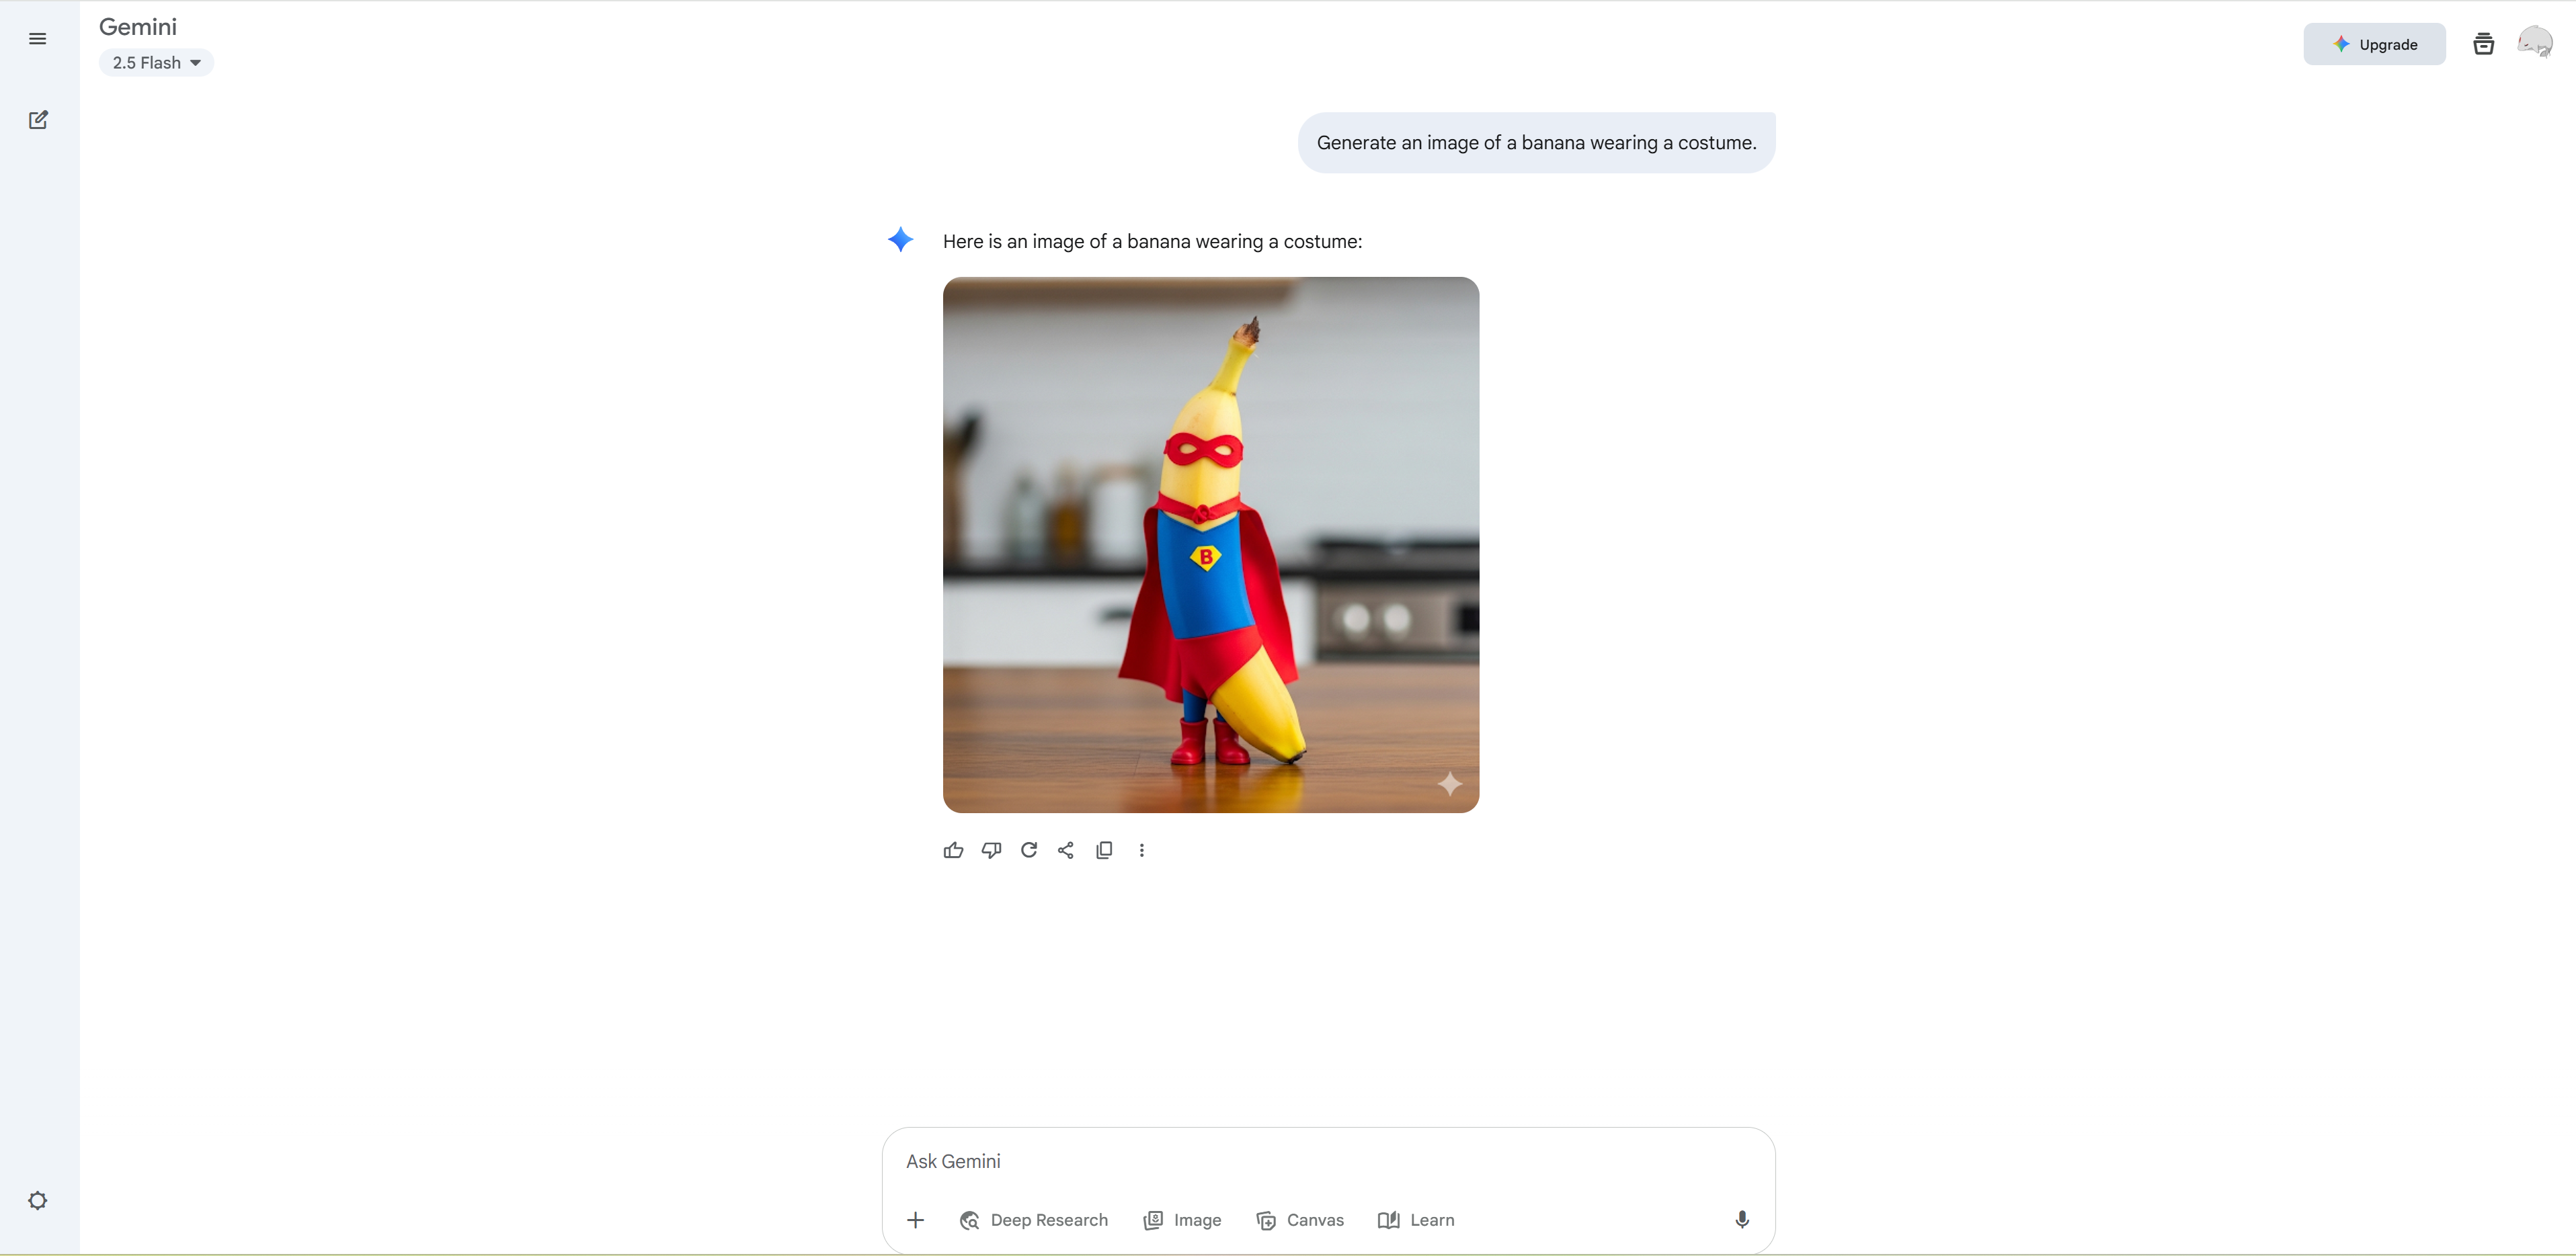
- Find the Image Tools: Hit Image button ont the butom of the screen
- Start Your First Edit: Upload your image and begin experimenting
Third-Party Interfaces - For users seeking dedicated interfaces, several specialized web applications offer streamlined Nano Banana editing experiences:
-
NanoBanana.ai - Professional interface with advanced features.
-
NanoBanana.im - Simplified interface focused on ease of use.
-
NanoBanana.app - Web application with mobile-optimized design.
-
NanoBanana.io - Developer-friendly interface with API access.
Basic Interface Overview
Once you’re in, the process is refreshingly simple:
- Upload: Drag and drop your image(s)
- Prompt: Describe your desired changes in natural language
- Generate: Watch Nano Banana work its magic in 1-2 seconds
- Iterate: Refine your results with follow-up prompts
The key to Nano Banana’s success, as you’ll discover in this comprehensive guide, lies in its natural language understanding. Instead of complex tools and layers, you simply tell it what you want to change - making this AI image editing approach incredibly intuitive for both beginners and advanced users.
Google’s 4 Essential Use Cases: Complete Nano Banana Tutorial Breakdown
Google has identified four core scenarios where Nano Banana truly shines. Let’s master each one with detailed, actionable nano banana tutorial instructions.
1. Give Yourself a Costume or Location Change
What it does: Upload a photo of a person or pet, and Nano Banana maintains their exact appearance while transforming their surroundings, outfits, or time period.
Nano Banana Tutorial: Transform Your Professional Headshot
Let’s say you have a standard LinkedIn headshot but want to see yourself in different professional contexts. This nano banana tutorial will show you exactly how.
Step 1: Upload Your Base Image Start with a clear, well-lit photo where your face is clearly visible. Nano Banana works best with photos where the subject is the main focus.
Step 2: Craft Your Transformation Prompt Here are proven prompt formulas that work:
- Time Travel: “Place me in a 1920s speakeasy wearing a vintage suit and bow tie”
- Professional Switch: “Show me as a chef in a bustling restaurant kitchen, wearing chef’s whites”
- Location Change: “Put me in front of the Eiffel Tower at sunset, keeping my current outfit”
Step 3: Maintain Character Consistency The magic of Nano Banana is its ability to keep you looking like you. Here’s what happens behind the scenes:
- Facial features remain identical
- Skin tone and eye color are preserved
- Hair texture and style adapt naturally to the new context
- Body proportions stay consistent
Pro Tips for Better Results:
- Use “keeping my face exactly the same” in your prompt for extra consistency
- Specify lighting conditions: “with warm evening lighting” or “in bright daylight”
- Be specific about clothing details: “wearing a navy blue business suit” rather than just “professional attire”
Video 1: Complete costume change walkthrough - Watch as we transform a simple headshot into multiple professional scenarios (3-4 minutes)
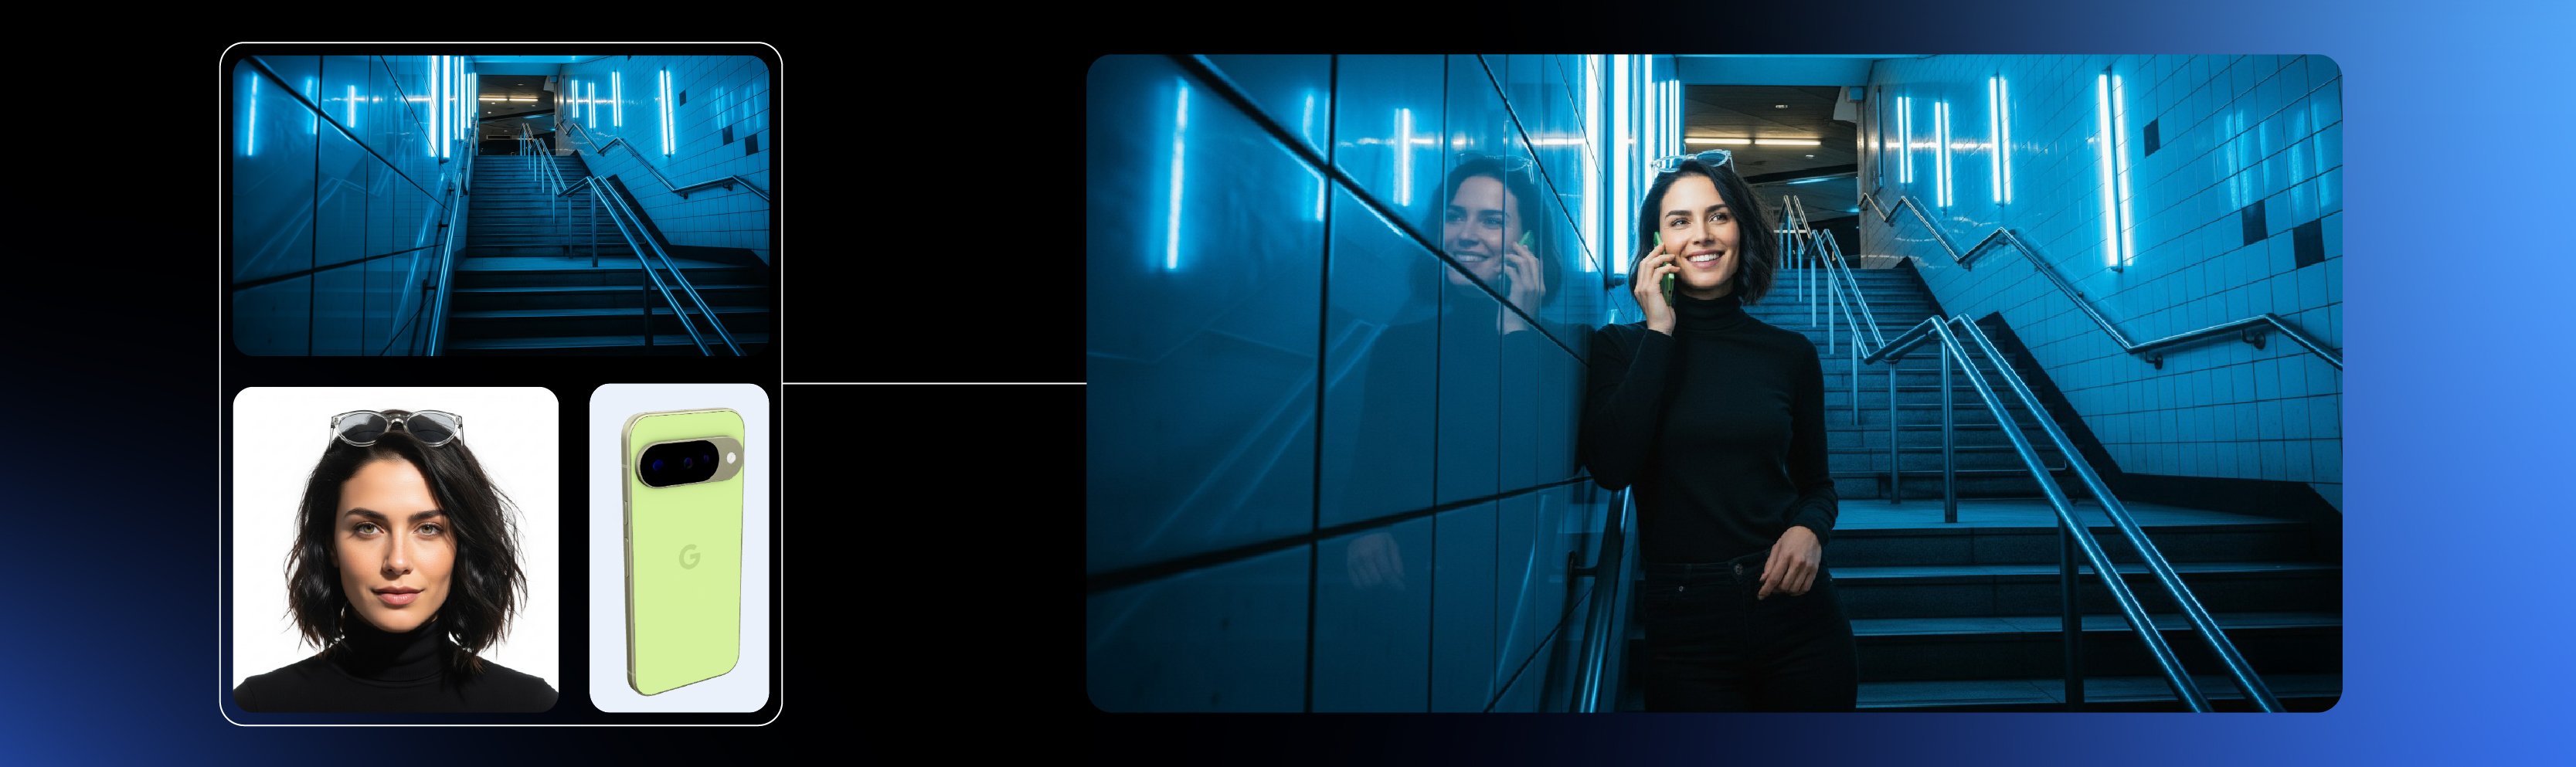
2. Blend Photos Together
What it does: Combine multiple separate photos into one cohesive scene, perfectly matching lighting, shadows, and perspective.
Advanced Nano Banana Tutorial: Create the Perfect Group Photo That Never Happened
Ever wanted a photo with your pet, but they never cooperate during photoshoots? Or need a family photo when everyone’s in different locations? This nano banana tutorial technique for photo blending becomes invaluable.
Step 1: Prepare Your Source Images
- Image A: Your photo (clear, good lighting)
- Image B: Your pet’s photo (or family member, friend, etc.)
- Context: Decide on your dream location (basketball court, beach, cozy living room)
Step 2: Upload Multiple Images In the Gemini interface, you can upload multiple photos simultaneously. The order matters - upload your primary subject first, then additional elements.
Step 3: Craft Your Blending Prompt Google’s official example: “Create a portrait of me and my dog on the basketball court”
More advanced prompts:
- “Blend these photos to show me and my grandmother baking cookies in a rustic kitchen”
- “Combine these images so we’re all sitting around a campfire at sunset”
- “Place me and my cat in this mountain landscape, both looking at the view”
Step 4: Master the Technical Details Nano Banana automatically handles complex technical aspects:
- Lighting Matching: Adjusts shadows and highlights so all subjects appear lit by the same light source
- Perspective Correction: Ensures all subjects appear at the correct scale and angle
- Color Harmonization: Balances color temperature across all elements
- Depth of Field: Creates natural blur relationships between foreground and background elements
Pro Tips for Seamless Blending:
- Choose source photos with similar lighting conditions
- Add “matching the lighting and shadows naturally” to your prompt
- Specify the relationship: “standing next to each other” vs. “with my arm around”
- Use reference points: “both looking at the camera” or “both facing the sunset”
3. Multi-Turn Editing
What it does: Build and refine images progressively, making multiple edits while preserving previous changes.
Step-by-Step Nano Banana Tutorial: Design Your Dream Room from Scratch
Multi-turn editing, as covered in this nano banana tutorial, is perfect for interior design, product mockups, or any scenario where you want to build complexity gradually.
Step 1: Start with Your Base Begin with either:
- An empty room photo
- A basic room that needs renovation
- A completely AI-generated starting point
Initial prompt: “Show me a bright, empty modern living room with large windows”
Step 2: Add Elements Progressively
Turn 1 - Paint the Walls: “Paint the back wall a deep navy blue, keep everything else the same”
Turn 2 - Add Major Furniture: “Add a large, comfortable gray sectional sofa facing the window”
Turn 3 - Include Storage: “Add built-in white bookshelves along the navy wall, filled with books and decorative objects”
Turn 4 - Final Touches: “Add a glass coffee table with a few design books and a small plant”
Step 3: Maintain Consistency Across Turns The key to successful multi-turn editing:
- Always reference previous elements: “keeping the navy wall and gray sofa”
- Use specific positioning: “to the right of the sofa” or “above the fireplace”
- Maintain lighting consistency: “with the same warm lighting throughout”
- Preserve the perspective: “from the same camera angle”
When to Start Fresh vs. Continue:
- Continue when adding complementary elements
- Start fresh if results become inconsistent or cluttered
- Hybrid approach: Save your best intermediate result and continue from there
Pro Tips for Multi-Turn Success:
- Plan your sequence: structural changes first, details last
- Save intermediate results you love
- Use “preserve everything except…” for targeted changes
- If consistency breaks, go back one step and try a different approach
4. Design Mixing
What it does: Apply the visual style, patterns, or textures from one image to objects in another, creating unique design combinations.
Creative Nano Banana Tutorial: Create Fashion Inspired by Nature
Design mixing opens up incredible creative possibilities. Let’s explore how to apply natural patterns to fashion items.
Step 1: Choose Your Style Source Select images with distinctive visual elements:
- Butterfly wings for iridescent, colorful patterns
- Flower petals for soft, organic textures
- Tree bark for rugged, natural textures
- Ocean waves for fluid, dynamic patterns
Step 2: Select Your Target Object Pick items that would benefit from pattern application:
- Clothing (dresses, jackets, shoes)
- Accessories (handbags, jewelry)
- Home decor (pillows, curtains, pottery)
Step 3: Craft Your Design Mixing Prompt
Google’s official examples:
- “Take the color and texture of these flower petals and apply it to these rainboots”
- “Design a dress using the pattern from these butterfly wings”
Advanced prompts:
- “Apply the iridescent shimmer from these soap bubbles to this evening gown”
- “Use the texture and colors from this sunset sky on this leather handbag”
- “Transform these plain white sneakers with the pattern from this peacock feather”
Step 4: Understanding the Process Nano Banana analyzes:
- Color palette from the source
- Pattern repetition and flow
- Texture qualities (smooth, rough, metallic, matte)
- Visual rhythm and movement
Then applies these elements while:
- Maintaining object structure (a dress stays dress-shaped)
- Adapting to surface curvature (patterns wrap naturally around 3D forms)
- Preserving functionality (zippers, buttons, seams remain logical)
Advanced Design Mixing Applications:
Product Customization: “Apply the marble pattern from this kitchen countertop to this phone case”
Seasonal Variations: “Give this summer dress the colors and feeling of autumn leaves”
Brand Style Transfer: “Apply the aesthetic from this vintage poster to this modern logo design”
Pro Tips for Design Mixing:
- Choose high-contrast source images for clearer pattern transfer
- Specify the intensity: “subtle hint of” vs. “bold application of”
- Consider material compatibility: “as if printed on silk” vs. “as if embossed in leather”
- Add context: “for a high-fashion runway look” vs. “for everyday wear”
[Image 4: Design Mixing Showcase] Grid layout showing 8 before/after pairs: butterfly wings → evening dress, ocean waves → sneakers, flower petals → handbag, tree bark → phone case, peacock feather → scarf, sunset clouds → furniture, marble texture → jewelry, leaf veins → architectural elements.
Advanced Nano Banana Tutorial Techniques and Pro Tips
Writing Powerful Prompts
The difference between amateur and professional results often comes down to prompt quality in any nano banana tutorial. Here are the techniques that separate experts from beginners:
Specificity Wins: ❌ “Make it look better” ✅ “Add warm golden hour lighting with soft shadows”
Layer Your Instructions:
- Primary action: “Change the background to a forest”
- Style specification: “Make it a misty, ethereal forest”
- Technical details: “With dappled sunlight filtering through trees”
- Consistency note: “Keep my outfit and pose exactly the same”
Use Professional Terminology:
- Lighting: “rim lighting”, “soft key light”, “dramatic shadows” (learn more about lighting techniques)
- Photography: “shallow depth of field”, “wide angle perspective”, “macro detail” (reference: Digital Photography School)
- Design: “minimalist aesthetic”, “vintage color grading”, “high contrast” (explore design principles)
Character Consistency Secrets: Expert Nano Banana Tutorial Tips
As you’ll learn in this nano banana tutorial, Nano Banana excels at maintaining character likeness, but you can optimize results:
Upload Quality Guidelines:
- Use well-lit, high-resolution images
- Ensure faces are clearly visible and unobstructed
- Choose photos where the subject is the primary focus
Prompt Reinforcements:
- “Maintaining exact facial features”
- “Keeping the same person’s appearance”
- “Preserving identity completely”
Lighting and Shadow Mastery: Professional Nano Banana Tutorial Techniques
Professional-quality edits require attention to lighting consistency:
Natural Light Scenarios:
- “Golden hour sunlight from the left”
- “Overcast day with soft, even lighting”
- “Bright noon sun creating sharp shadows”
Artificial Light Setups:
- “Studio lighting with key light and fill”
- “Warm indoor lighting from table lamps”
- “Neon city lights reflecting on wet pavement”
Shadow Considerations:
- “Cast shadows that match the environment”
- “Soft shadows consistent with cloudy conditions”
- “No shadows for a studio backdrop effect”
Quality Optimization Techniques
Resolution and Detail:
- Request “high detail” or “photorealistic quality”
- Specify important elements: “sharp focus on faces”
- Avoid over-processing: “natural skin texture” vs. overly smooth results
Color and Tone:
- “Natural color grading”
- “Warm/cool color temperature”
- “High dynamic range” for better contrast
Common Mistakes to Avoid:
- Overcomplicating Prompts: Keep instructions clear and focused
- Ignoring Lighting Logic: Make sure your lighting requests make sense together
- Rushing the Process: Take time to refine and improve results
- Using Vague Language: Be specific about what you want to see
- Mixing Incompatible Styles: Keep your aesthetic choices consistent
[Image 5: Prompt Writing Cheat Sheet] Infographic-style guide with two columns: ”✅ Good Prompts” vs ”❌ Poor Prompts”. Include specific examples like “Add warm golden hour lighting” vs “Make it look better”, plus visual examples of the different results each type produces.
Troubleshooting Common Issues: Nano Banana Tutorial Problem-Solving Guide
Even with perfect prompts learned from this nano banana tutorial, you might encounter challenges. Here’s how to overcome them:
Failed Edits and Retry Strategies
Problem: Edit doesn’t match your expectation Solution:
- Try the same prompt 2-3 times (AI generation has randomness)
- Add more specific details to your prompt
- Break complex requests into simpler steps
Problem: Character consistency breaks Solution:
- Use higher resolution source images
- Add “maintaining exact appearance” to prompts
- Try uploading the image again for a fresh start
Prompt Refinement Techniques
Start General, Get Specific:
- First attempt: “Change the background”
- Refined: “Change to a forest background”
- Final: “Change to a misty pine forest with dappled sunlight”
Quality Issues Solutions:
- Blurry results: Add “sharp focus” or “high detail”
- Unnatural colors: Specify “natural color palette”
- Distorted features: Use “photorealistic” and “anatomically correct”
When Results Don’t Match Expectations
The Iteration Approach:
- Identify what worked vs. what didn’t
- Adjust one element at a time
- Build on partial successes
- Save intermediate results you like
Alternative Angles:
- Try describing the scene differently
- Upload a different source image
- Use multi-turn editing to build gradually
Conclusion and Next Steps
You’ve now learned Google’s four core Nano Banana techniques through this comprehensive nano banana tutorial and discovered real-world business applications. These capabilities represent the cutting edge of AI-powered image editing.
Key Takeaways:
- Simple language is your most powerful tool - describe what you want clearly
- Practice makes perfect - don’t expect amazing results on the first try
- Character consistency is Nano Banana’s strongest feature
- Business applications are virtually unlimited across industries
Your Next Steps:
- Start experimenting with your own photos today
- Try combining techniques for unique creative results
- Read our companion article “What is Nano Banana” for technical background
- Join communities like r/ArtificialIntelligence or AI Twitter to share your results
- Stay updated with Google’s AI blog for the latest developments
The future of image editing is here - conversational, intuitive, and incredibly powerful. As MIT Technology Review predicts, AI tools like Nano Banana are reshaping creative industries. With this technology, you can bring any visual idea to life with just words.
Ready to get started? Open Gemini, upload your first image, and let your creativity run wild. For additional inspiration, check out the Google AI showcase featuring amazing creations from the community.