Image via Wildlight Entertainment
Secure Boot is easy to turn on if you know the right steps.
|
Published FR: Jan 26, 2026 04:11 pm
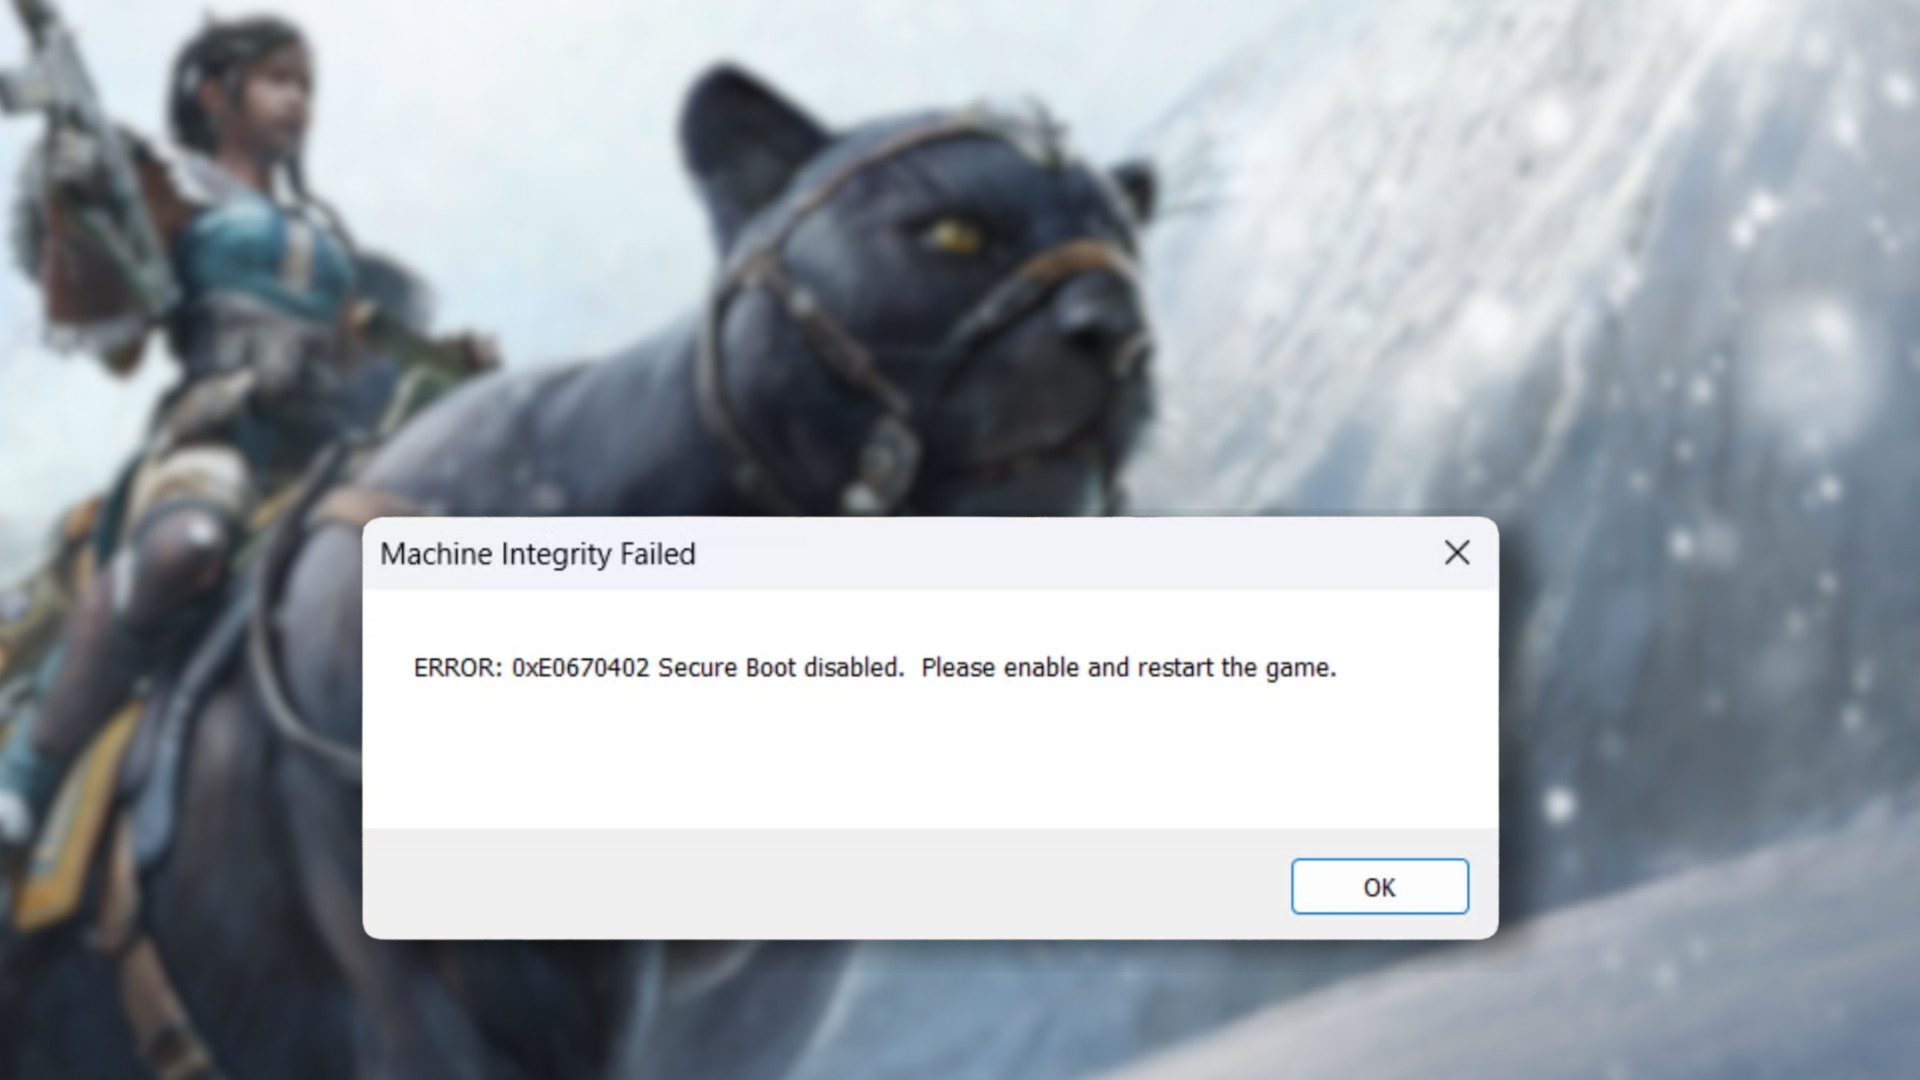
Secure boot has become a mainstay in competitive gaming as an underlying technology for nearly every anti-cheat. Highguard, the new PvP Raid Shooter by the team behind Apex Legends and Titanfall 2, follows this trend. The game mandates both Secure Boot and TPM 2.0 to be enabled before players can hop in for their first match. So here’s how you can turn on Secure Boot for Highguard.
How to check if Secure Boot is already enabled?
Before you start changing your BIOS settings, it’s a good idea to check if Secure Boot is already enabled on your machine to begin with. Most default installations of Windows 11 will usually have this turned on, and there’s a simple method to check it.
Steps to check if Secure Boot is turned on:
- Open the start menu
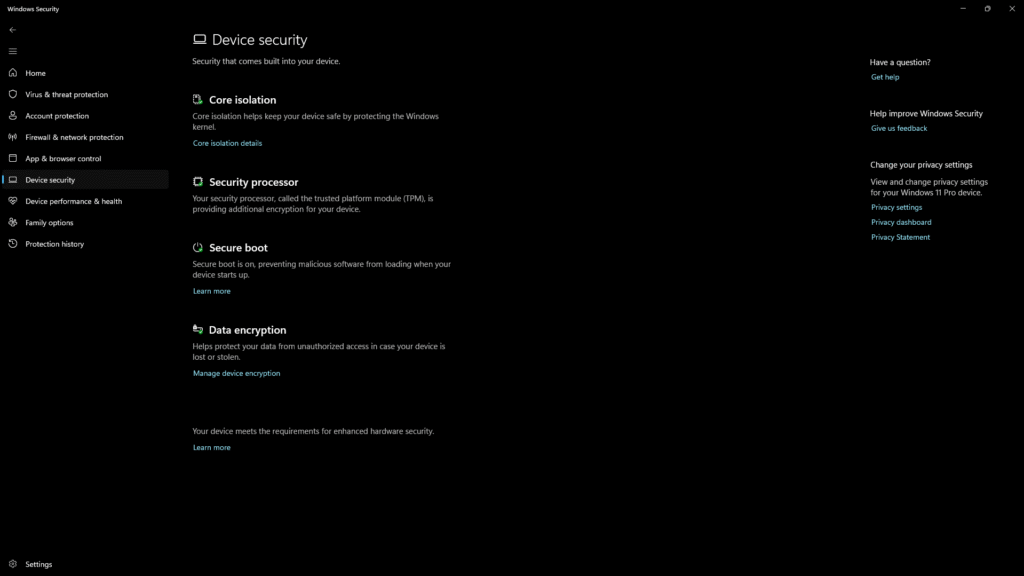
- Search for, and launch Windows Security
- From the Security at a glance screen, click on Device Security
Under this menu, you should see the Secure Boot option. If the icon has a green checkmark next to it, and says “Secure boot is on” under the heading, then you’re all set. Simply launch Highguard without worrying about secure boot.
Related—Highguard system requirements: Minimum and recommended PC specs
How to enable Secure Boot for Highguard?
To enable secure boot, first you have to enter your BIOS. If you’ve never done this step before, don’t worry! The BIOS is just a simple menu that helps you set your PC up exactly as needed. To launch the BIOS menu:
- Turn your PC off
- Click the power button on your PC to turn it back on
- As the PC starts to turn on, repeatedly press either the Delete key or the F2 key on your keyboard (it can vary based on your motherboard manufacturer)
- Once in the BIOS, change the Secure Boot setting to enabled.
If you’re unable to open the BIOS via this method, check your motherboard’s manual or support page to find out the exact process for your particular board. From there you can open the menu featuring the secure boot settings and turn it on. It will usually be under Security or Boot settings.
How to fix “Secure Boot can’t be enabled” error
In some occasions, your BIOS may prompt you with an error message like “Secure Boot can be enabled when the system is in user mode. Repeat operation after enrolling Platform Key”. While Platform keys sound complicated on the surface, they too are just a couple clicks away.
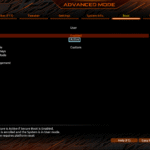
To enroll Platform Keys for Secure Boot follow these steps:
- Open the Secure Boot menu again
- Under Secure Boot mode, select Custom
- Click Enroll all Factory Default Keys.
- Save and Exit from the BIOS (your PC may prompt you to do so automatically too.)
After this, repeats the steps above to enable Secure Boot and you’ll be good to go. So boot up your PC again, and hop into your first Highguard match with no Secure Boot errors!
Dot Esports is supported by our audience. When you purchase through links on our site, we may earn a small affiliate commission. Learn more about our Affiliate Policy