After handing in my MacBook Pro at the end of my last job, I needed a new setup to code on. I had an old Lenovo IdeaPad that I had repurposed as a home server. I also had an HP Chromebook 11 that I hadn’t used much in a while.
I spent a bit of time trying to make the Lenovo usable as a “desktop” again, but I found it was too much work to configure an environment minimal enough for my tastes. Instead, I slid it back on the shelf and started exploring other options. What I’ve settled on for now is a stack of OpenVPN, SSH and tmux.
Chrome Secure Shell
The built-in crosh shell of Chrome OS includes an SSH client, but it is very tedious to make connections with, since it requires entering the user, host, and SSH key every time.
Luckily, there is a Chrome app named Secure Shell, which exposes a much nicer interface. It saves connection information and remembers your SSH keys, although you still have to generate them beforehand. It is still in beta, but the only thing that seems to be missing is a more usable settings page.
Generating Keys
Generating SSH keys for Secure Shell works much the same way as usual:
ssh-keygen -t rsa -C 'comment' -f chromebook.id_rsa
This will write the private key
to chromebook.id_rsa
and the public key
to chromebook.id_rsa.pub.
I then served these files over local HTTP and downloaded them on my Chromebook. They can then be imported from the Secure Shell connection dialog.
Colours
Secure Shell works great,
but the default colour scheme
isn’t exactly pretty to look at.
Since there isn’t much of a settings interface,
you have to enter a JSON object
in the color-pallete-overrides field.
I based mine on the Gruvbox Generalized
XResources file:
{
  "0": "#282828", "8":  "#928374",
  "1": "#cc241d", "9":  "#fb4934",
  "2": "#98971a", "10": "#b8bb26",
  "3": "#d79921", "11": "#fadb2f",
  "4": "#458588", "12": "#83a598",
  "5": "#b16286", "13": "#d3869b",
  "6": "#689d6a", "14": "#8ec07c",
  "7": "#a89984", "15": "#ebdbb2"
}
I also set background-color to #1d2021 (hard contrast),
and foreground-color and cursor-color both to #ebdbb2.
Dynamic DNS
In order to easily access my home server from anywhere, I need a domain pointing to my home connection. The Arch Wiki lists many options for Dynamic DNS. I use CloudFlare for my domains, so I use wimpunk’s ddclient fork (AUR), which has support for CloudFlare and other services.
The relevant part of
my ddclient configuration (/etc/ddclient/ddclient.conf)
looks like this:
protocol=cloudflare, \
zone=cmcenroe.me, \
server=www.cloudflare.com, \
login=redacted, \
password=redacted, \
home.cmcenroe.me
Note that it was necessary
to manually create an A record
for home.cmcenroe.me before
ddclient could update it.
On Arch,
it is then as simple as
enabling and starting ddclient
I found a guide
for creating .onc files
for OpenVPN connections,
which covers creation pretty well.
with systemd:
sudo systemctl enable ddclient
sudo systemctl start ddclient
OpenVPN Server
In order to access my home server securely from anywhere, I decided to set up a VPN using OpenVPN. Arch Wiki has an excellent page page on OpenVPN, with thorough setup instructions.
I did, however,
run into one problem
with the server configuration.
When connecting to the VPN
from my Chromebook
on another wifi connection,
the DNS configuration would break.
I fixed this by having the server
send DNS configuration to the client explicitly,
using this option in /etc/openvpn/server.conf:
push "dhcp-option DNS 8.8.8.8"
Chrome OS & OpenVPN
Although the Chrome OS “Private Network” interface
in Settings supports OpenVPN,
it does not support using
an HMAC secret key (ta.key),
which greatly enhances security.
There is also a misinterpretation of the OpenVPN protocol on the part of Chrome OS, which causes breakage when not tunneling all traffic through the VPN. A flag needs to be used, which is not available from the interface, to prevent this behaviour.
As an alternative to the interface,
Chrome OS supports “Open Network Config” files (.onc)
in JSON format,
which can be imported
through chrome://net-internals/#chromeos.
I found a guide
for importing certificates
and creating and importing .onc files
for OpenVPN.
I would suggest
using the uuidgen command line utility
(from util-linux)
to generate UUIDs.
The other,
more important change,
is the addition
of the IgnoreDefaultRoute flag.
This prevents the buggy behaviour
mentioned above.
In the end, my home.onc file ended up looking like this:
{
  "Type": "UnencryptedConfiguration",
  "Certificates": [
    {
      "GUID": "{0fac9c63-a364-407a-b680-5525b19437ab}",
      "Type": "Authority",
      "X509": "redacted"
    }
  ],
  "NetworkConfigurations": [
    {
      "GUID": "{c3be34ff-94f5-43cb-bc42-99d19a0ae307}",
      "Name": "Home",
      "Type": "VPN",
      "VPN": {
        "Type": "OpenVPN",
        "Host": "home.cmcenroe.me",
        "OpenVPN": {
          "ServerCARef": "{0fac9c63-a364-407a-b680-5525b19437ab}",
          "AuthRetry": "interact",
          "ClientCertType": "Pattern",
          "ClientCertPattern": {
            "IssuerCARef": ["{0fac9c63-a364-407a-b680-5525b19437ab}"]
          },
          "CompLZO": true,
          "Port": 1194,
          "Proto": "udp",
          "RemoteCertTLS": "server",
          "RemoteCertEKU": "TLS Web Server Authentication",
          "SaveCredentials": true,
          "ServerPollTimeout": 10,
          "Username": "june",
          "KeyDirection": 1,
          "IgnoreDefaultRoute": true,
          "TLSAuthContents": "redacted"
        }
      }
    }
  ]
}
After importing this .onc file,
I could select the “Home” private connection
from the interface.
When prompted,
I entered a fake password
and checked “Save identity and password”.
To check that I was properly connected,
I used Secure Shell
to SSH to 10.8.0.1.
I also made sure I could connect
to everything else
as normal.
tmux
I had never used tmux before, but it quickly became clear that it is an invaluable tool when doing work over SSH. I created a configuration that very closely mimics VIM window management, which can be found in my dotfiles repository.
I also wrote some shell functions for quickly getting into tmux:
tn() { [ -n "$1" ] && tmux new -s "$1" || tmux new }
ta() { [ -n "$1" ] && tmux attach -t "$1" || tmux attach }
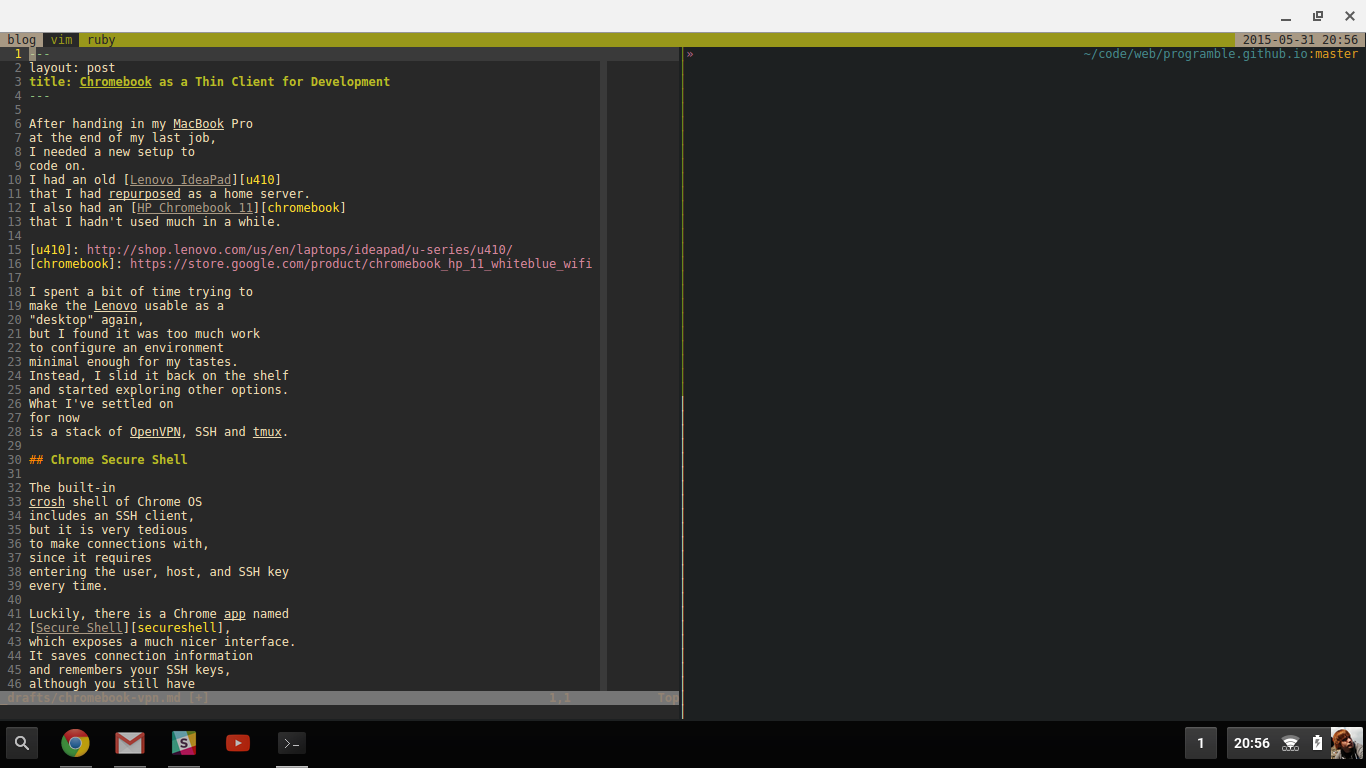
End Result
Here is me editing this post on my Chromebook, with OpenVPN, SSH, tmux, VIM and zsh:
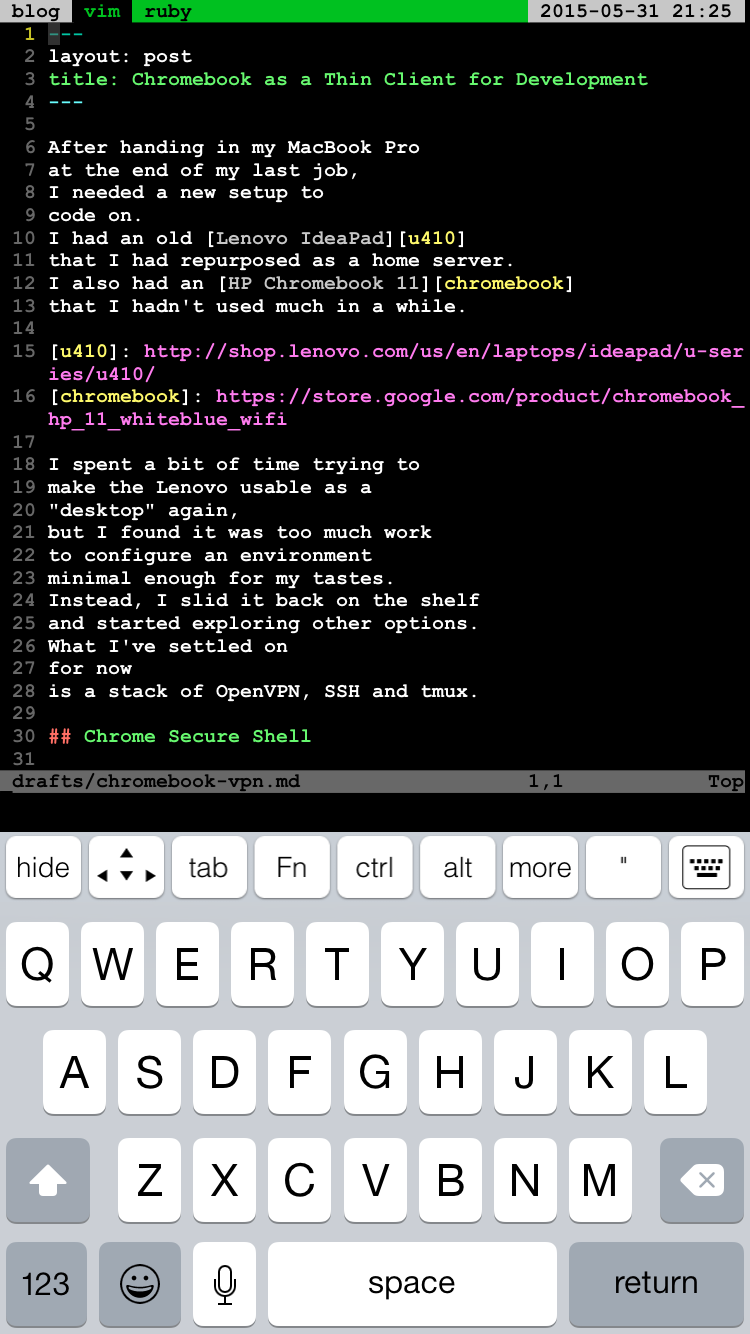
Bonus: OpenVPN & iPhone
I also wanted to be able to SSH into my home server from my phone if I ever needed to. I use the ServerAuditor SSH client on iOS. It can generate its own keys and export them.
For VPN, there is the OpenVPN Connect app.
This app uses .ovpn files
for client configuration.
These files are just regular OpenVPN .conf files
with a different extension.
The only complicated part
of creating one is
adding the certificates and keys inline,
using HTML-like tags.
After generating a new certificate for my phone,
my .ovpn file looked like this:
client
dev tun
proto udp
remote home.cmcenroe.me 1194
resolv-retry infinite
nobind
persist-key
persist-tun

<ca>
-----BEGIN CERTIFICATE-----
redacted
-----END PRIVATE KEY-----
</ca>

<key>
-----BEGIN CERTIFICATE-----
redacted
-----END PRIVATE KEY-----
</key>

remote-cert-tls server

key-direction 1
<tls-auth>
-----BEGIN OpenVPN Static key V1-----
redacted
-----END OpenVPN Static key V1-----
</tls-auth>

comp-lzo
I then imported the .ovpn
by emailing it to myself
and opening it in OpenVPN Connect
from the Mail app.
This is what the end result looks like on iPhone: