Cliparr 2.0 is here after three months.
Don’t worry, this is not a full rewrite of Cliparr. This is just technically version 2.0 because I implement semantic versioning.
Version 2.0, does however come with significant improvements, new additions, and optimizations.
The New Canvas Timeline
When I first started adding support for loading and editing subtitles, it became clear the previous timeline implementation didn’t scale for larger sessions. When loading subtitles for a full TV episode or movie, the old UI could generate too many DOM nodes and cause stutter on my fairly beefy Mac Studio.
If the problem was DOM performance, the solution was to move timeline rendering to canvas.
So, I created Canvas Timeline: a headless video editor timeline engine and a canvas renderer for high-performance timeline interactions. It is open source and now available to everyone.
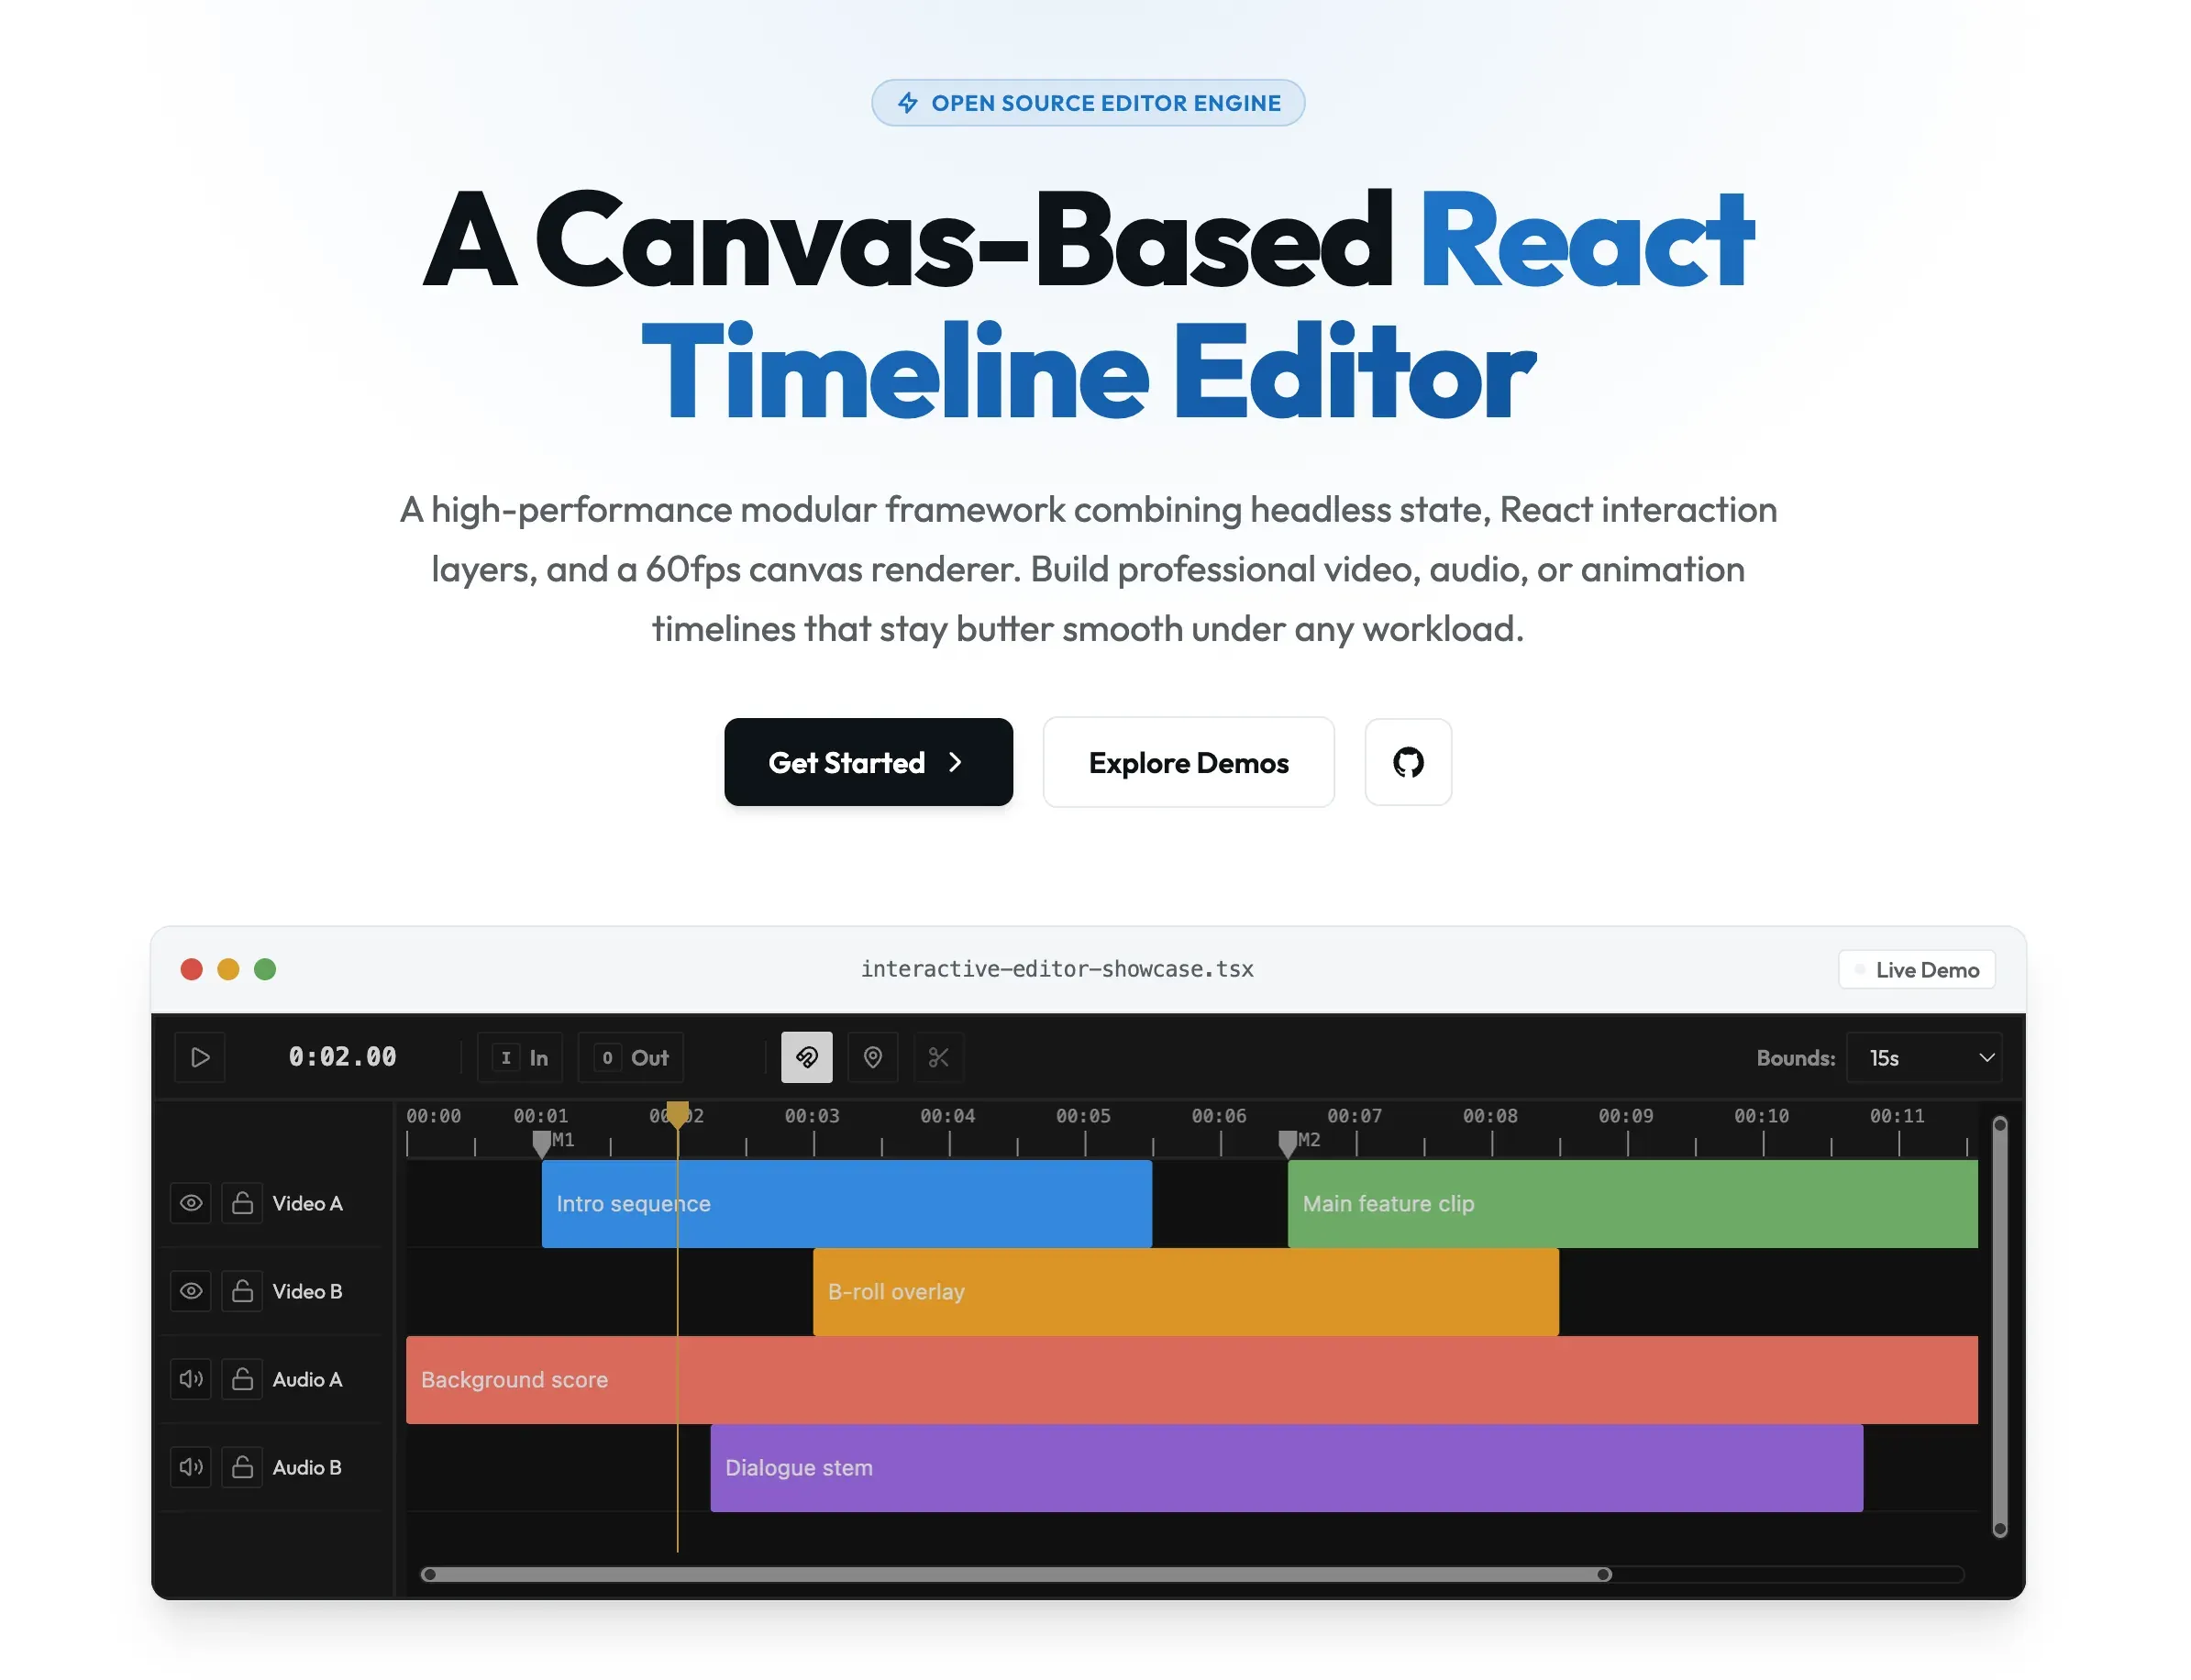
At this point, Canvas Timeline is a significantly larger project than Cliparr and has yet to reach the same level of adoption within the developer community. Still, the relationship between these two projects will drive improvements in both and deliver a better experience for developers and users alike.
Stress test benchmark
To continuously evaluate performance and validate this approach, one of the first tests I ran was a simulated stress test that mirrored the exact problems I saw with the old solution. You can run it yourself on the demo page Timeline Stress Test & Benchmark.
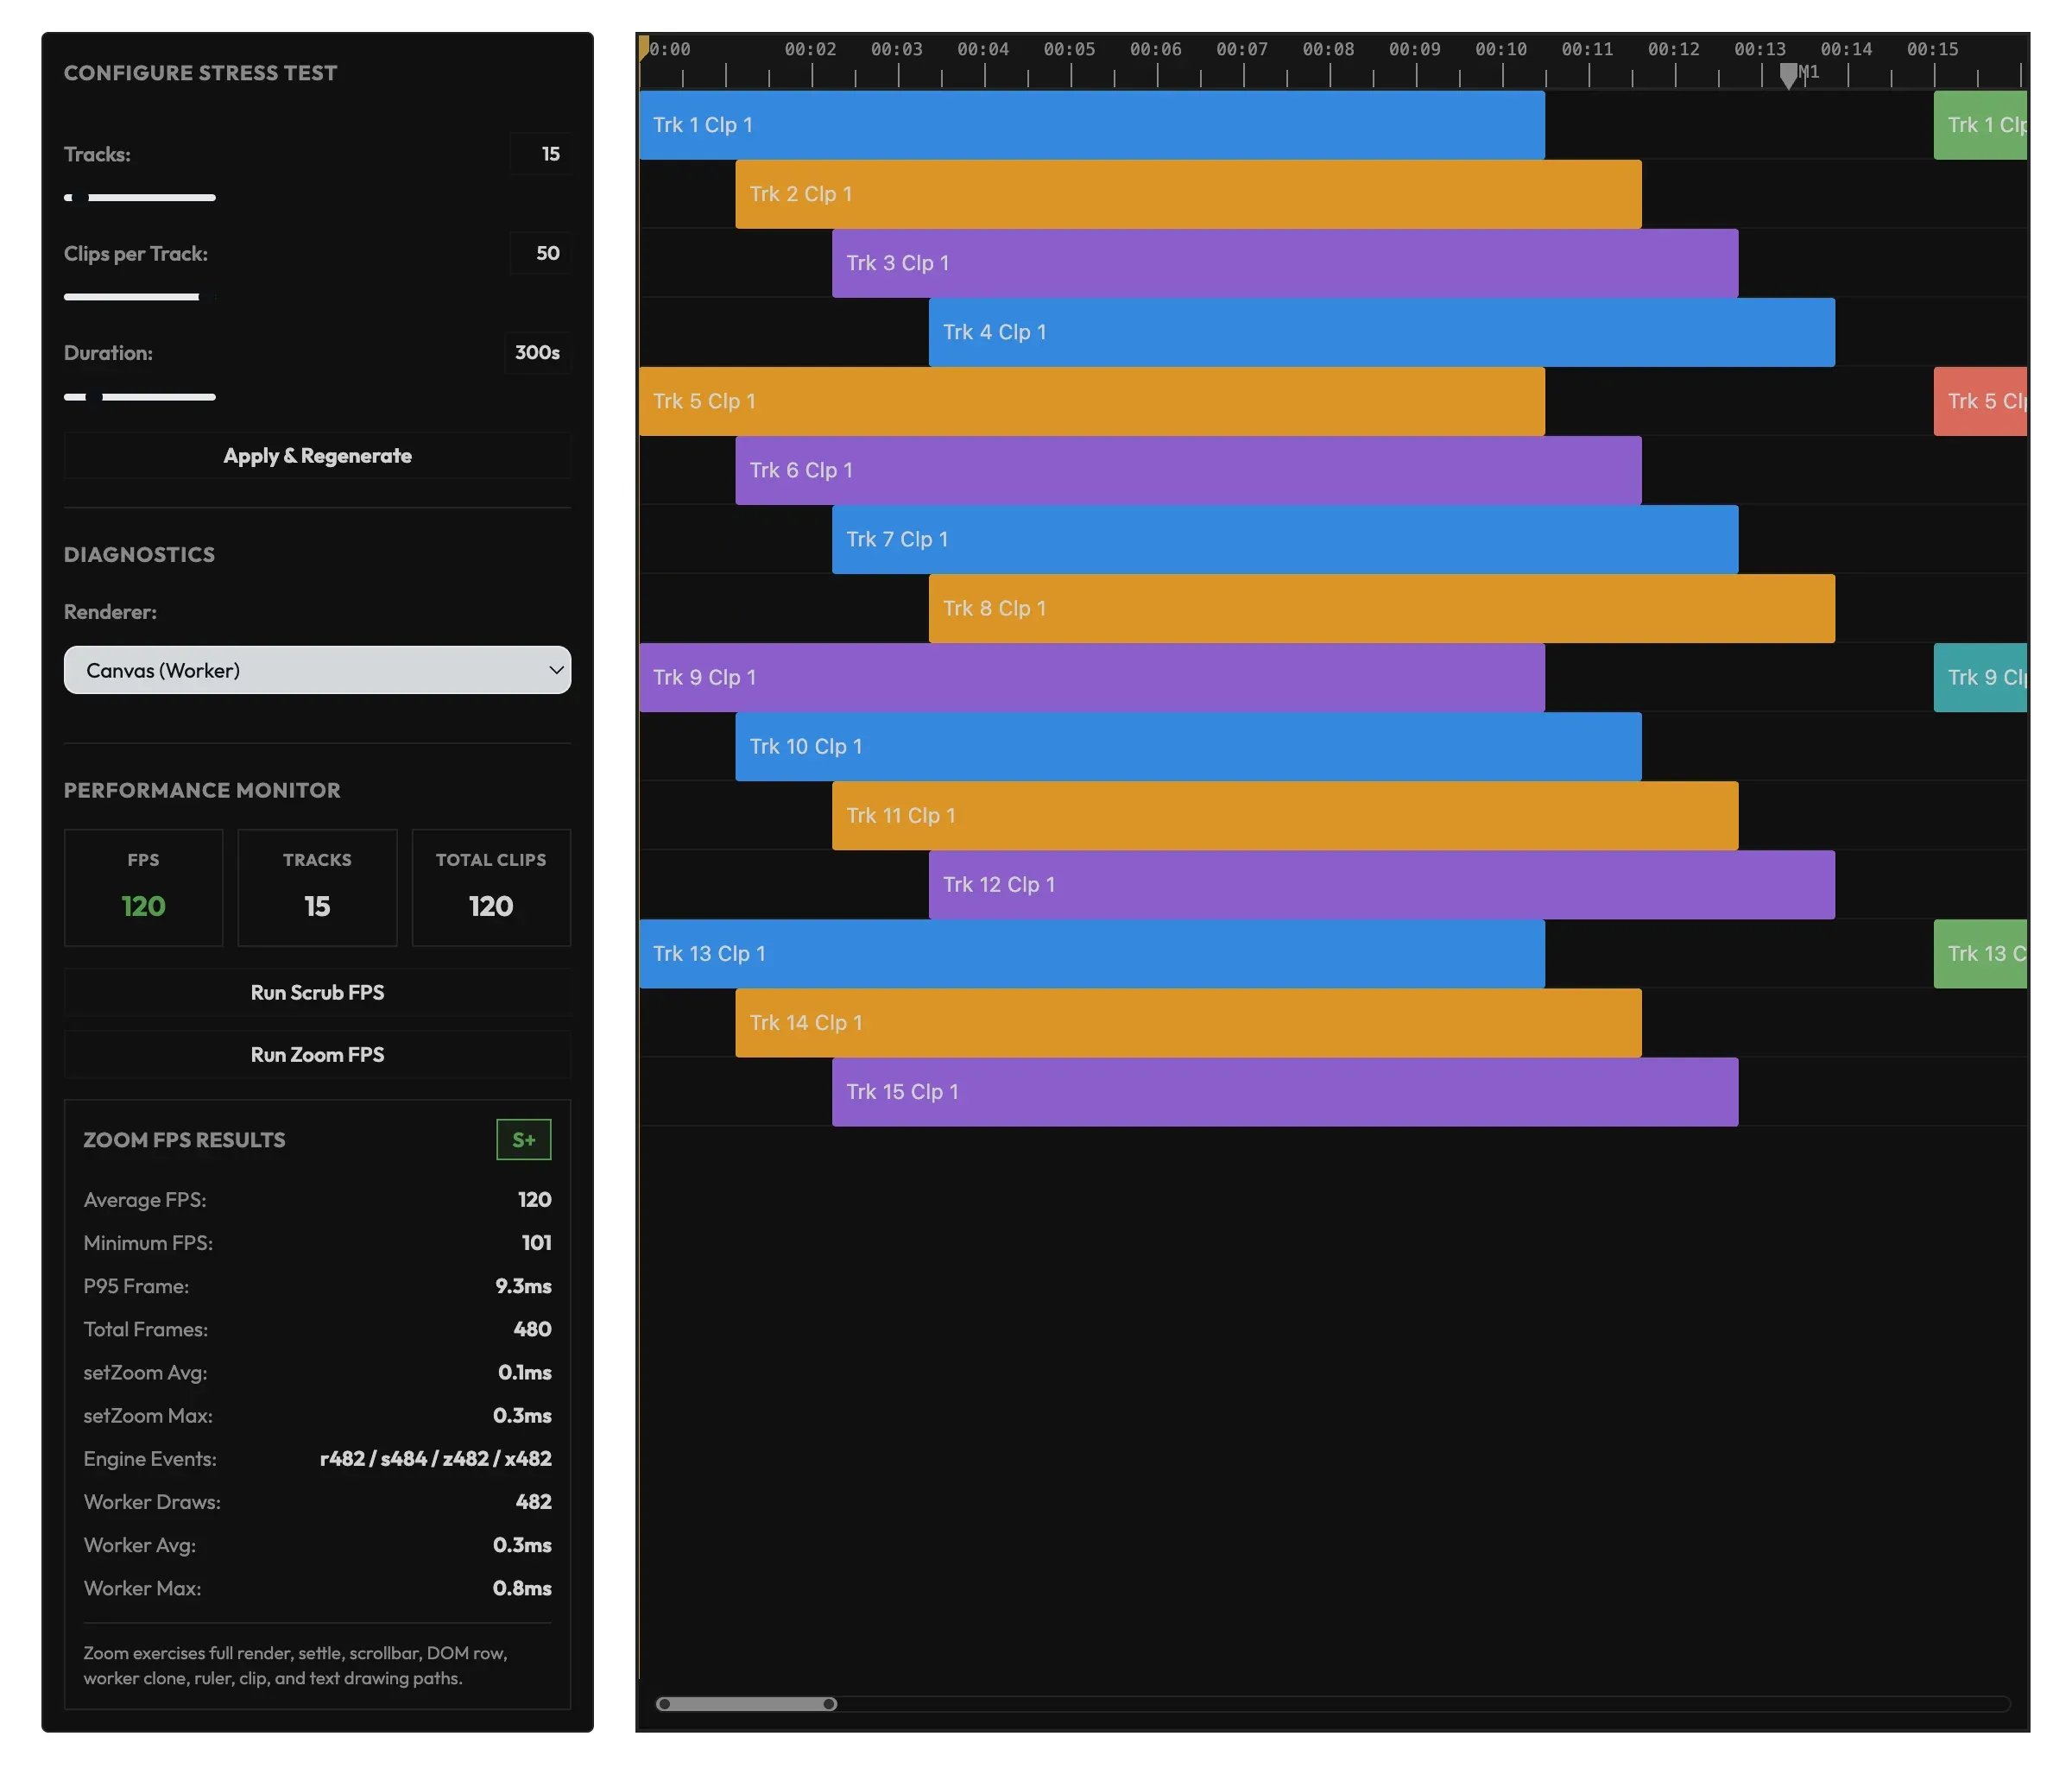
Because the timeline is headless, we can compare both a canvas and a DOM-based implementation.
At first there were clear and massive gains in performance when selecting the canvas-based renderer. After many rounds of optimizing and iterating with feedback from this stress test, both rendering systems are now within a comparable range.
The canvas-based renderer still needs some DOM elements, or you just end up essentially recreating the DOM in canvas for things like the interactive bits, tab focusing, accessability, and anything else you get “for free” from the DOM. So, the canvas-based approach was optimized further, including only injecting the currently visible DOM elements into the canvas as needed.
Eventually, because all of the optimization work was happening on the DOM part of the canvas-based renderer, many of the same techniques could be applied to the DOM-based renderer as well, and now as it turns out, both rendering systems perform fairly similarly.
So, regardless of how we render, this timeline editor is more efficient. Canvas still gives us a slight edge, but no matter how we implement it, the result is significantly better.
Subtitles Editor
With the canvas-based editor, subtitle clips are no longer an issue to render in the timeline.
Now, it is fully possible to edit and re-time individual subtitle clips, just as you would the video clip. If you are familiar with any major video editing software, this will feel right at home.
If you’ve used Cliparr before, we already had support for loading subtitles and editing their visuals, including size, position, color, and font. But what we couldn’t do was edit subtitle content or re-time them.
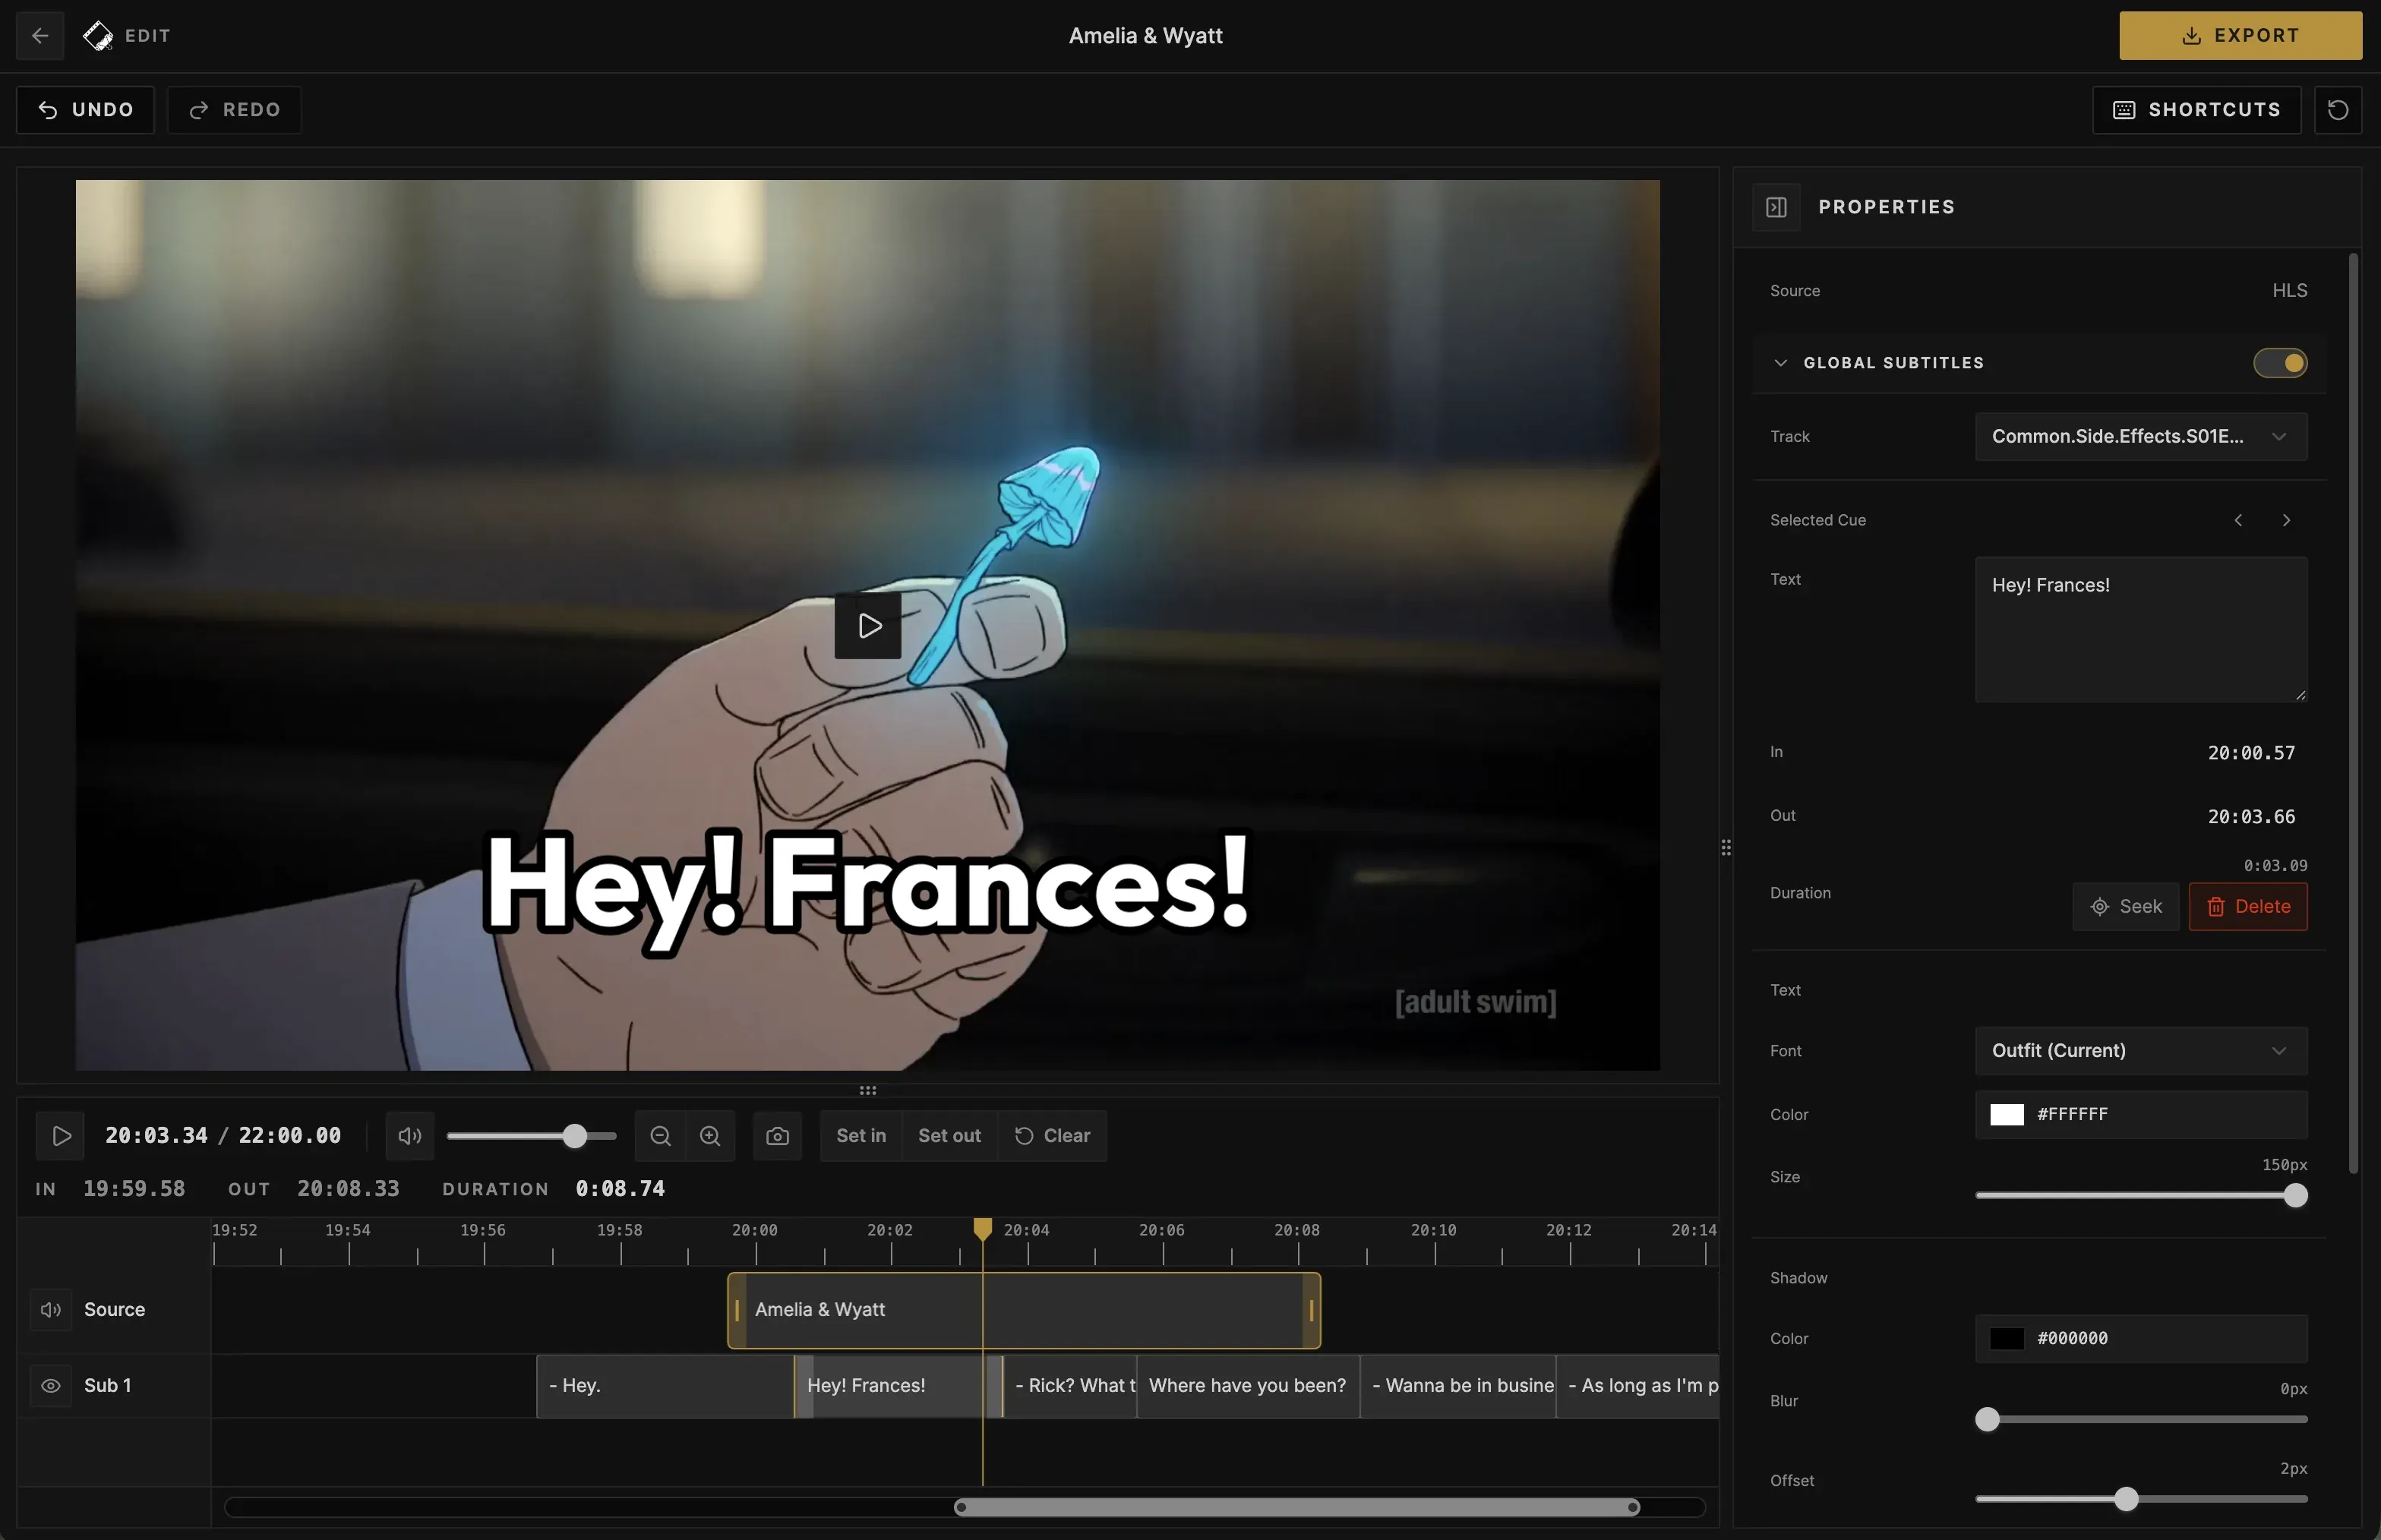
In the next few updates, we’ll add more customization options, like adding new subtitle tracks and clips.
An even better mobile experience
With the release of V2, I spent extra time cleaning up the UI.
The changes are most noticeable on mobile, but the entire app also got a small visual refresh.
We found a way to fit more information on smaller screens without visual issues or sacrificing functionality. There are now a few alternative layouts and components, plus a few horizontal-scrollable sections where necessary. It should feel significantly more like a native app on small screens.
Export size estimation
Cliparr offers the ability to select the resolution and quality you want on export.
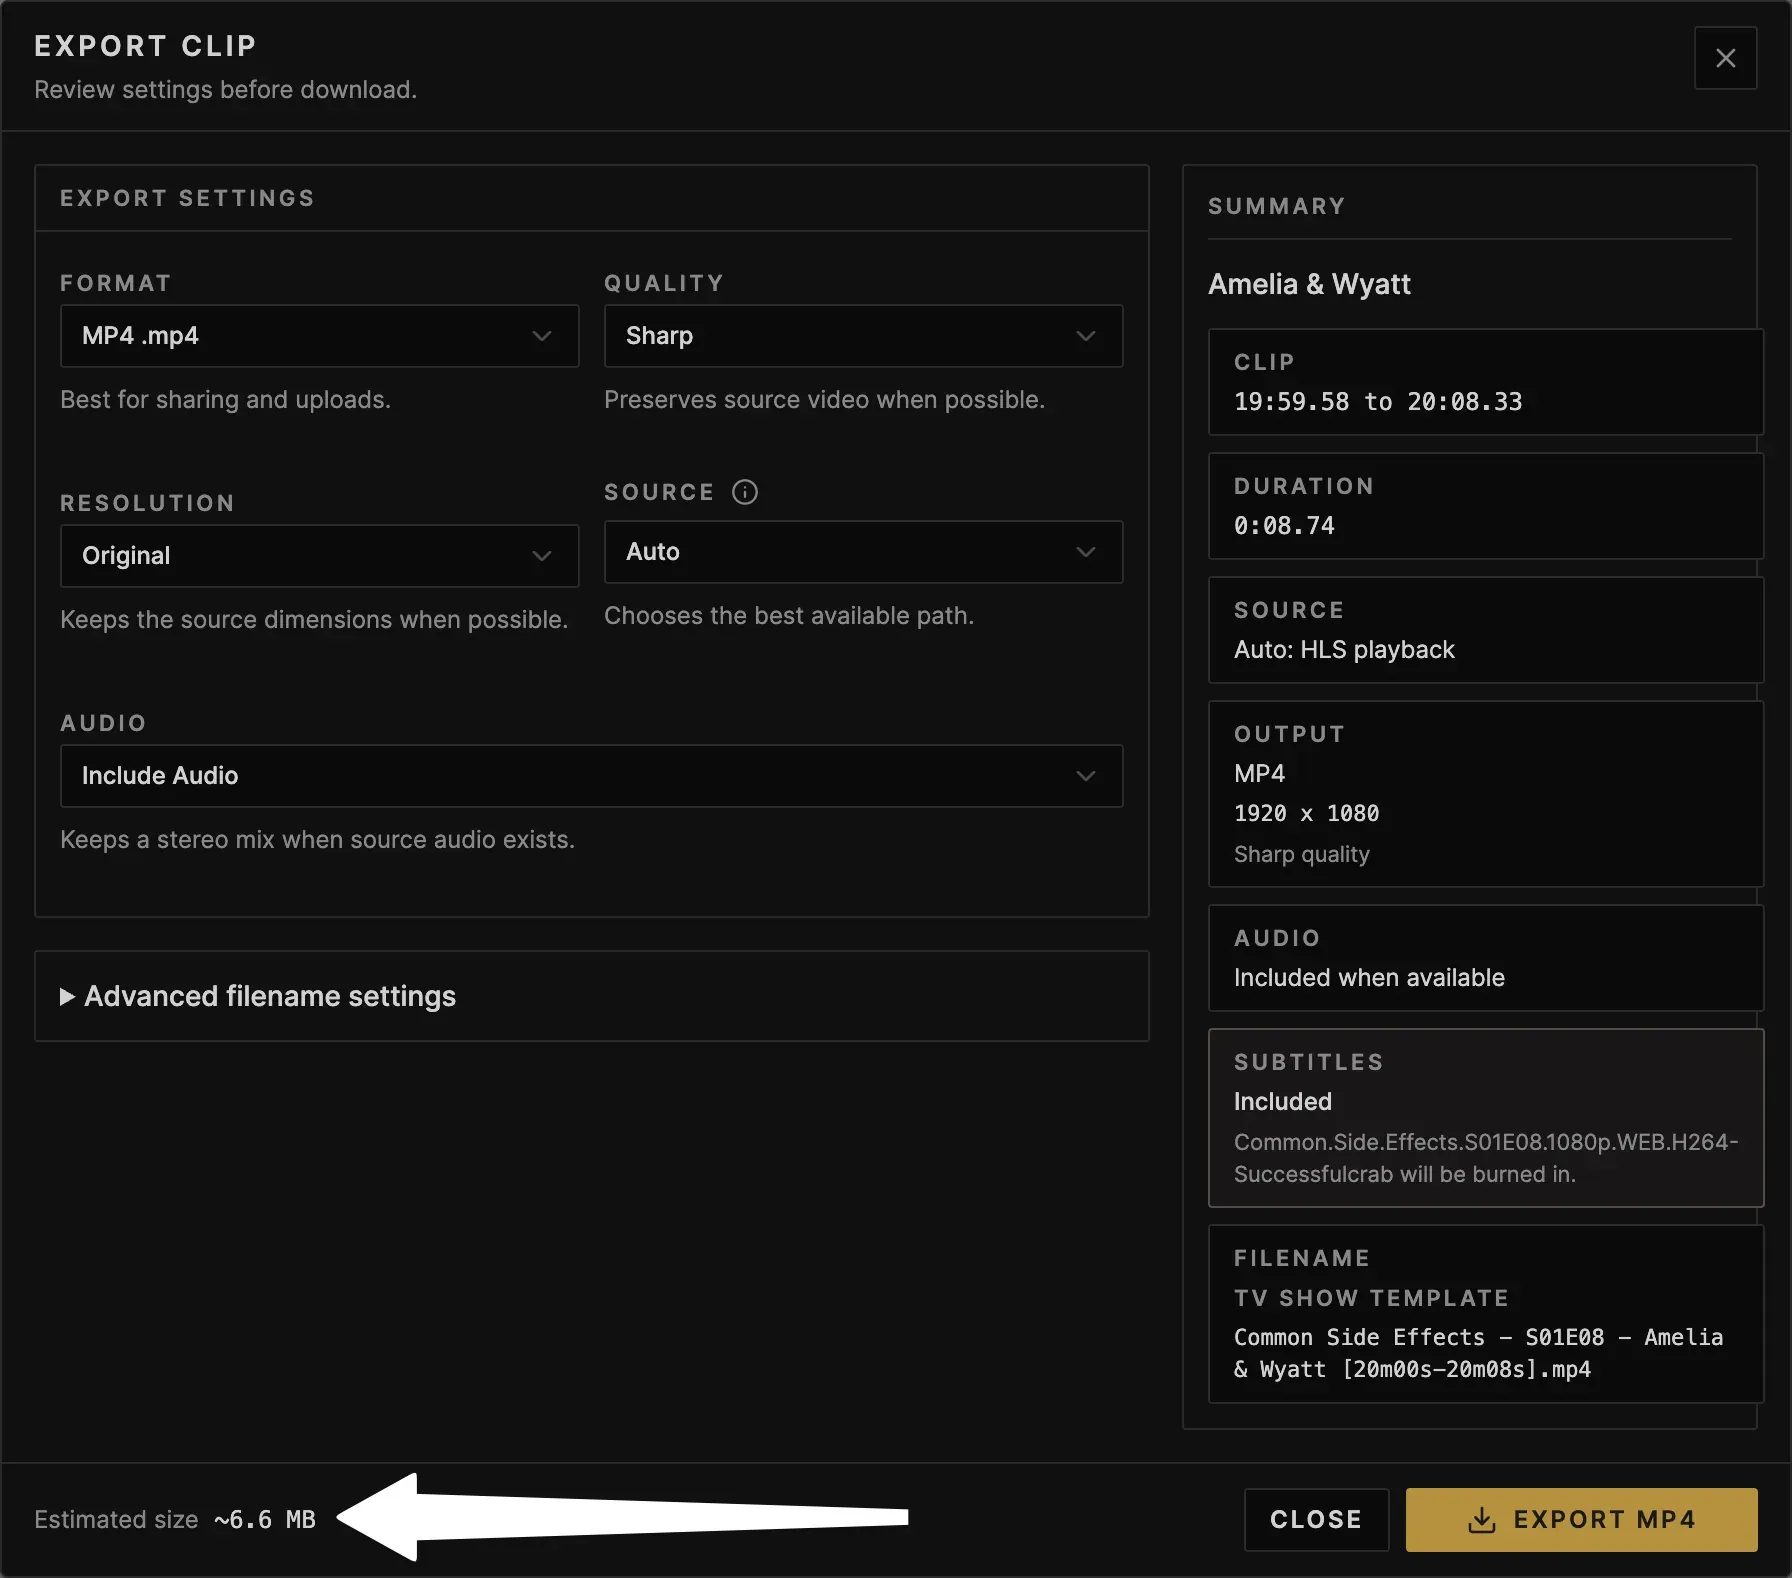
But if you want to upload that video to Discord or Slack, it helps to know what the final file size will be before exporting.
You may have already seen Cliparr Convert, a free web-based video converter you can use right now without uploading anything. Most of the reason for building it—mentioned in our last blog post—is to add size estimation to Cliparr.
What I did was break out the export engine into a separate package that we can use in both Cliparr and Cliparr Convert. The public-facing Cliparr Convert has minimal anonymous metrics reporting that helps improve the accuracy of size estimations in the future and track how well it is working now. The self-hosted app benefits from the same improvements but includes no anonymous reporting.
For full release details, see the Changelog.