When you read about using Raspberry Pi cameras as part of your home security system, most of the information you will find will point you in the direction of running motion which is the de-facto standard for doing video motion detection on Linux. There are also variants of motion such as MotionEye or motionEyeOS which provide a nicer UI on top of motion.
Motion requires some horsepower to handle the video processing to detect motion, and also to run the web server and other features. On the modest hardware on the Raspberry Pi, I was only able to reliably achieve 4-10 frames-per-second at 800×600, depending on the Raspberry Pi model in use.
Using this technique below, my camera system is now able to get closer to the full resolution for each Raspberry Pi camera which is 1920×1080 at 30 frames per second – and reliably running for years without issue.
The problem with using motion on the Raspberry Pi
After much experimentation and time trying to make it work, I found the motion solution is not that great in practice. I have spent countless hours writing scripts, web pages, and various hacks to build a robust 4 camera home security system using this setup.
The cameras suffered from low frame rate (FPS), high load average, frequent lockups, and SD cards dying. This slow frame rate is due to the high CPU needed by motion performing image processing on the low powered Pi. The high load average and SD card death is being caused by the high number of writes (images and video files) on the SD card.
Managing all the video files was a problem as well. Files from the multiple cameras need to be remotely viewable in one central location. The SD card fills up fast and old files need to be deleted to make room for new files.
There has to be a better way!
The Solution
The solution I found was to take as much of the processing off of the Raspberry Pis as possible. I wanted to get the devices to send video, and not write anything on the local SD card. The image processing / motion detection needs to be removed from the Pi and moved to a more powerful machine.
The NVR software I went with
For your camera server, you could choose any NVR hardware or software which supports the RTSP standard for video streams.
In my case I had an old Mac Mini in the closet, and went on the hunt for software that would work on MacOS. After some research, I came across a software called SecuritySpy from Ben Software. This software provides so many capabilities that I was attempting to create myself and now I am a huge fan of it. For the purpose of this article I will go through how I set up SecuritySpy, but you can use any video recording software that you want.
SecuritySpy is a paid software and is totally worth the price for the features and support that you get.
Configure the Raspberry Pi camera to be a RTSP streaming server
Set up the Pi camera according to the camera setup guide. You need to run raspi-config and enable the camera module.
This technique uses the software raspivid and the VLC command line interface cvlc. raspivid should already be installed with your Raspbian install, but you will probably need to install VLC:
Create a script to turn your Raspberry Pi into a RTSP streaming server. In the pi home directory /home/pi, create the file stream-rtsp.sh:
#!/bin/bash
raspivid -o – -t 0 -w 1920 -h 1080 -fps 30 -b 250000 | cvlc -vvv stream:///dev/stdin –sout ‘#rtp{access=udp,sdp=rtsp://:8554/stream}’ :demux=h264
Tweak the settings to your liking. The -w width -h height -fps fps -b bitrate are good values to play with.
I sometimes run on a lower configuration to reduce network bandwidth:
#!/bin/bash
raspivid -o – -t 0 -w 1000 -h 576 -fps 20 -b 250000 | cvlc -vvv stream:///dev/stdin –sout ‘#rtp{access=udp,sdp=rtsp://:8554/stream}’ :demux=h264
With this simple script, your Pi will be running as a RTSP server listening on both TCP and UDP. Remove access=udp to disable the UDP stream if you want. My suggestion is to leave both enabled, and see which one works best for you.
Make the script executable:
Test the script by running it manually:
Making the script run on startup
After you see it is working, set up the script to run automatically on startup. I have two examples of how to do this here. First is using a systemd startup script which is recommended. Second is inside of a screen session. You only need to choose one option.
Script startup Option 1 – systemd startup script
Create the file /etc/systemd/system/stream-rtsp.service
[Unit]
Description=auto start stream
After=multi-user.target
[Service]
Type=simple
ExecStart=/home/pi/stream-rtsp.sh
User=pi
WorkingDirectory=/home/pi
Restart=on-failure
[Install]
WantedBy=multi-user.target
Set the service to auto start
sudo systemctl enable stream-rtsp.service
Then you can start, stop, or check on the service with:
sudo systemctl start stream-rtsp.service
sudo systemctl stop stream-rtsp.service
sudo systemctl status stream-rtsp.service
Script startup Option 2 – Using screen
As a reminder, you do not need to do this part if you did the systemd startup script above.
Install screen
sudo apt-get install screen
To make screen start every boot, add this to the middle of your /etc/rc.local file (above exit 0):
# start streaming video
su – pi -c "/usr/bin/screen -dmS stream /home/pi/stream-rtsp.sh"
Note: When using this method the stream-rtsp script will NOT auto restart if for some reason it crashes. That it one benefit in using systemd. Easiest is to just reboot the box.
Option 1 for NVR – Using SecuritySpy
Download, Install and set up SecuritySpy
Some of the features SecuritySpy provides:
– Live Video with FPS overlay
– Constant recording, or motion detection recording
– A robust interface for viewing recorded videos
– Web based interface for viewing on computer, phone, TV
– iOS client for live viewing on iPhone, iPad, AppleTV
– Automatic deletion of old video files (by age, or when the hard drive fills)
..and much more
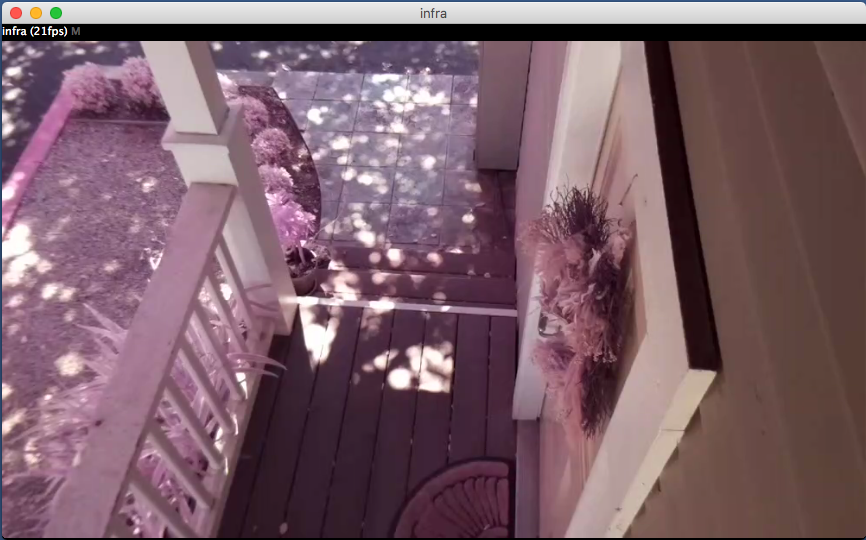
Add a new camera in the SecuritySpy setup.
Enter the Raspberry Pi camera IP address. Select “Profile” “Manual configuration”, “Format” “RTSP TCP (video and audio)”, and down in “Request” enter “/stream”.
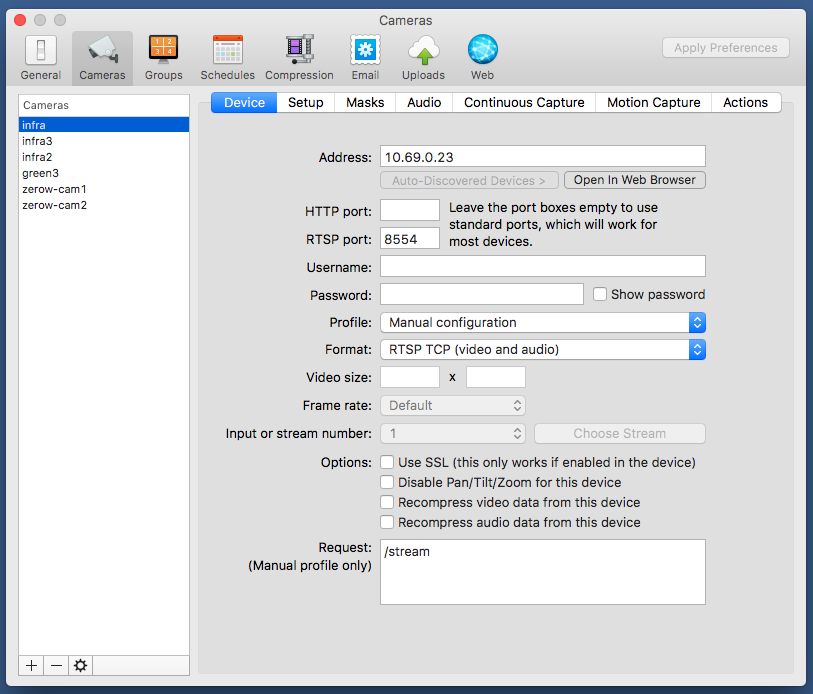
Apply Preferences, then the video should show up.
Option 2 for NVR – Monitor the camera with any NVR software of your choosing
The important part here is that we configured the Raspberry Pi to run a RTSP server which accepts connections over TCP or UDP on port 8554 and the request url is /stream
You can connect to this stream with a variety of applications.
One example is to stream this to another Raspberry Pi, you could do it with omxplayer:
Install omxplayer on some other Raspberry Pi:
sudo apt-get install omxplayer
Make a script called stream-video.sh
#!/bin/bash
killall omxplayer.bin
sleep 1
omxplayer –aspect-mode stretch -o hdmi rtsp://10.69.0.23:8554/stream
Edit the IP address to be the camera’s IP.
Make the script executable:
Run the script
and you should see the full screen video sent out the hdmi port
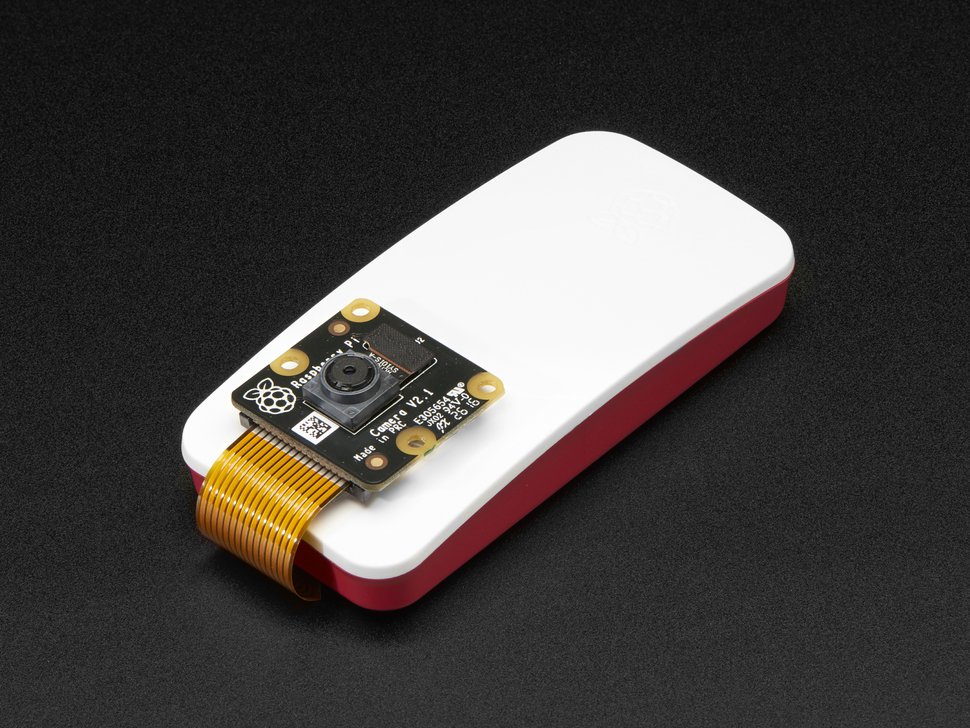
Works with Raspberry Pi Zero W
This technique of creating a RTSP server also works for getting high resolution and high frame rate out of the new Raspberry Pi Zero W camera packs (infrared or standard)! At $45 the bundle pack that comes with the case and infrared camera is a great way to add extra wireless cameras to your home security system.