Introduction
Have an existing Nuxt web application? In this guide, you’ll learn how to transform it into native iOS and Android mobile apps using Capacitor 8 — the latest version with improved performance and new features.
Capacitor wraps your web app in a native container, giving you access to device APIs like camera, filesystem, and push notifications while keeping your existing Vue codebase. Unlike Flutter or React Native, you don’t need to rewrite anything — your Nuxt code runs as-is.
What you’ll learn:
- Configure your existing Nuxt app for static generation
- Add Capacitor 8 with essential native plugins
- Build and test on iOS and Android simulators
- Enable live reload for faster development
- Optionally add Konsta UI for native-looking components
Looking to start a new project from scratch? Check out our guide on Building a Nuxt Mobile App from Scratch.
Benefits of Using Nuxt and Capacitor
- Code Reusability: Share your Vue components and logic between web and mobile apps.
- Performance: Nuxt’s static generation creates optimized bundles perfect for mobile.
- Native Capabilities: Access device features like camera, geolocation, and filesystem through Capacitor plugins.
- Simplified Development: Use familiar Vue/Nuxt patterns without learning native development.
Prerequisites
Before you begin, make sure you have:
- Node.js 18+ installed
- An existing Nuxt 4 application
- Xcode (for iOS development, macOS only)
- Android Studio (for Android development)
Configuring Your Nuxt App for Mobile
The first step is to configure your Nuxt app for static generation. Capacitor needs static HTML/JS/CSS files to bundle into the native app.
Make sure your package.json has the generate script:
{
"scripts": {
"dev": "nuxt dev",
"build": "nuxt build",
"generate": "nuxt generate",
"preview": "nuxt preview",
"mobile": "bun run generate && bunx cap sync",
"mobile:ios": "bun run mobile && bunx cap open ios",
"mobile:android": "bun run mobile && bunx cap open android"
}
}
Important: If you’re using server-side features (API routes, server middleware, etc.), you’ll need to refactor those to use client-side alternatives or external APIs.
Test the static generation by running:
You should see a .output/public folder with your static files. This is what Capacitor will bundle into your native app.
Adding Capacitor 8 to Your Project
To package your Nuxt app into a native mobile container, follow these steps:
- Install Capacitor core and CLI:
bun add @capacitor/core
bun add -D @capacitor/cli
- Install common Capacitor plugins you’ll likely need:
bun add @capacitor/app @capacitor/keyboard @capacitor/splash-screen @capacitor/status-bar @capacitor/preferences
These plugins provide essential features:
- @capacitor/app: Handle app lifecycle events (foreground/background, deep links)
- @capacitor/keyboard: Control keyboard behavior on mobile
- @capacitor/splash-screen: Manage the native splash screen
- @capacitor/status-bar: Style the device status bar
- @capacitor/preferences: Key-value storage (like localStorage but native)
- Initialize Capacitor with your project details:
bunx cap init my-app com.example.myapp --web-dir .output/public
Replace my-app with your app name and com.example.myapp with your app ID (reverse domain notation).
- Create or update the
capacitor.config.tsfile with the proper configuration:
import type { CapacitorConfig } from '@capacitor/cli';
const config: CapacitorConfig = {
appId: 'com.example.myapp',
appName: 'my-app',
webDir: '.output/public',
plugins: {
SplashScreen: {
launchShowDuration: 2000,
launchAutoHide: true,
androidScaleType: 'CENTER_CROP',
splashFullScreen: true,
splashImmersive: true,
},
Keyboard: {
resize: 'body',
resizeOnFullScreen: true,
},
StatusBar: {
style: 'dark',
},
},
};
export default config;
- Install native platforms:
bun add @capacitor/ios @capacitor/android
- Add the native platform folders:
bunx cap add ios
bunx cap add android
Capacitor will create ios and android folders at the root of your project containing the native projects.
To build the Android project, you need Android Studio. For iOS, you need a Mac with Xcode.
- Build and sync your project:
This runs your custom script that generates the static Nuxt build and syncs the files with the native platforms.
Building and Deploying Native Apps
To build and deploy your native mobile app, follow these steps:
To develop iOS apps, you need to have Xcode installed, and for Android apps, you need to have Android Studio installed. Moreover, if you plan to distribute your app on the app store, you need to enroll in the Apple Developer Program for iOS and the Google Play Console for Android.
- Open the native projects:
For iOS:
For Android:
Or directly with Capacitor CLI:
bunx cap open ios
bunx cap open android
- Build and run the app:
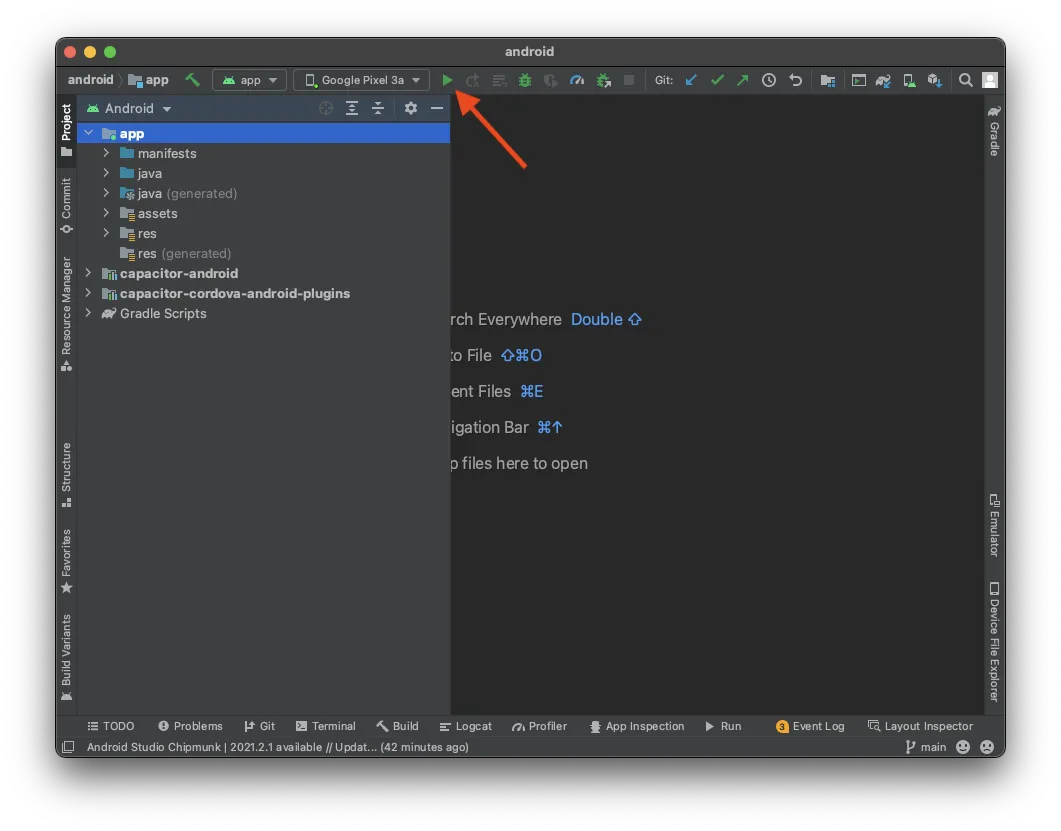
- In Android Studio, wait for the project to be ready, and then click on the “Run” button to deploy the app to a connected device or emulator.
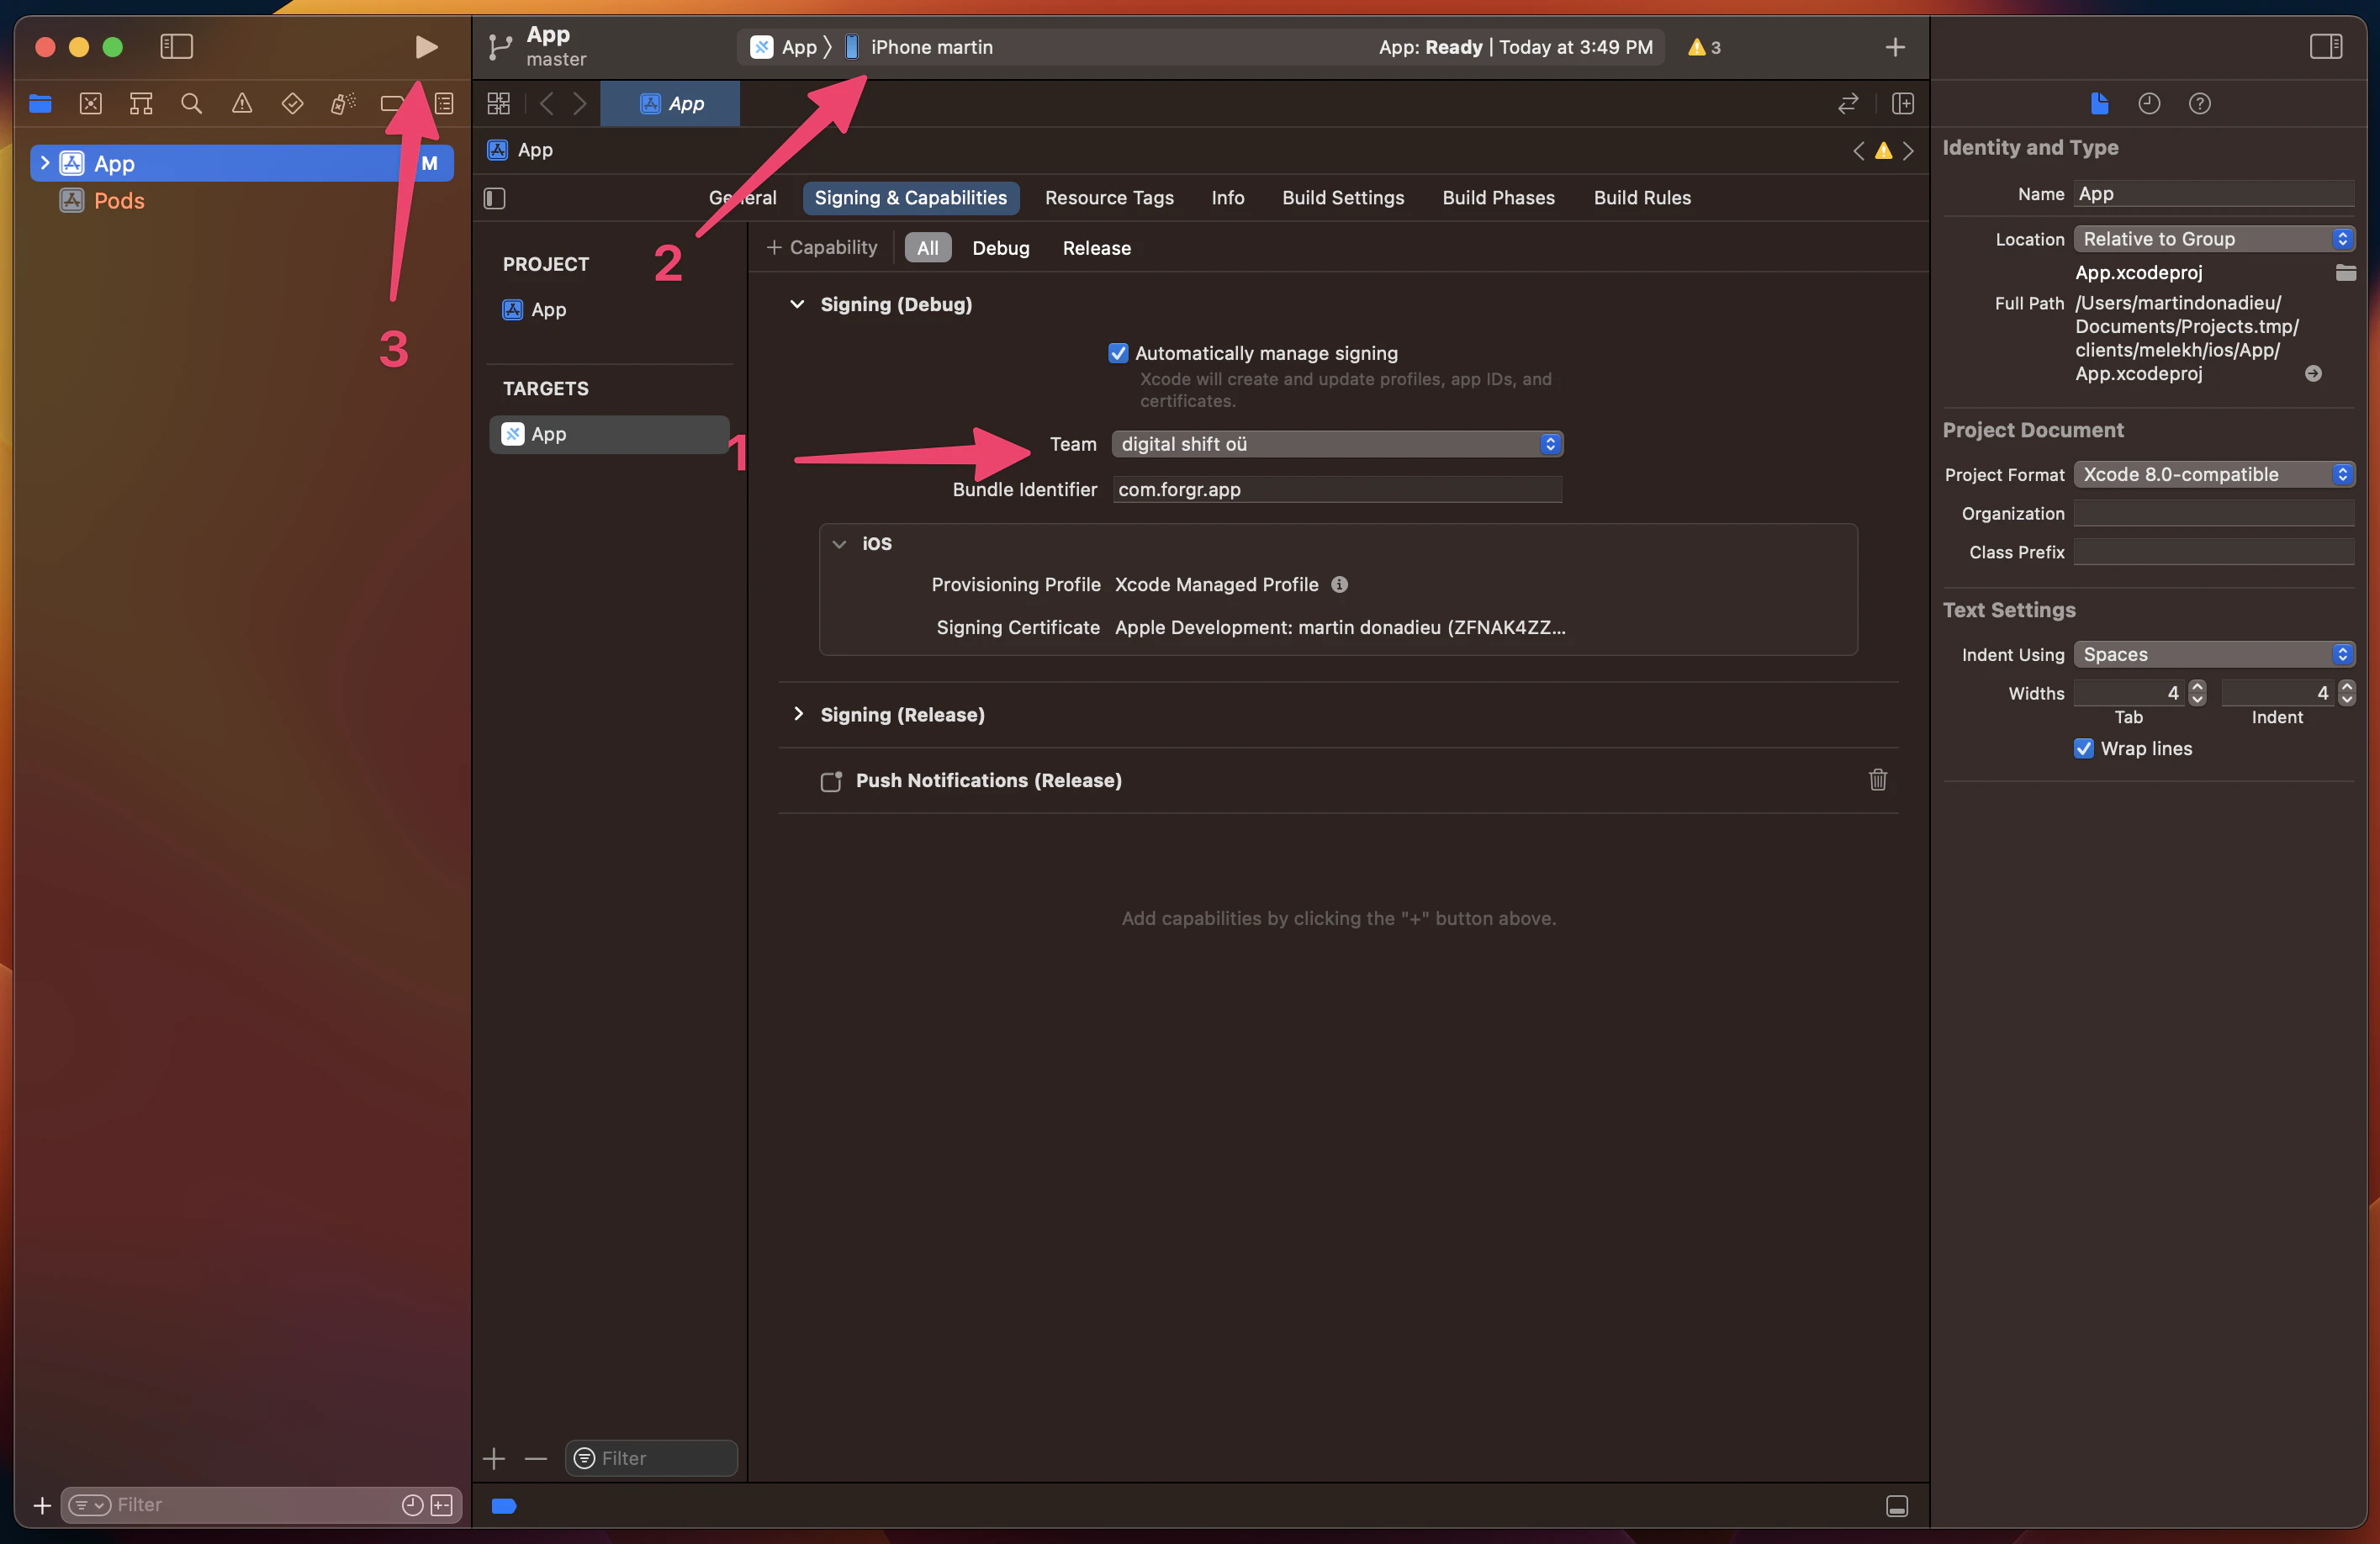
- In Xcode, set up your signing account to deploy the app to a real device. If you haven’t done this before, Xcode will guide you through the process (note that you need to be enrolled in the Apple Developer Program). Once set up, click on the “Play” button to run the app on your connected device.
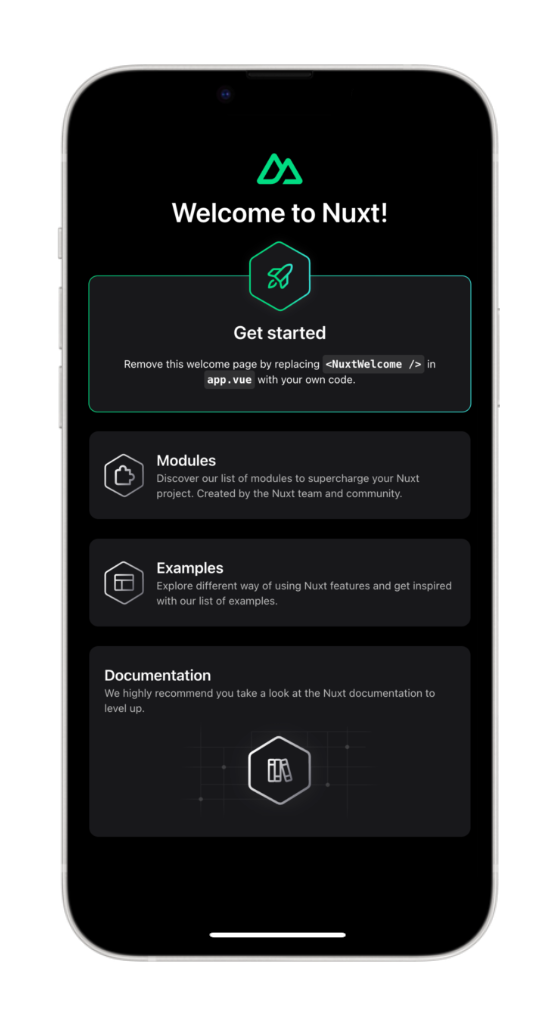
Congratulations! You have successfully deployed your Nuxt web app to a mobile device.
But hold on, there’s also a faster way to do this during development…
Capacitor Live Reload
During development, you can take advantage of live reloading to see changes instantly on your mobile device. To enable this feature, follow these steps:
- Find your local IP address:
-
On macOS, run the following command in the terminal:
-
On Windows, run:
Look for the IPv4 address in the output.
- Update your
capacitor.config.tsto point to your development server:
import type { CapacitorConfig } from '@capacitor/cli';
const config: CapacitorConfig = {
appId: 'com.example.app',
appName: 'my-app',
webDir: '.output/public',
server: {
url: 'http://YOUR_IP_ADDRESS:3000',
cleartext: true,
},
plugins: {
// ... your plugin config
},
};
export default config;
Replace YOUR_IP_ADDRESS with your local IP address (e.g., 192.168.1.100).
- Apply the changes to your native project:
The copy command copies the web folder and configuration changes to the native project without updating the entire project.
- Start your Nuxt dev server and rebuild in Xcode/Android Studio:
Now, whenever you make changes to your Nuxt app, the mobile app will automatically reload to reflect those changes.
Note: If you install new plugins or make changes to native files, you’ll need to rebuild the native project since live reloading only applies to web code changes.
Using Capacitor Plugins
Capacitor plugins allow you to access native device features from your Nuxt app. Let’s explore how to use the Share plugin as an example:
- Install the Share plugin:
- Create or update a page to use the Share plugin. In Nuxt 4, pages go in
app/pages/:
<template>
<div class="p-6">
<h1 class="text-2xl font-bold mb-4">Welcome to Nuxt + Capacitor!</h1>
<button
@click="shareContent"
class="px-6 py-3 bg-blue-600 text-white rounded-lg font-semibold"
>
Share now!
</button>
</div>
</template>
<script setup lang="ts">
import { Share } from '@capacitor/share';
async function shareContent() {
await Share.share({
title: 'Check this out!',
text: 'Built with Nuxt and Capacitor',
url: 'https://capacitorjs.com',
dialogTitle: 'Share with friends',
});
}
</script>
- Sync the changes with the native project:
Or just sync without rebuilding:
- Rebuild and run the app on your device.
Now, when you click the “Share now!” button, the native share dialog will appear.
Adding Konsta UI v5 with Tailwind CSS 4
To make the button look more mobile-friendly, you can add Konsta UI for native-looking iOS and Android components.
You need to have Tailwind CSS 4 already installed.
- Install the required packages:
bun add konsta
bun add tailwindcss @tailwindcss/vite
- Configure the Vite plugin in
nuxt.config.ts:
import tailwindcss from '@tailwindcss/vite';
export default defineNuxtConfig({
compatibilityDate: '2025-01-15',
devtools: { enabled: true },
css: ['~/assets/css/main.css'],
vite: {
plugins: [tailwindcss()],
},
});
- Create
app/assets/css/main.css:
@import 'tailwindcss';
@import 'konsta/theme.css';
- Wrap your app with the Konsta UI
Appcomponent inapp/app.vue:
<template>
<App theme="ios">
<NuxtPage />
</App>
</template>
<script setup>
import { App } from 'konsta/vue';
</script>
- Update your page to use Konsta UI components:
<template>
<Page>
<Navbar title="My App" />
<Block strong>
<p>
Here is your Nuxt & Konsta UI app. Let's see what we have here.
</p>
</Block>
<BlockTitle>Navigation</BlockTitle>
<List>
<ListItem href="/about/" title="About" />
<ListItem href="/form/" title="Form" />
</List>
<Block strong class="flex space-x-4">
<Button>Button 1</Button>
<Button>Button 2</Button>
</Block>
</Page>
</template>
<script setup>
import {
Page,
Navbar,
Block,
Button,
List,
ListItem,
BlockTitle,
} from 'konsta/vue';
</script>
- Add Roboto font for Material Design theme in
nuxt.config.ts:
export default defineNuxtConfig({
app: {
head: {
link: [
{ rel: 'preconnect', href: 'https://fonts.googleapis.com' },
{ rel: 'preconnect', href: 'https://fonts.gstatic.com', crossorigin: '' },
{
rel: 'stylesheet',
href: 'https://fonts.googleapis.com/css2?family=Roboto:wght@400;500;700&display=swap',
},
],
},
},
// ... rest of config
});
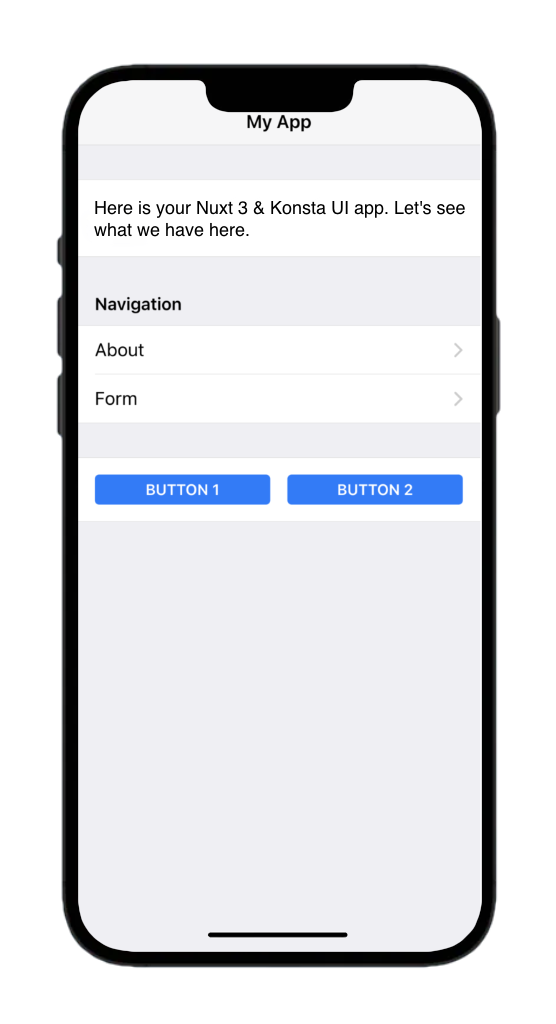
Your Nuxt app should now have a native-looking mobile UI:
Conclusion
You’ve successfully converted your existing Nuxt web application into native iOS and Android apps using Capacitor 8. Your Vue codebase now runs natively on mobile devices with access to device APIs.
What you accomplished:
- Configured Nuxt for static generation
- Added Capacitor 8 with essential plugins
- Built and deployed to iOS and Android simulators
- Enabled live reload for development
- Optionally added Konsta UI for native-looking components
Next steps:
- Set up Capgo for over-the-air updates without app store resubmission
- Add more native plugins like Camera, Geolocation, or Push Notifications
- Configure app icons and splash screens for production
- Prepare your app for App Store and Google Play submission
Starting a brand new project? Check out Building a Nuxt Mobile App from Scratch for a guided walkthrough.
Resources
- Nuxt Documentation
- Capacitor 8 Documentation
- Konsta UI Vue Documentation
- Capgo - Live Updates for Capacitor Apps
Learn how Capgo can help you build better apps faster, sign up for a free account today.