The Plan
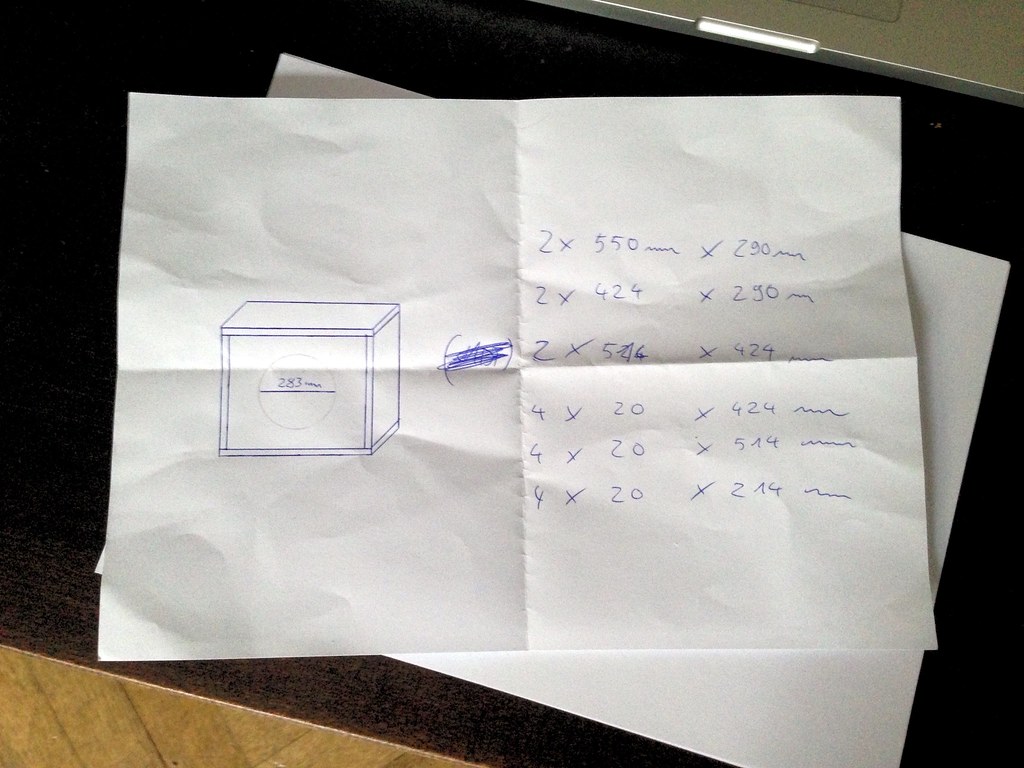
As you might know I’m really into guitars and guitar equipment right now. In my recent holidays I wanted to tinker a little bit and so I decided to build my own 1×12 guitar speaker cabinet. One day I started to scribble a cabinet on a piece of paper that was flying around and half an hour later the plan was laid out. I looked up an existing speaker enclosure to get the proportions right and did not bother to spend much time on speaker cabinet size calculations, which you should do if you plan to build HiFi speakers.
If you search around the web there are certain people who insist you have to do the Thiele/Small calculations to get proper results but I also found an article by one of the most popular speaker vendors claiming that this is only really relevant for HiFi. You can find this article here on the Celestion Website.
There are basically two types of guitar speaker cabinets: closed/sealed and open/vented. Again if you search on the web to know what the differences are you will find tons of information and as usual, sometimes highly contradicting opinions. The biggest difference is how the sound is distributed. An open cabinet will also emit sound through the back and from that alone you get a room filling sound experience even on low volumes. Closed cabinets are more directional and usually put more emphasis on the mid and low frequencies. There is a really exhaustive and informative article on guitarplayer.com about guitar speaker cabinets which includes a very good description of the different sonic properties. For my cabinet I have decided to make the back plate out of three parts so I can have it open or closed and see what works best. When you build a closed cabinet you also have to seal the enclosure airtight as the pressure inside the cab will contribute to the sonic properties.
There is another elaborate article on Seymour Duncans website which I can recommend for further studies.
Materials
Most of the speaker cabs out there are build from multiplexed birch plywood and so I bought 18mm plywood and had the store (Modulor) where I bought it cut for me to the specified sizes. Birch plywood is very inflexible and solid and whatever material you might choose, always make sure that it is not too soft or prone to vibration. Another common and sometimes cheaper material is MDF.

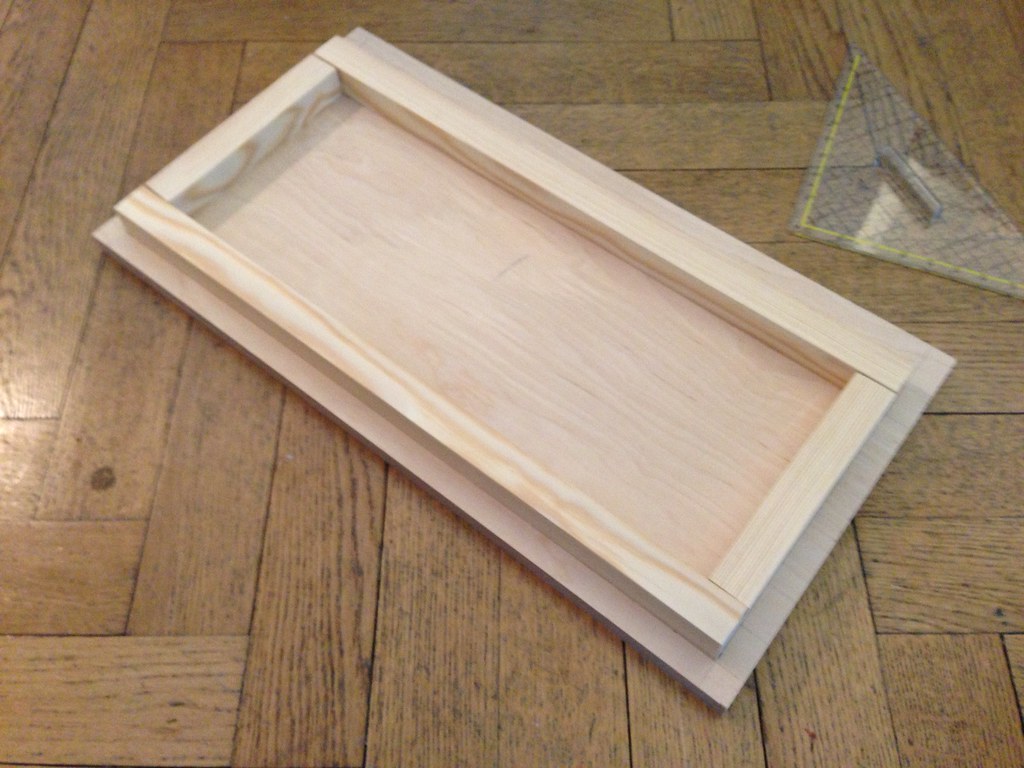
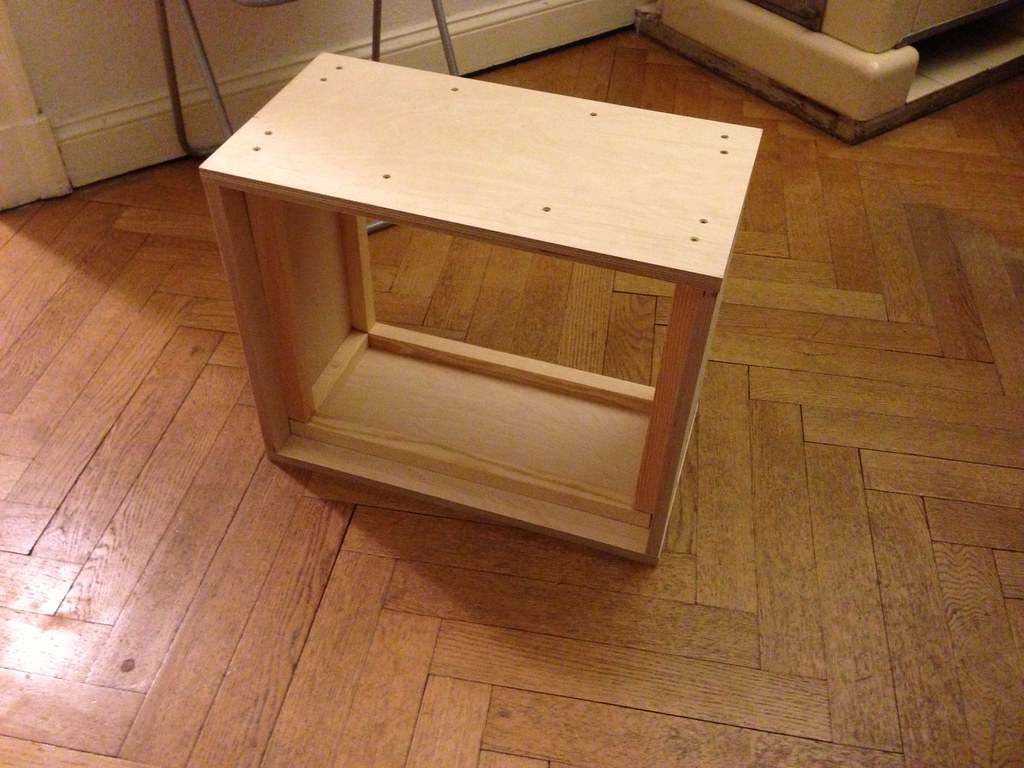
For assembly you have to figure out how to make really stable wood joints. There are simple and complex approaches and I went for a rather simple but stable one which can be seen on the next picture. Its basically adding an inner skeleton and connecting the different pieces of wood with that, rather than just screwing the pieces together directly.
In the next step I had to saw a hole for the speaker and I did it with a simple jigsaw and a special blade for making round cuts. The hole was ok in the end but it did not have to be perfect as I intended to cover the speaker for protection anyway.
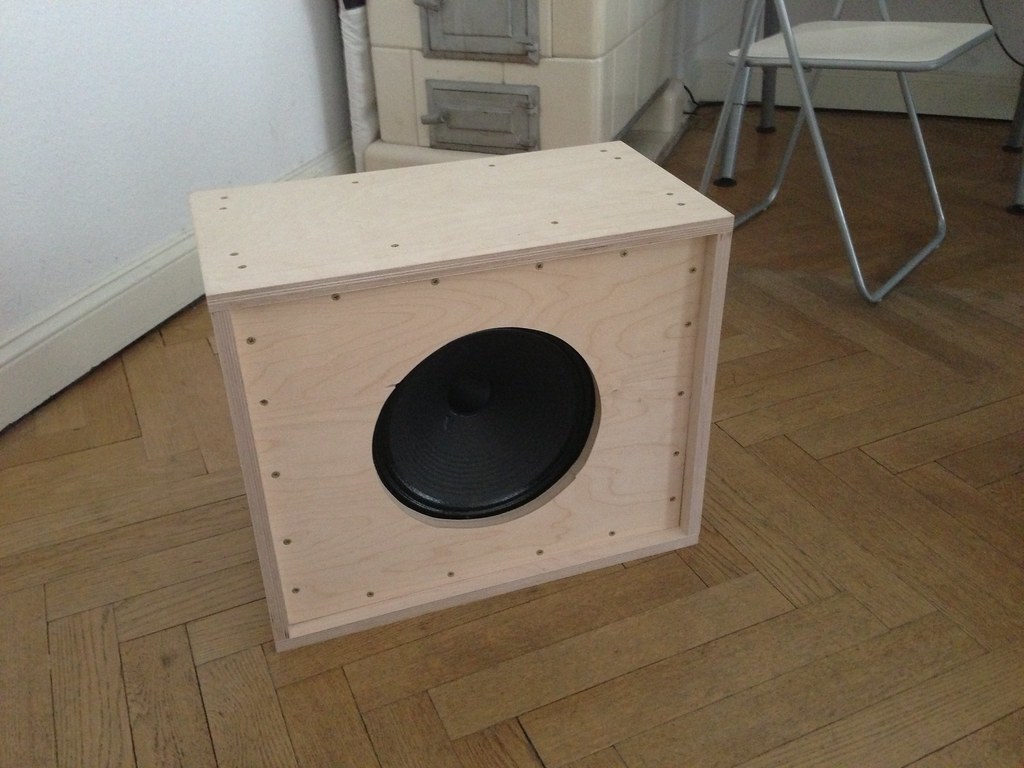
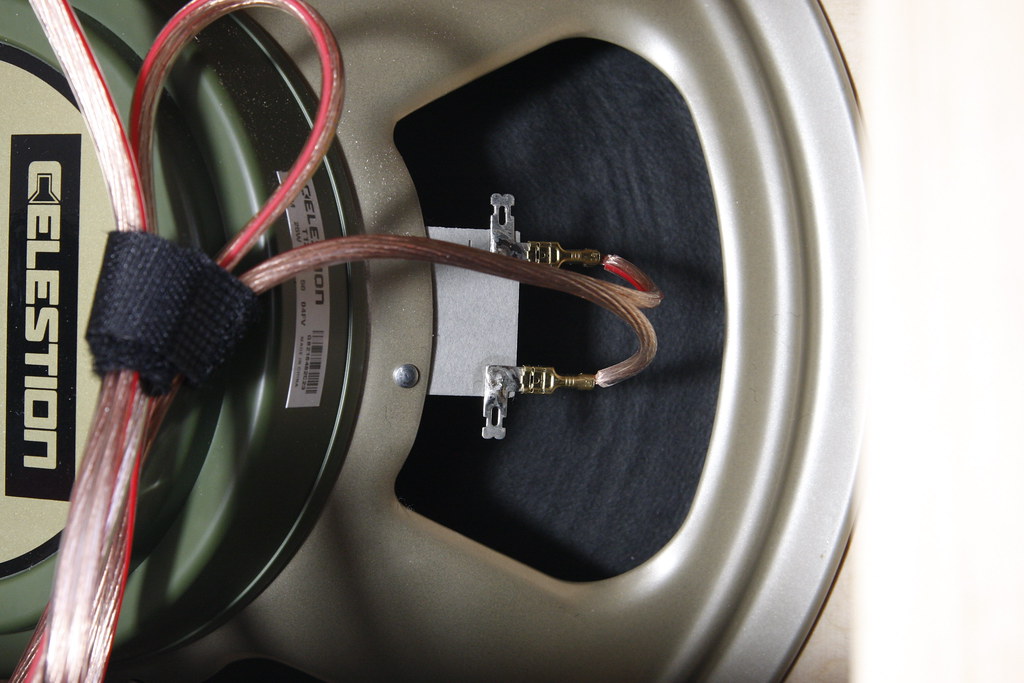
The speaker is a Celestion Greenback G12M with 25 Watts and 8 Ohm. and it is screwed directly onto the plywood. The speaker vendors usually give you a cut hole diameter and you should rather make it a few millimeters smaller than bigger to have enough room for the screws in the wood.
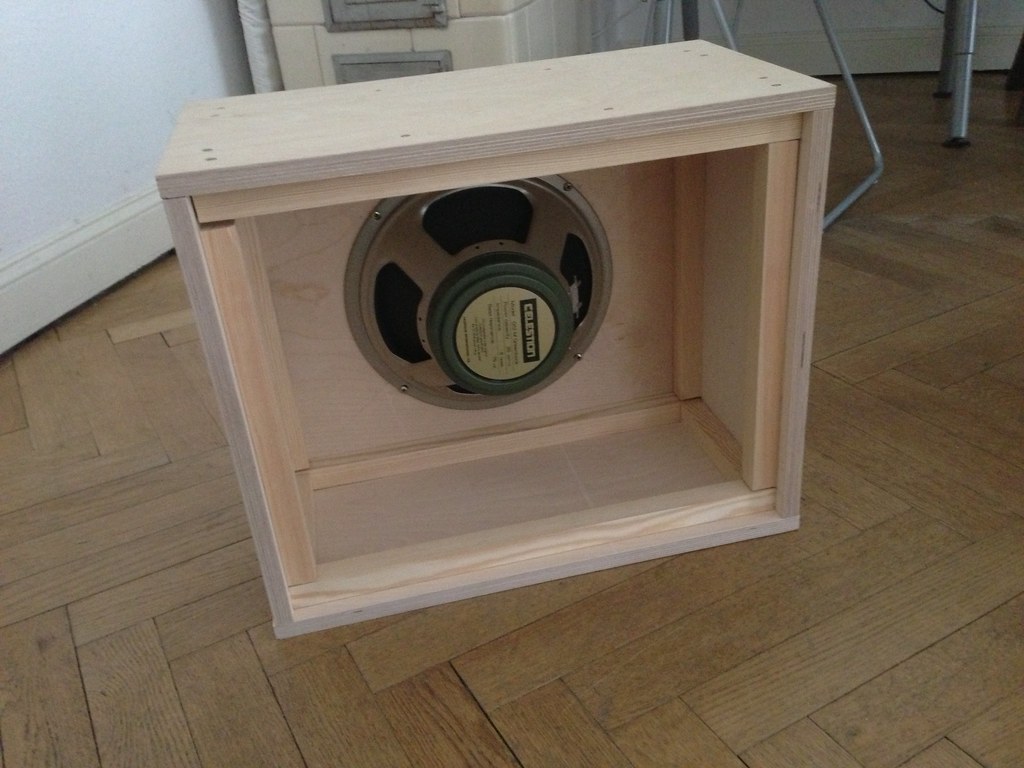
In the last picture you can see that the inner joints do not sit perfectly on top of each other and without the front and back plate the whole thing was not super stable but once I screwed in the front plate and thereby connecting all parts with another, it became so solid it felt like it was made from one piece.
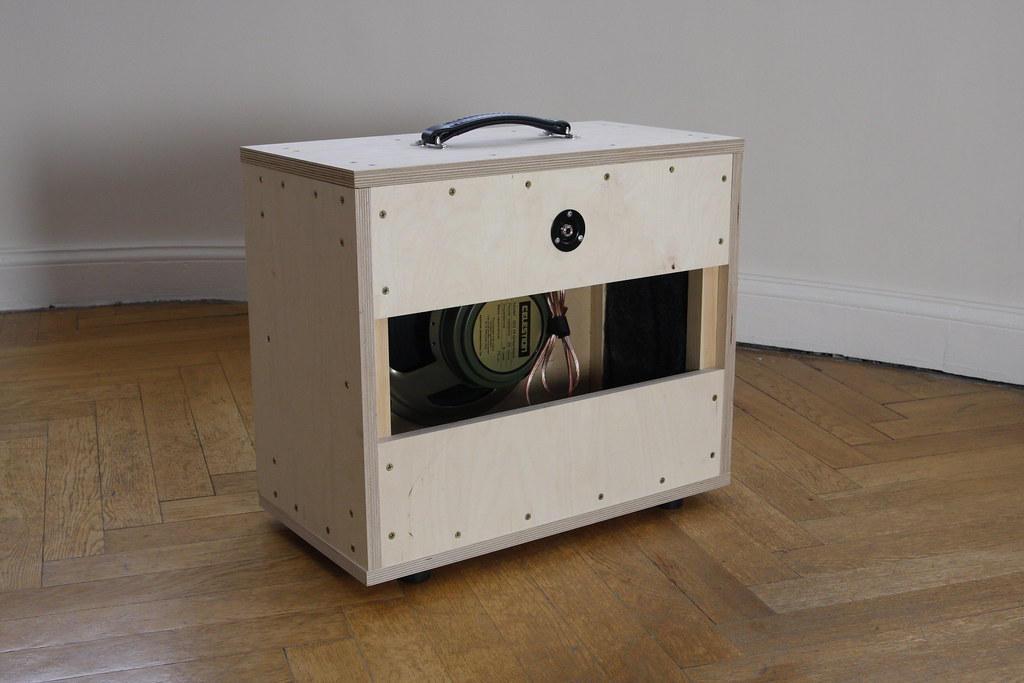
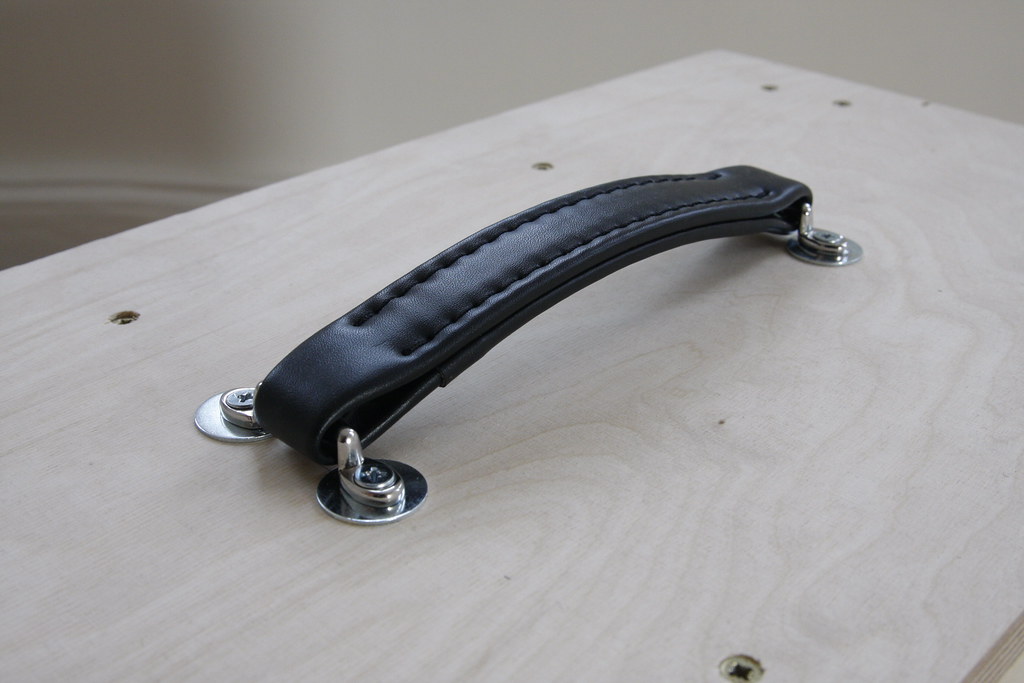
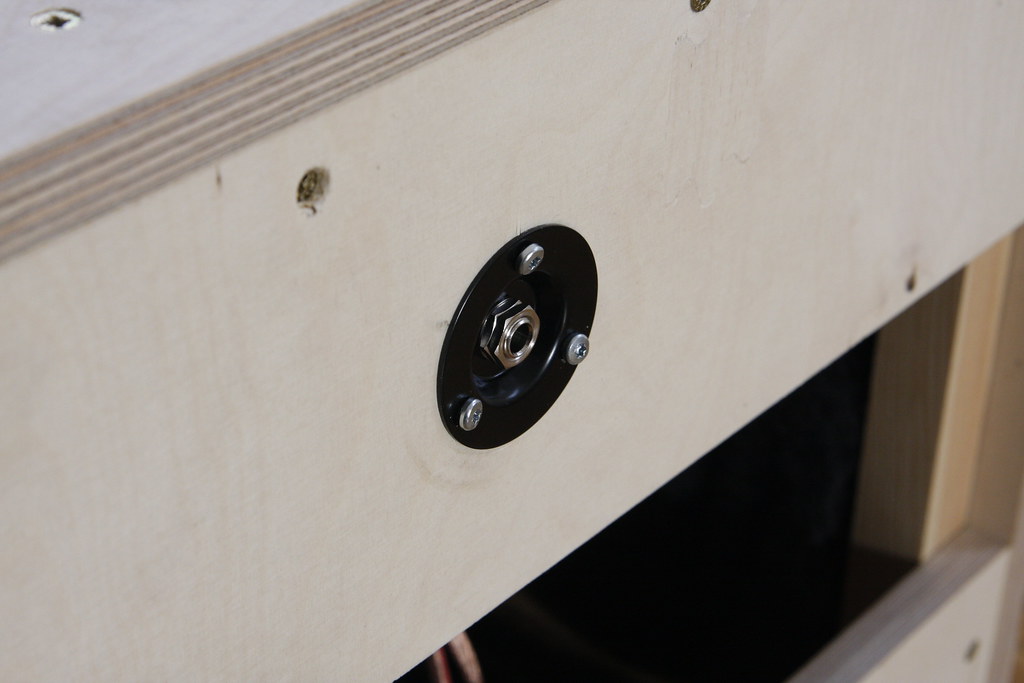
Once I had the cab together some additional hardware was necessary to complete it: A handle, an audio input jack, a cable, insulation wool to reduce echoes inside the cab, a front grill for protection and rubber feet. Luckily there are plenty of web stores that have this kind of amp hardware in stock and so once I got the stuff I finalized the cab.
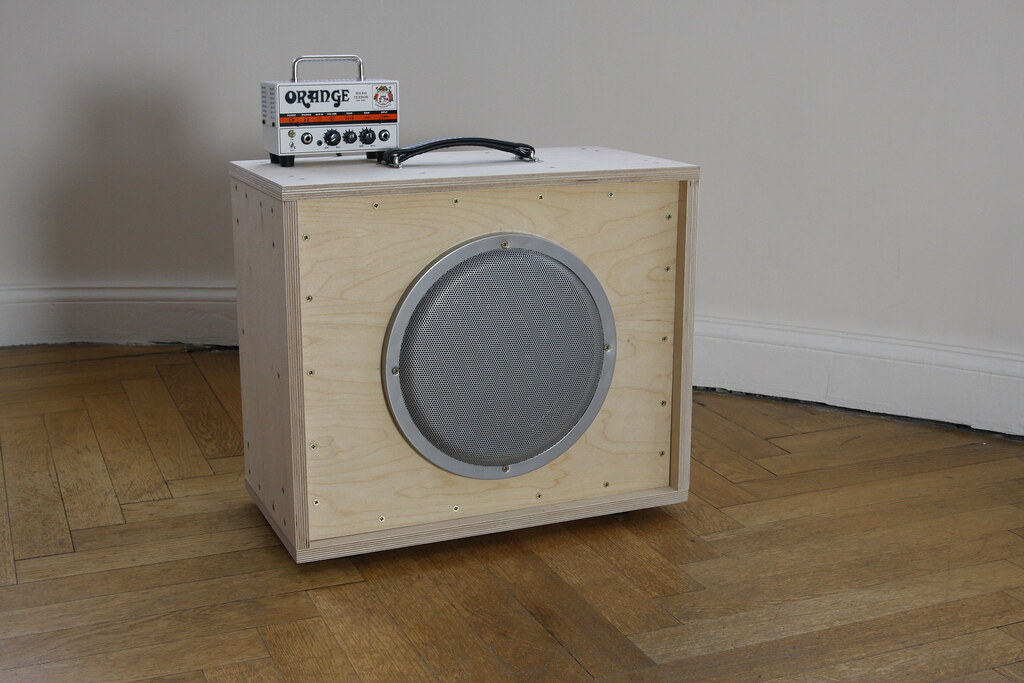
This is what it looks like in good quality pictures:
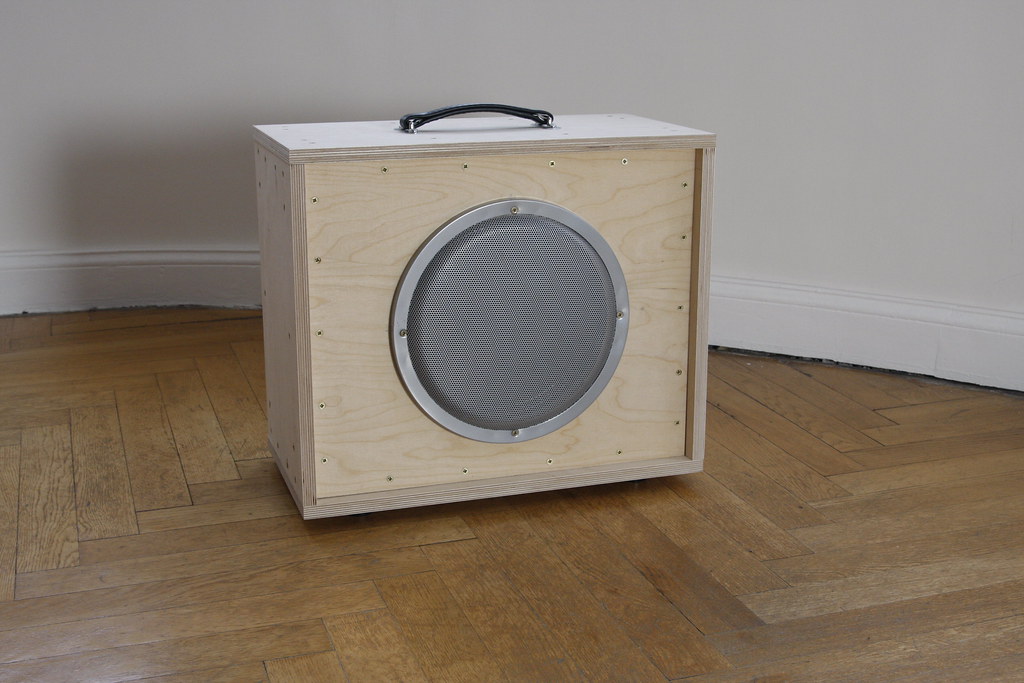

I’m not super exited about the grill and in retrospect I should have probably used regular grill cloth but for now it serves the purpose of protecting the speaker.
Apart from the handle I only used wood screws. I predrilled the outer plywood with a small drill so it would not burst when I screwed in the bigger wood screws. For the handle I drilled holes and used screws with big washers and a self locking nut so it would not become loose again.
After playing around for a little bit I have decided to leave it open. I like the sound much better. The whole thing took about a week with getting all the materials together and the actual construction work. It was a lot of fun and now I have a 12″ speaker cabinet that sounds awesome … and is quite heavy.
To give you an impression of the sound I recorded a basic loop with a Shure SM57 from three different positions. The center of the speaker, the edge of the speaker and the open back of the cabinet. The center is expected to bring out the mid frequencies, the edge includes more low frequencies and less bite in the mid range and the open back is mostly low end frequencies. After the three positions I combined the center and the back track so you can see what kind of options you have with an open cabinet. In the very end I recorded the same loop through my small, closed 8″ Orange cab to give you some point of reference. Notice though that the sound is very different because of the different speaker sizes and closed vs. open cabinet. I used a Telecaster and the Orange Micro Terror in a somewhat clean setting.
[soundcloud url=”http://api.soundcloud.com/tracks/75836795″ params=”” width=” 100%” height=”166″ iframe=”true” /]
There is also a flickr set with all the pictures.
UPDATE
I made a video where I demo the Orange Micro Terror using this cabinet – check it out here
Related
Also check out my blog post on how to build an electric guitar