Dave Girard sees if the geotagging, soft-proofing, video, and book support …
Version 4 of Adobe’s popular Lightroom hit the streets a few weeks ago. While the feature list isn’t extensive, it thankfully lacks padding (new yellow button somewhere!). The public beta took the wind out of any surprises but the release was highly anticipated for a number of new features: GPS tagging in the new Map module, book creation and export, video file support and basic clip editing.
Another big feature was the downgraded price tag: Lightroom 4 is now half the price of version 3; $149 is sweet for an application this powerful (the upgrade price is $79). The motivation for this change was clear. Apple, on a price-cutting binge of their Mac App Store professional apps, dropped the price of Aperture 3 down to $80. That’s still almost half as cheap as Adobe’s Lightroom but there is no longer a demo for Aperture, so you have more risk involved in making that purchase. Anyway, Apple’s selling hardware, not apps, so I don’t fault Adobe for failing to match Aperture’s shareware-like price point.
Test Hardware
- 17″ quad-core 2.5GHz MacBook Pro Sandy Bridge 2011
- 16GB RAM
- Vertex Turbo SSD system disk + 720GB HDD working disk
- Radeon 6770M 1GB
- OS X 10.7.3
- Dual hexacore Mac Pro 2.66GHz Westmere Xeon 2010
- 24GB RAM
- OWC Mercury Elite 6GB 120GB on PCIx SAS card system disk + 2TB striped RAID working disk
- Radeon 5870 1GB
- OS X 10.7.3
New and updated features
Video support
Lightroom 3 had very limited video file support and I complained about it in previous reviews. Your videos would be recognized on import and they’d get a poster frame, but they would have to be played externally. Version 4 adds playback for a wide variety of formats—it’s no VLC but it supports more than enough to cover digital camera video formats of all stripes. In a surprise move, Adobe added some basic editing features that should up the bar of what’s expected of a program handling video. You can trim clips non-destructively by clicking the gear icon in the player:
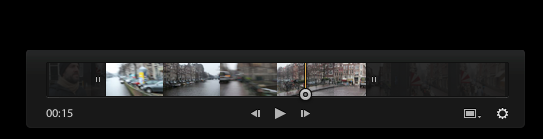
The pop-up trim interface—simple and effective.
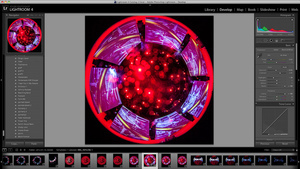
What’s more impressive is that you can do some balance and tone tweaks on video footage within the Library module and get feedback in real time (even on 1080p footage). The system requirements don’t list any GPU specs for this, so it’s not based on CUDA or OpenCL from what I can tell. On my MacBook Pro, it used very little CPU resources for playback, after doing an initial pre-caching. The list of editable adjustments for video is more limited than with RAW or JPEG pics, but it’s still enough to do some drastic tonal and color tweaks:
The cross-process preset: grading like it’s 1999.
Videos can be shared via Facebook and Flickr. It would be nice if YouTube and Vimeo were supported out of the box but I’m pretty sure there are plug-ins out there for these already. It will be interesting to see how much video stuff Adobe adds to Lightroom in the future. I can see their excellent warp stabilizer from After Effects being useful for hand-held video footage, but I doubt they’ll be giving this stuff away on the cheap.
Adjustment updates
Lightroom 4 has rejigged the Tone section of the basic adjustment sliders in an effort to make tonal adjustments clearer and improve dynamic range adjustments.
Lightroom 3’s adjustments panel:
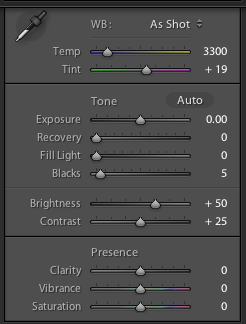
Lightroom 4’s:
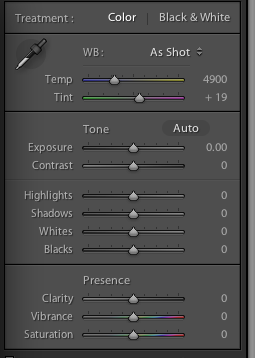
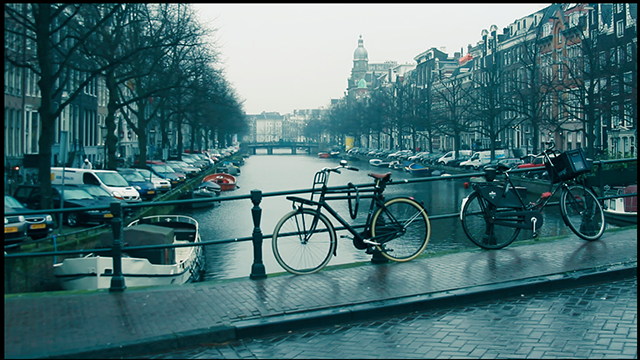
Since “Recovery” is ambiguous, “Fill Light” is a little misleading. “Brightness” recalls the days when brightness adjustments were a gain slider that just added white, Adobe’s made a panel that cuts the luminance spectrum into more literal and understandable divisions. This makes it easier to do faux-HDR tonal control to regain highlight and shadow regions that are nearly clipped. Here’s a shot that should help show this in practice:
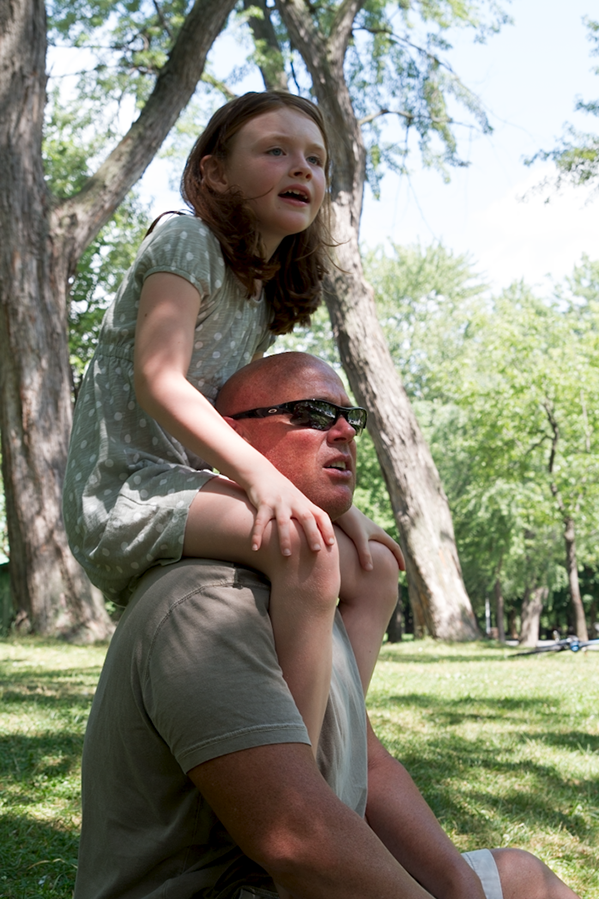
After hitting Auto and doing some tweaks, it looks much better, with very nice falloff in areas that were almost clipped above:
It still needs some localized adjustments of the figures but it’s a very good start.
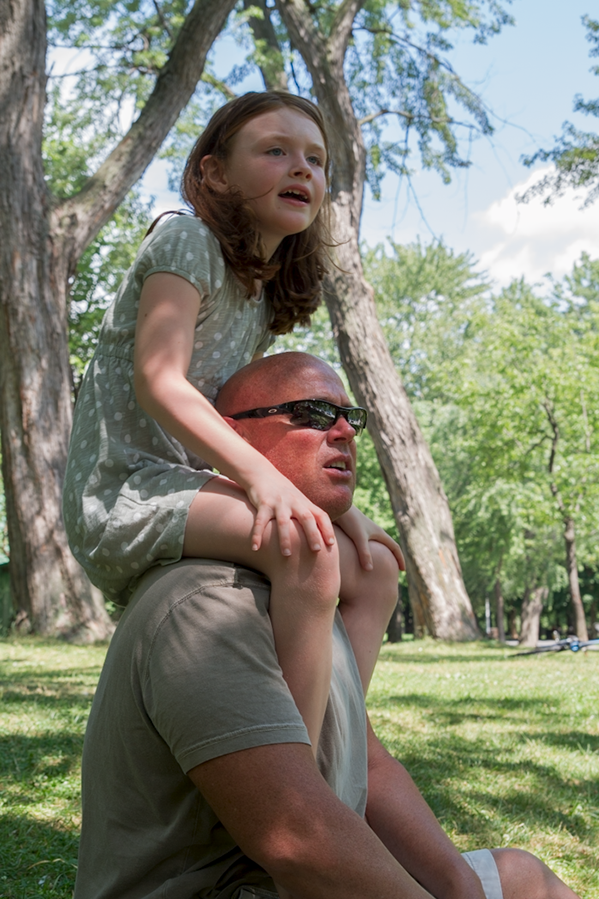
Since I was suspicious of this being just a reorganization of sliders and not an actual improvement in Lightroom’s tonal manipulation, I tried the get the same result with Lightroom 3:
Obviously not as good. Apart from the washed out look, the sky is patchy and transitions are harder in the recovered areas. It looks like Adobe’s made some real progress with this, in both quality and ease of use.
Local adjustments updates
Lightroom had robust localized edits for a while now and version 4 adds some more filters to the bag of brushable and graduated tricks. You can now do white balance, noise reduction, and moiré on a localized basis:
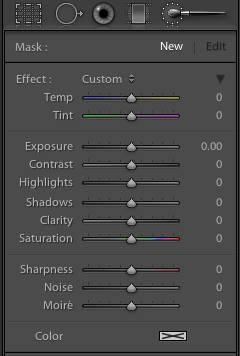
Those settings are the same for graduated filter and local edit brush.
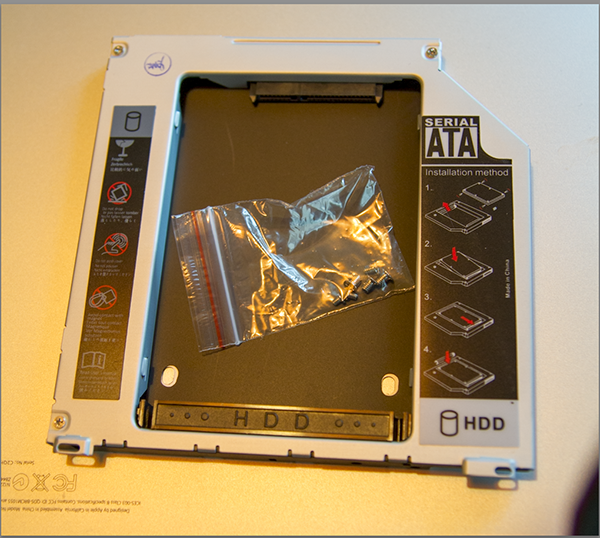
Some people may wonder about the need for localized white point adjustment, but this quickly came in handy for me. I was making a blog post about swapping out the MacBook Pro’s Superdrive for an HD caddy and this pic, with its mix of natural light from the window and tungsten light from above, posed a problem:
With a graduated white point, I neutralized the gradual yellow cast towards the left:
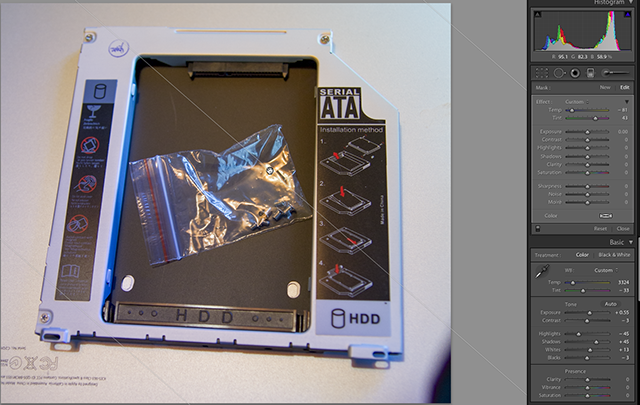
Call me a fan of this one.
Changes to auto-correction of chromatic aberration
Lightroom’s lens-profile based correction is brilliant but the profile-based chromatic aberration fix was prone to error when many variables were added in. The profile-based chromatic aberration correction is now gone and chromatic aberration detection is now evaluative. We’ll see how this fared in our RAW conversion tests.
Map module and GPS data tagging
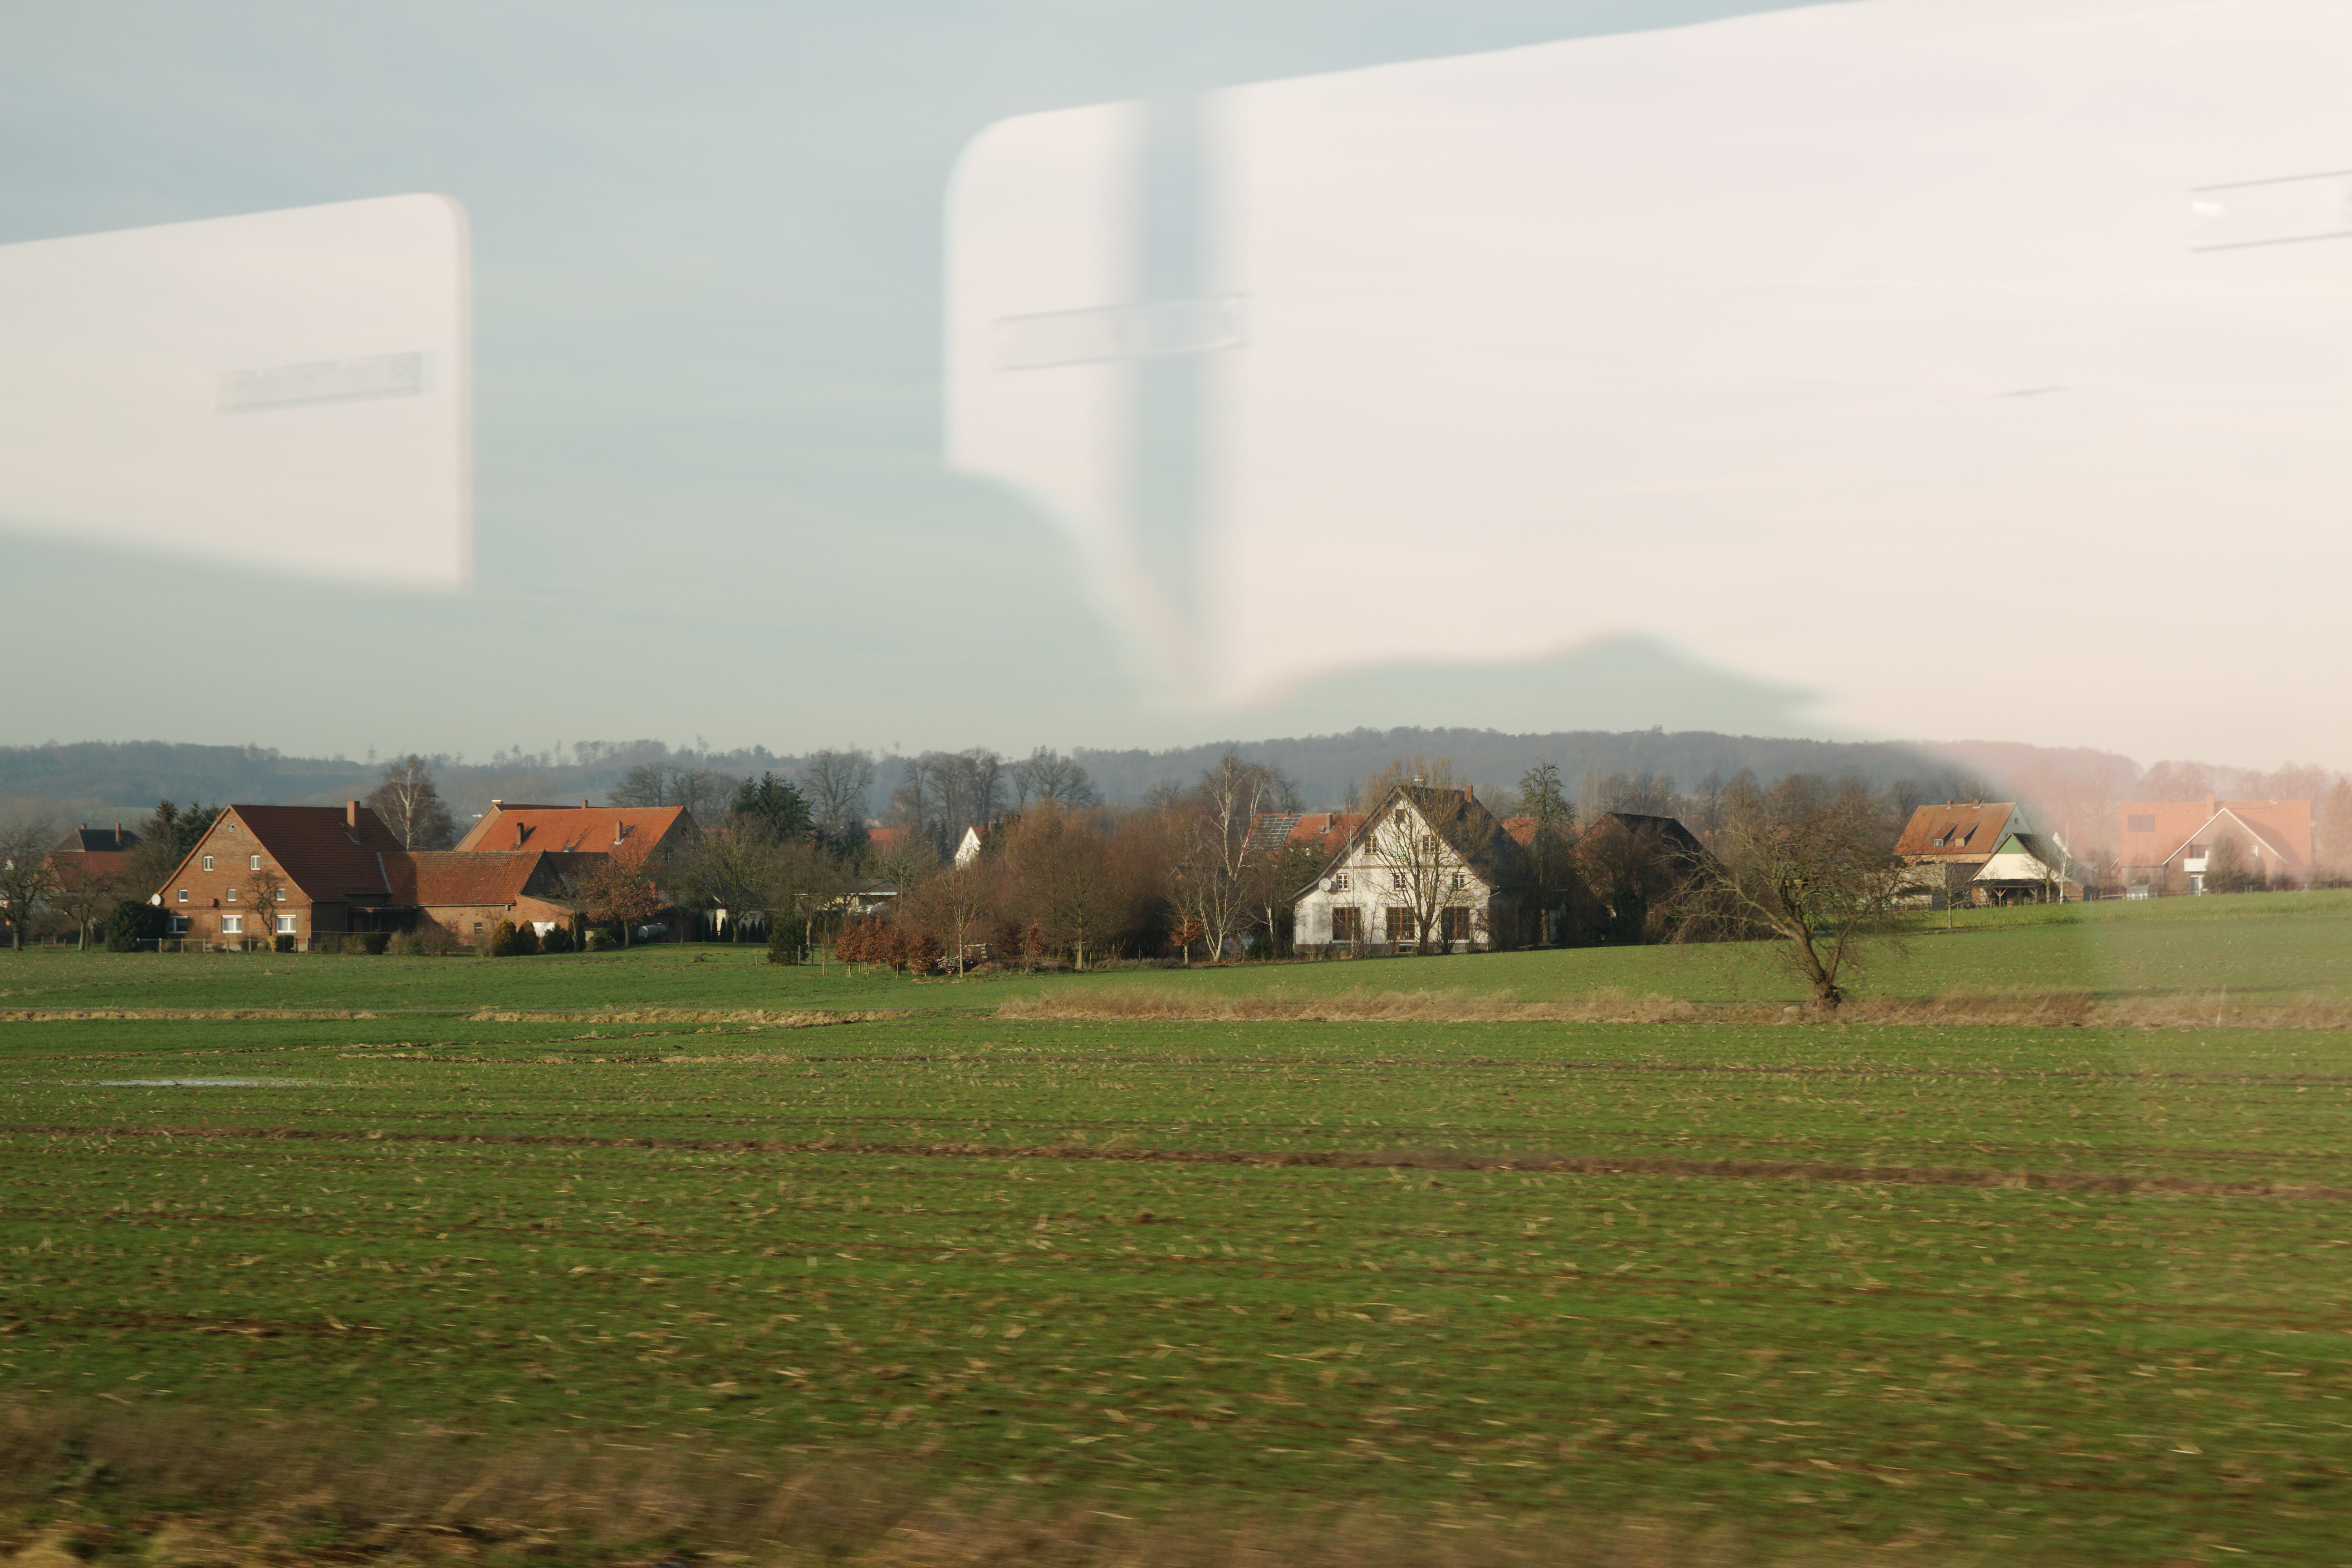
Since Lightroom 4 went into beta testing, one of the most anticipated features—at least for me—was the geo-tagging features in the new Map module. In my review of Aperture 3, I noted this isn’t necessarily a professional feature but it adds a richness to your image library that Lightroom badly needed. The implementation is similar to Aperture’s and the familiar Google Maps offers a number of viewing modes (satellite, road, hybrid, and terrain) with your images plopped on clearly shown tags:

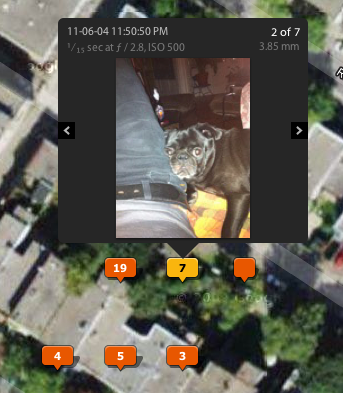
He knows we’re looking down at him.
When you start Lightroom 4, it asks you if you want to enable reverse geocoding to read this GPS data encoded in your images:
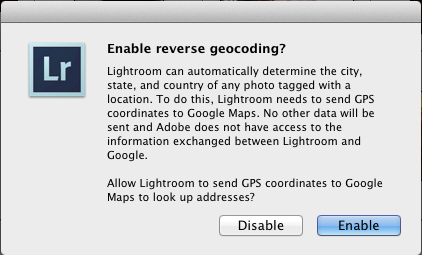
Tinfoil hat types will surely assume that the U.N. are going to come for their cameras a week after they hit “Enable,” but us educated people know that it’s more like a month.
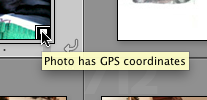
After you enable that, Lightroom tags the location data in your existing and newly-imported images and the Library grid view shows a little tag at the bottom right of the images that contain this GPS data:
Within the Map module, a nice little pop-up slideshow for locations with multiple images:
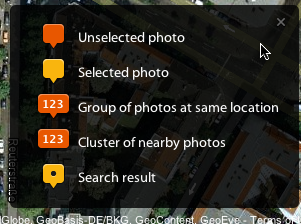
A legend sits at the bottom right to let you know what the badges mean:
Since GPS data is often inaccurate, you can manually edit the tagged locations by dragging them within the map module. Or, better yet, just have the location saved and specify a radius as a loose catch-all for the location:

As you can see above, locations can be marked private for export. I think Dick Cheney requested that feature.
Search and employ
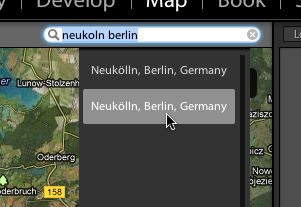
For images that don’t have location data embedded, you can use the Map module’s search function and right click the map to tag the selected pics with that location:
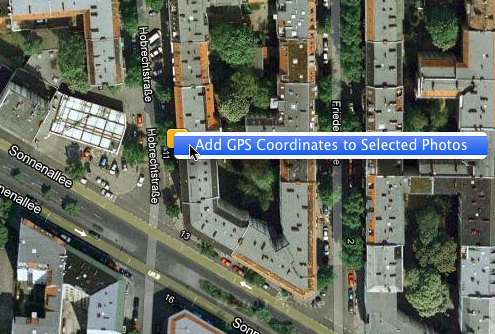
Using Google’s location smarts, it predictably finds things with little context. A search for “vice williamsburg ny” found the Vice Magazine office in Brooklyn. A search for “neukoln berlin” without the umlauts and a missing “l” also found that without a problem:
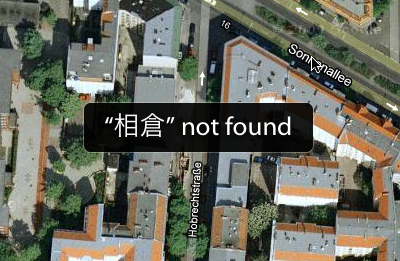
To test the two-byte language support, I entered ?? (Ainokura) into the search field. I expected the same results as from Aperture, since they both use Google’s mapping service but Lightroom didn’t find anything:
Aperture found it for the same Kanji search:
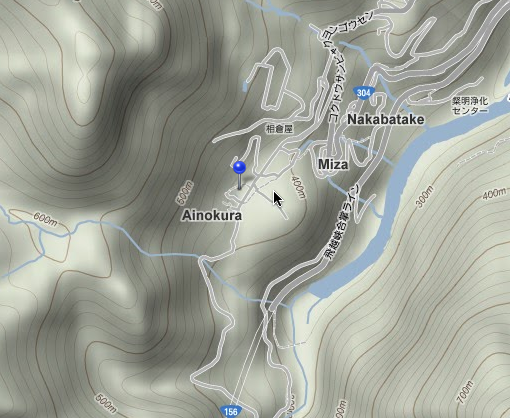
Lightroom managed to find ?? (Tokyo) and ?? (Noto), so I guess it’s a matter of obscurity—Ainokura is a tiny (and amazing) village in the middle of the mountains of Japan. Still strange though, given Aperture’s result.
GPS Track log pic mapping
Similar to Aperture, Lightroom 4 lets you import GPS data to use as location data for images shot with GPS-less cameras. Import a GPS track log in .gpx format, set the starting point for a series of shots and then Lightroom uses the difference in times between shots to map the images to the route:
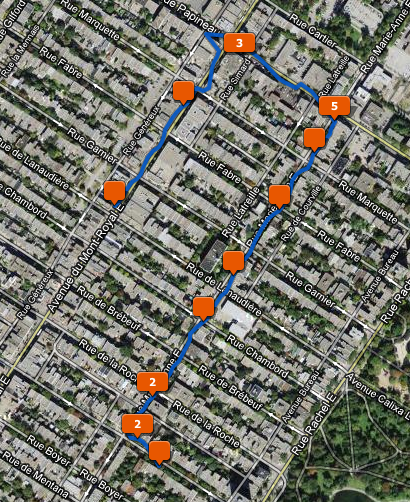
In my test, my time offset was slightly off and I couldn’t figure out how to change that without individually dragging the locations around. It wasn’t a big shift but it was off by about a minute even though my track and first shot were started at exactly the same time.
Lightroom’s mapping features aren’t an improvement on Aperture’s, but they were much-needed and they add an awesome dimension to your photo library. Location-tagging photos quickly becomes an addiction once you’ve started. This will only get better as more and more cameras include GPS functionality.
Soft proofing
I need accurate color rendering for prints from my Epson R1900 and 7890, so this was a welcome addition to Lightroom. I tested .icc profiles created with my Colormunki Photo and my screen was calibrated with the Colormunki software, so I was a good candidate for testing the accuracy of this feature. Lightroom automatically detects your ICC profiles from your user folder and lets you make a proof copy to work on in the Develop module.
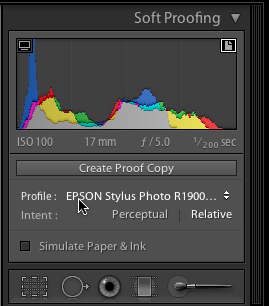
You can pick from two rendering intents: relative colorimetric and perceptual.
Relative colorimetric rendering attempts to closely match your colors while clamping out-of-gamut colors in a way that can be harsh. Perceptual rendering creates smoother gradations at the expense of color accuracy. The two other rendering intent methods in Photoshop (saturation and absolute colorimetric) aren’t used much, so they shouldn’t be missed.
Soft proofing works well for most scenarios. The monitor and output gamut warnings show an overlay of areas from your image that can’t be seen accurately on your screen or output to your destination profile’s color space. The paper and ink simulation was fine with my R1900 lustre paper but I had less success with the 7890 and its canvas profiles, which print fine:
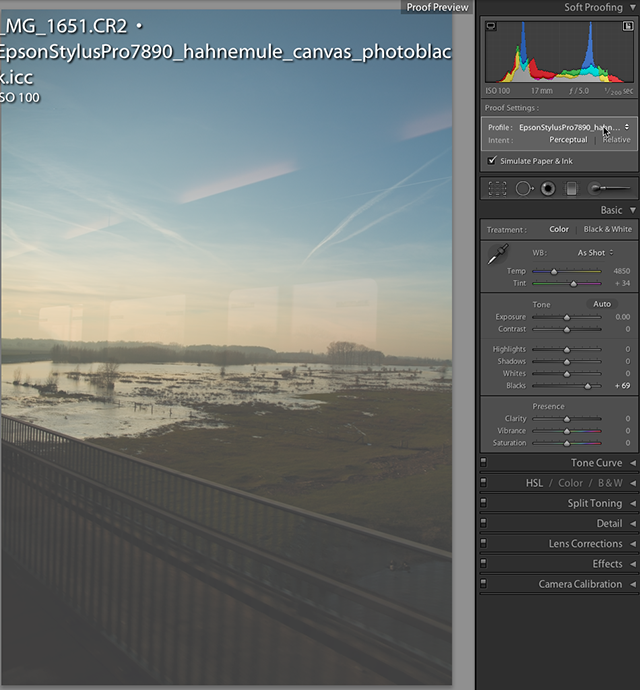
I’m sure there’s a good reason why it looks that bad—but it’s not accurate. The blacks and saturation should be much deeper than what I’m seeing there. I’d like to see this worked out since Photoshop shows the same result for those ICC v4 profiles.
Books
Adobe obviously has a lot of experience in publishing software, so it’s no surprise the book features of Lightroom 4 are professional quality. The auto-layout feature drops your selected pics into a layout in the Book module and there are tons of options for number of photos per page and page grid configurations. Thanks to margins and column widths that enforce a wider margin in the gutter, it’s hard to screw up the layout:
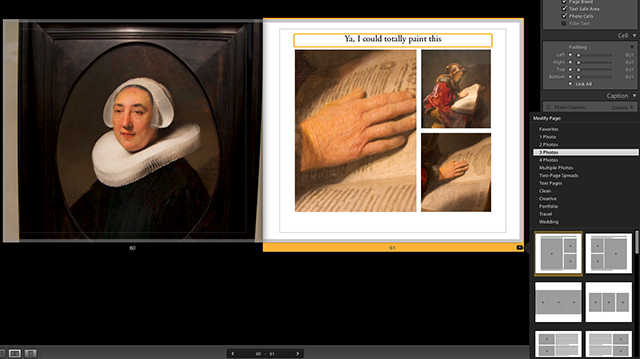
My Rijksmuseum spread view. The light gray border is the bleed area that will be cropped out.
There are borders built into some templates for those who like this kind of thing:
And the type presets are intuitive and clearly labelled with “caption,” “title,” etc. Playing with the book designer is dangerous because it makes even the most banal shots look great next to each other and the gutter gradient overlay gives the impression that you’re browsing a book you already own:
Books can be output to Blurb for publishing as a physical book or to low-res RGB PDF. It’s too bad you can’t control the resolution of PDF exports, but I guess it was to prevent people from emailing 2GB PDF books to their sons.
I art direct magazines and Adobe’s done a really great job of making slick photo and text layouts enjoyable. That’s not easily done. Tweaking page grids and margins is about as fun as changing Web code for IE6 compatibility—it’s a grind—so they deserve credit for making the process something exciting and easy. Sure, they aren’t the first to do it but this is a flawless implementation and there are so many variations of page layout presets that it would be hard to get bored playing with the Books module. I haven’t printed a book for myself, but the prices are low enough that I could be tempted to. Since the Blurb service offers international distribution, I also won’t have problems getting it in French Canadia.
Now, onto the RAW conversions.
RAW conversion showdown
Time for the professional portion of our show. I’m going to shake things up a little and include DxO Optics Pro 7.2.1 in this comparison. It’s good software and, with the exception of its lacking 64-bit support, it is definitely professional-grade. There are plenty of RAW converters out there, but adding even one gives me about 4 more hours of work to do for these tests. I just can’t review them all. Since there isn’t anything significantly different between the noise and sharpening in Lightroom 3 and 4, I’m not including results from version 3.
The full test line-up:
- Aperture 3.2.3
- Bibble Pro 5.2.3
- Capture One Pro 6.3.5
- DxO Optics Pro 7.2.1
- Lightroom 4 (how badly would this review suck if this was missing?)
As always, the goal of the conversions is to reduce luminance and chromatic noise as much as possible while increasing detail and getting rid of chromatic aberration, if any. No tonal adjustments are done so don’t look at the comparison images and think “this looks a bit washed out—the program must be crappy.” This makes a quality comparison easier—we aren’t comparing basic color editing features, which are pretty even across the board. Also, I didn’t pick these photos because they’re great pics—they were chosen because they present a variety of challenges to the RAW converters.
To see the uncropped high-res PNG files for each conversion, click the cropped image under the software’s name.
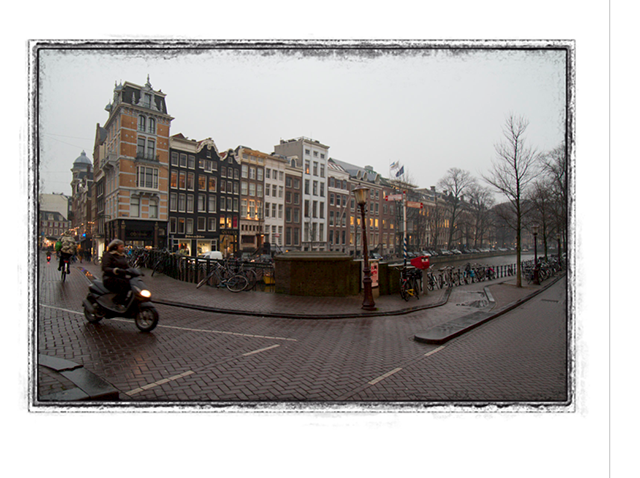
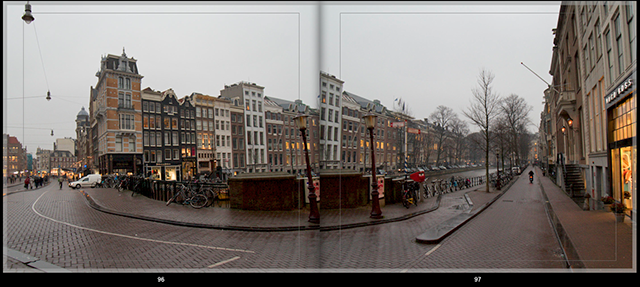
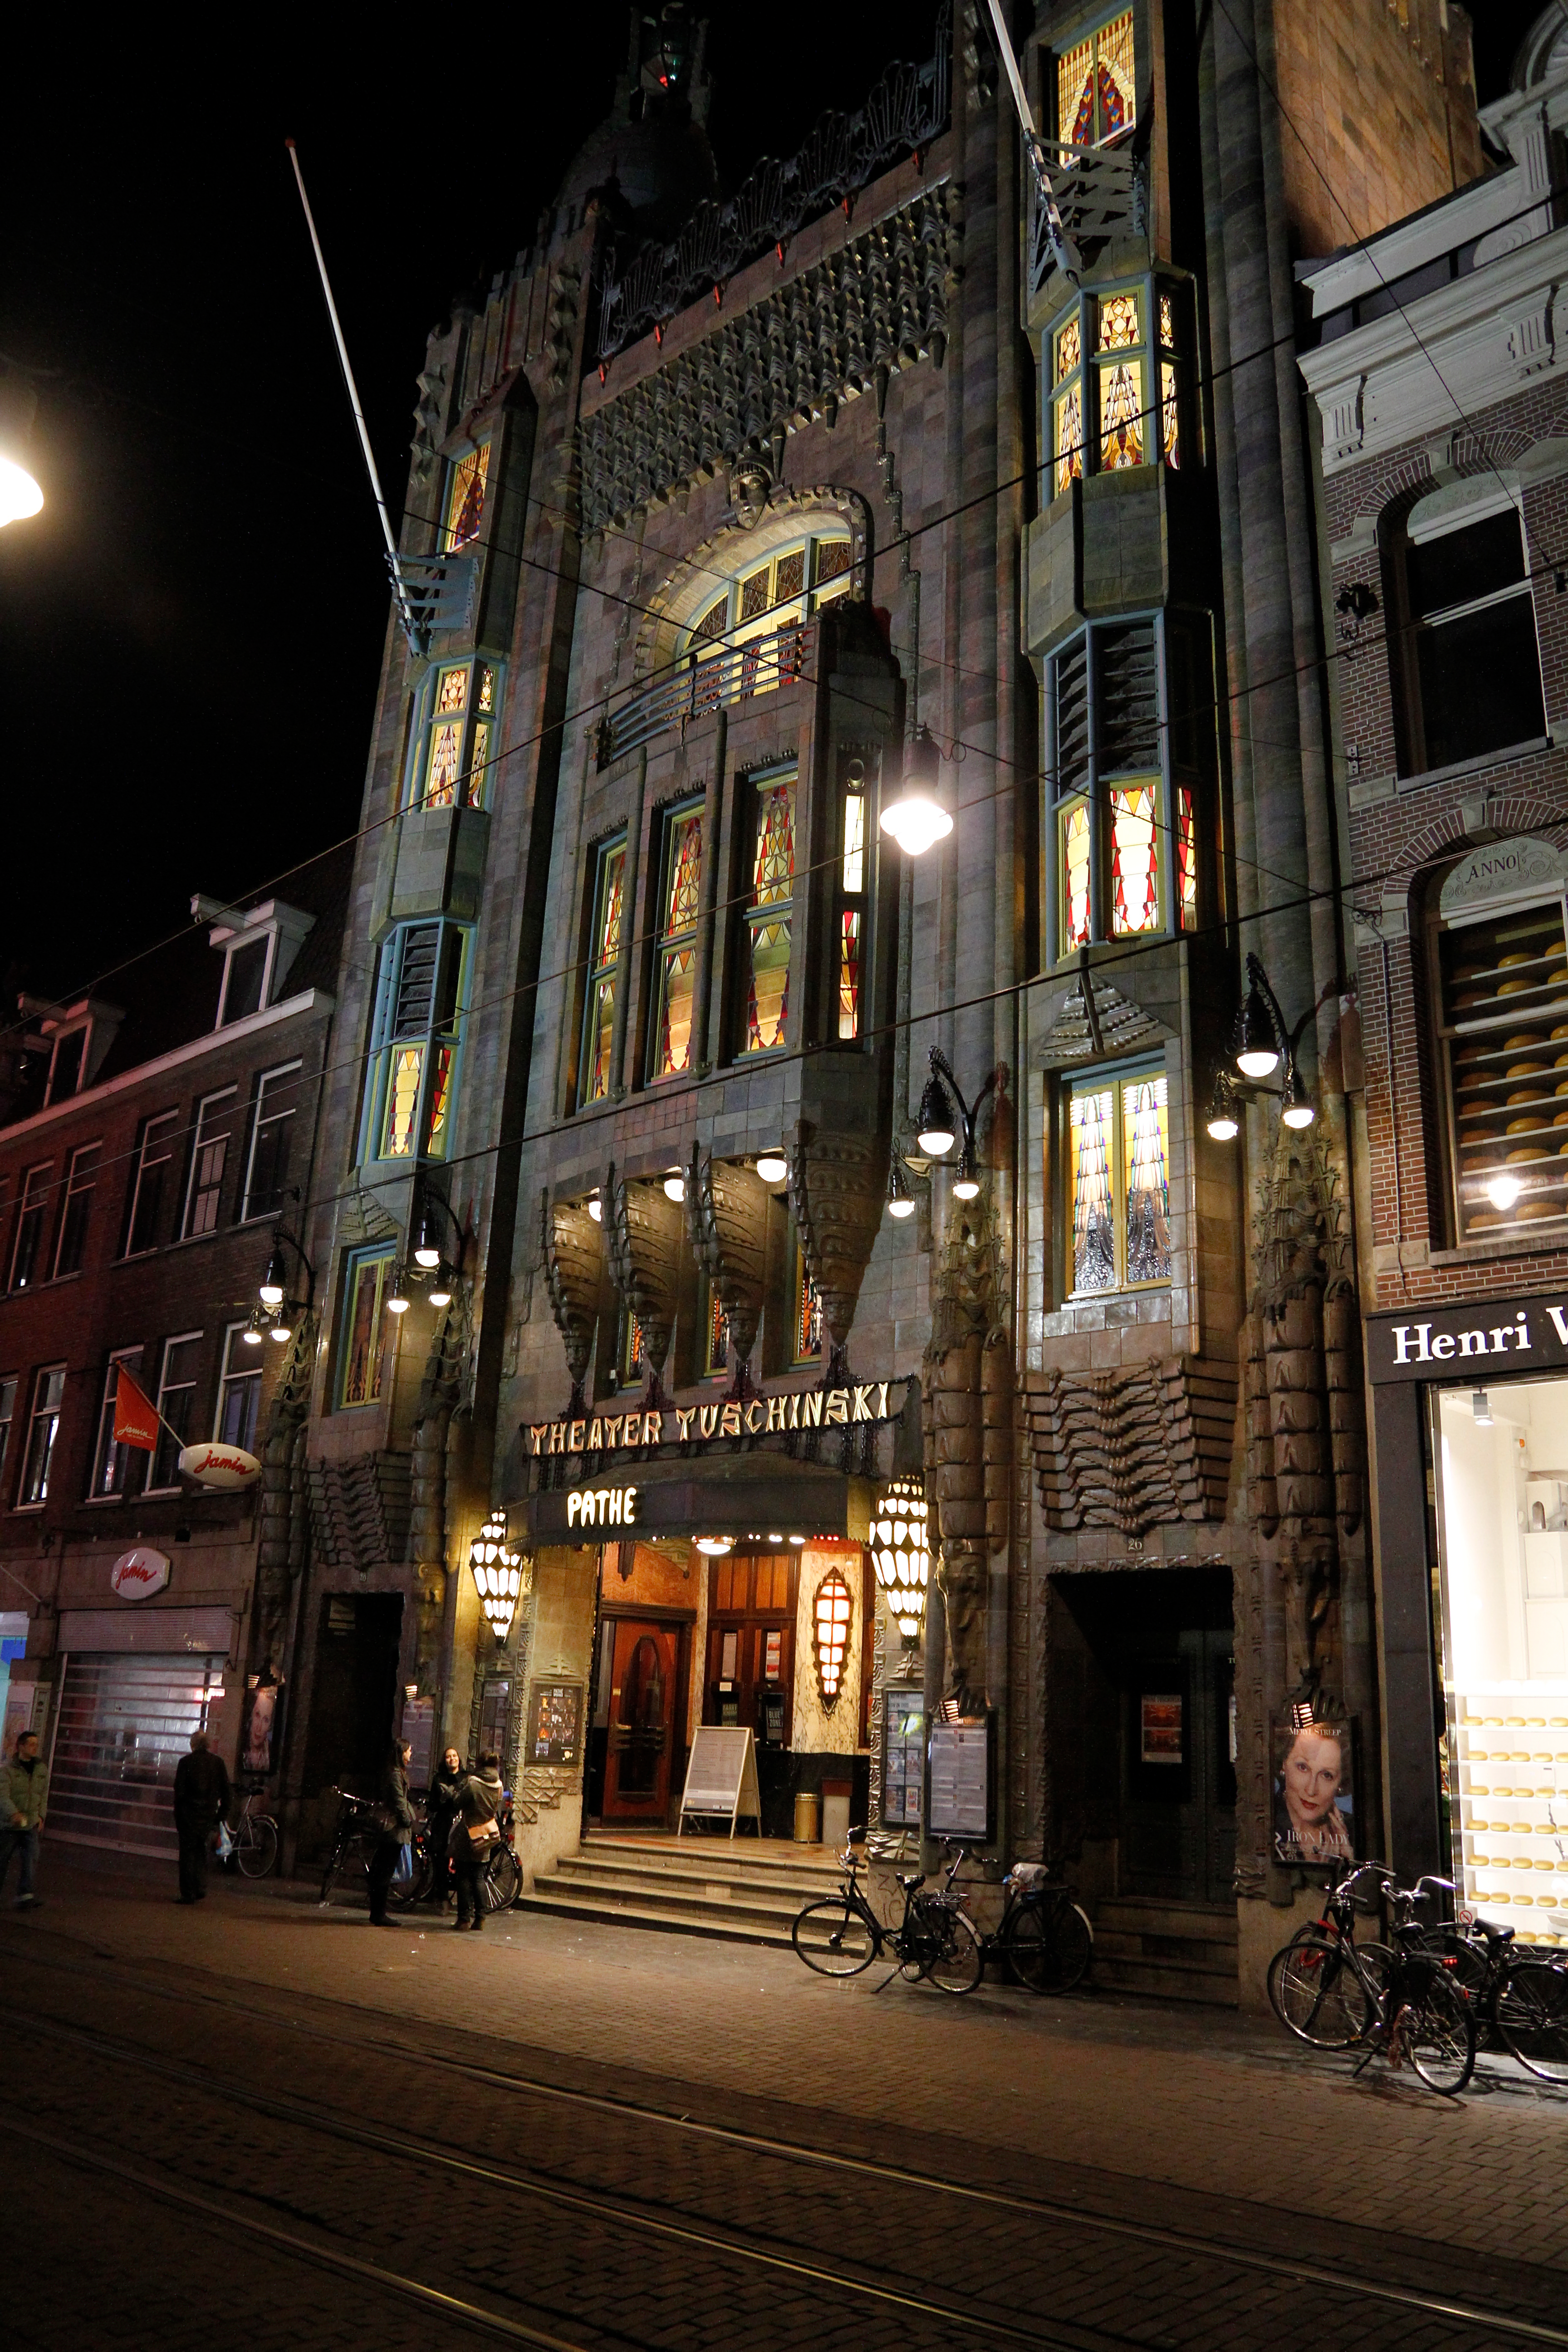
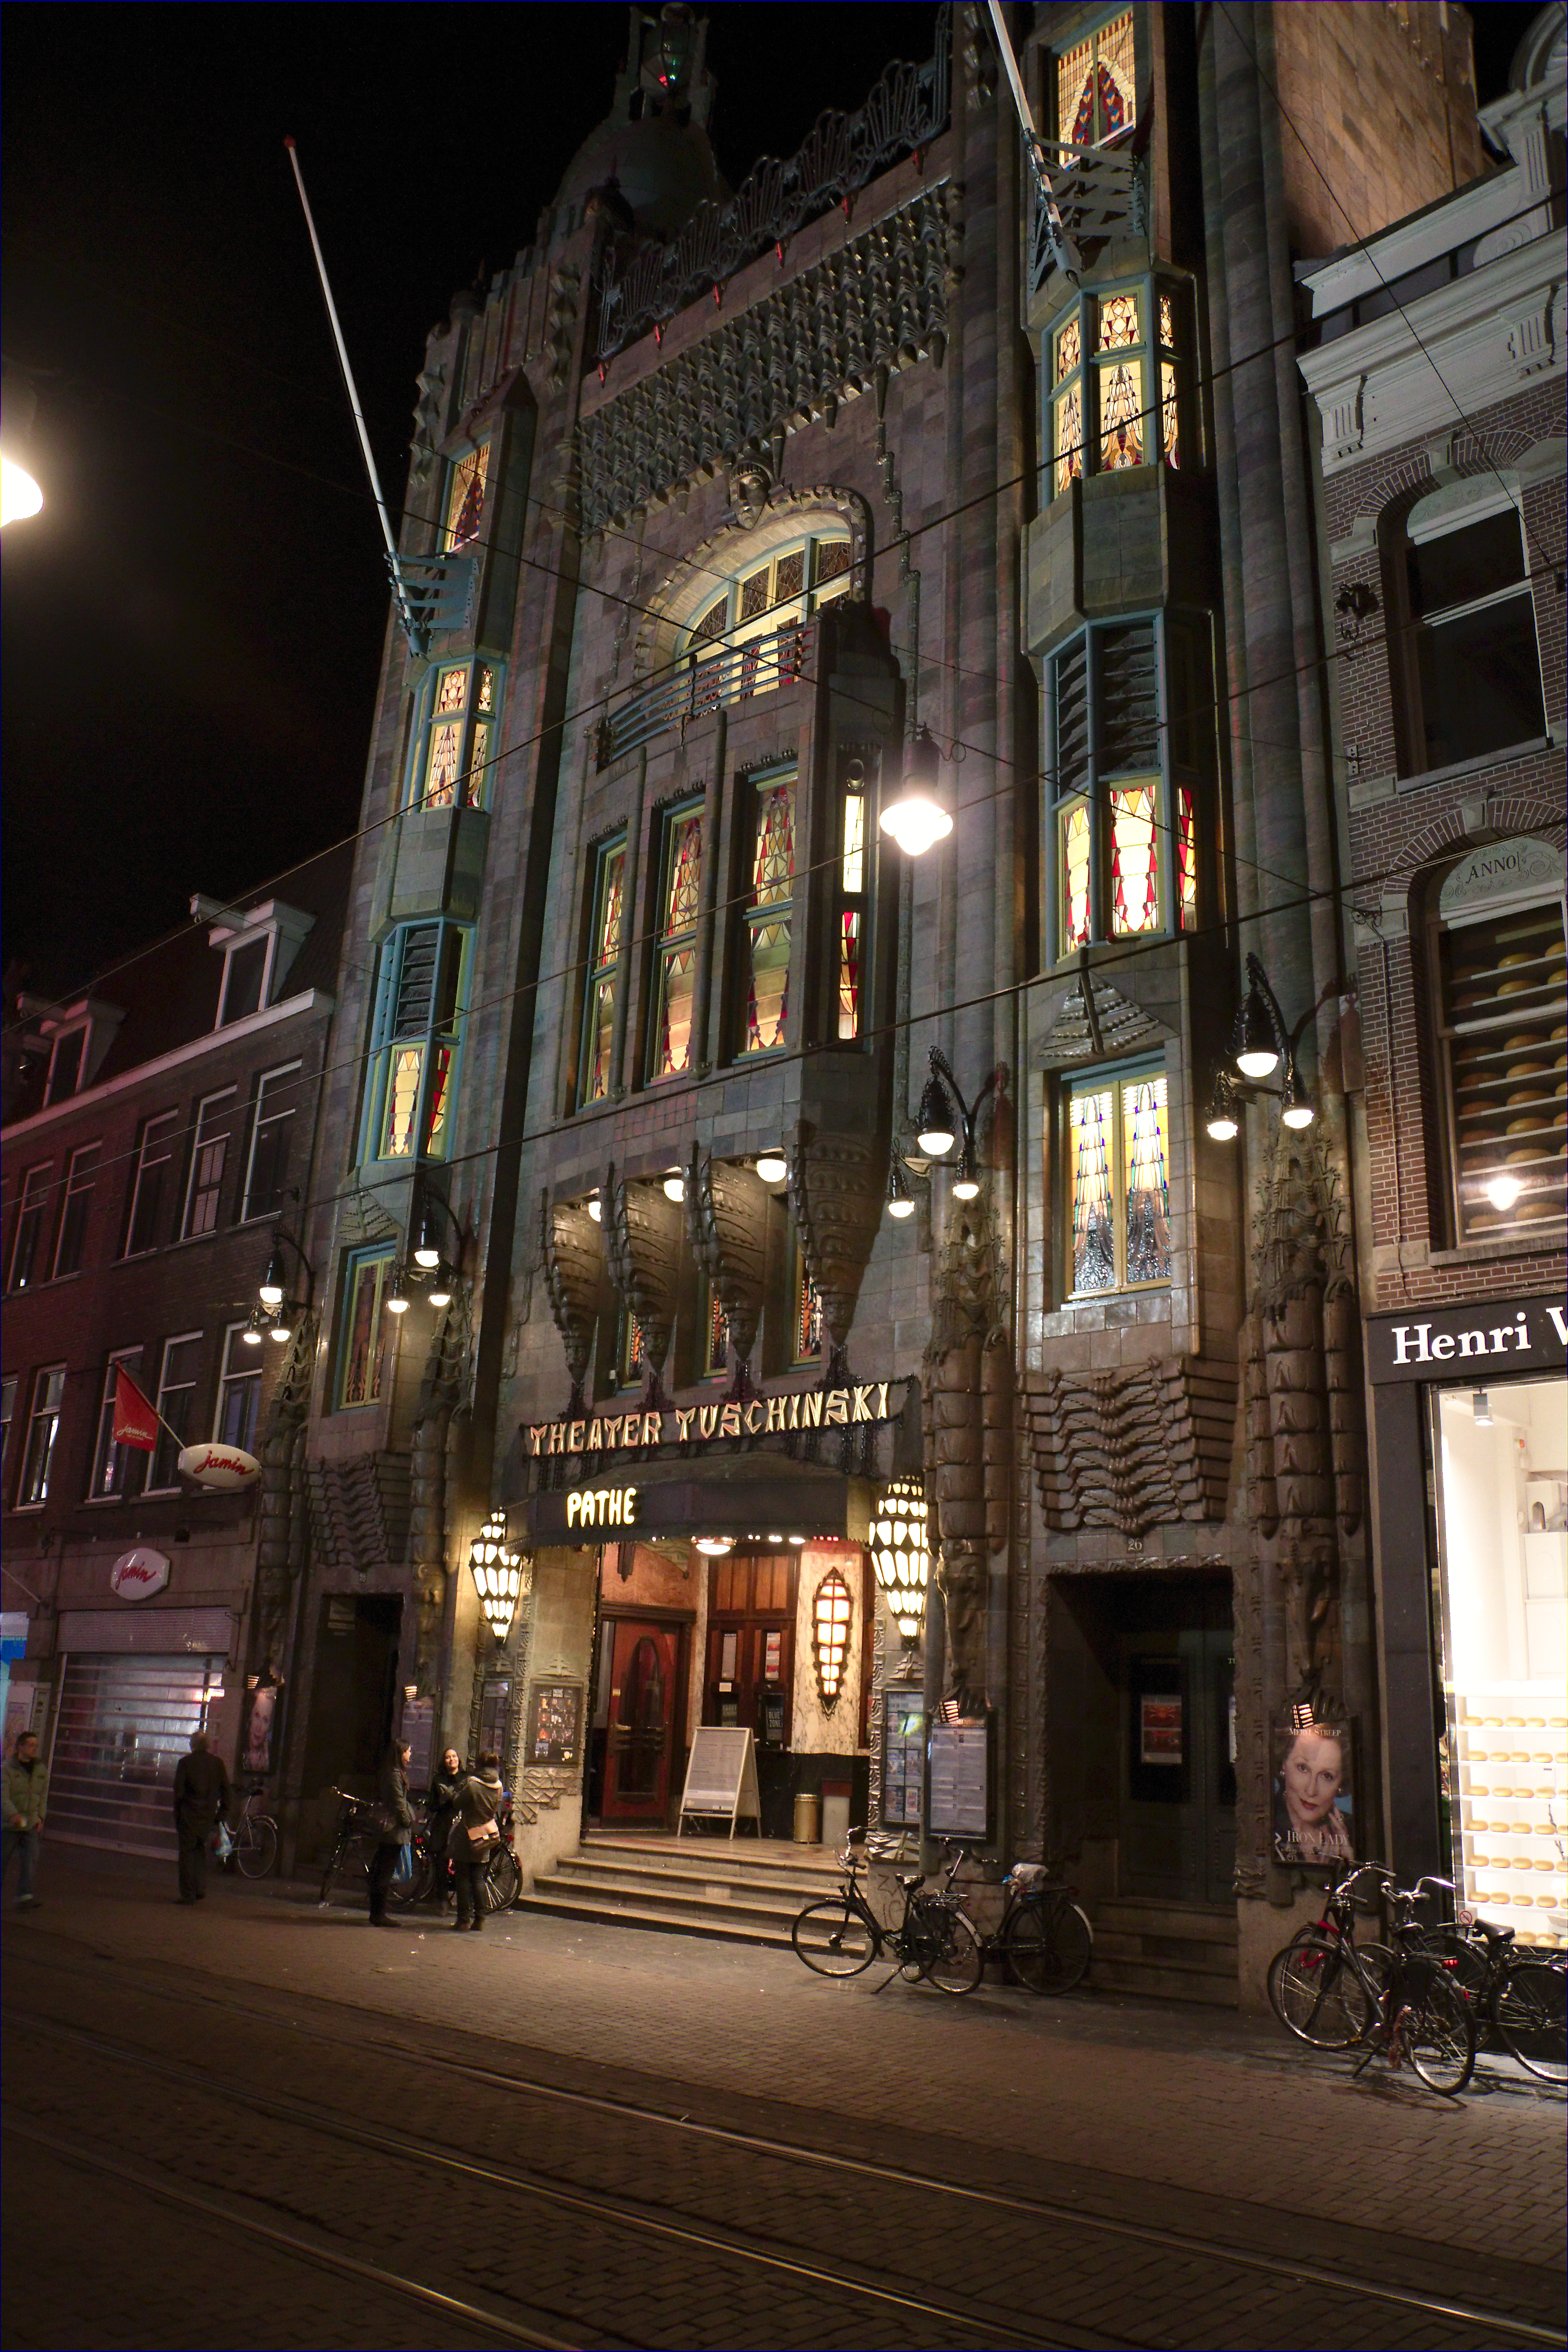
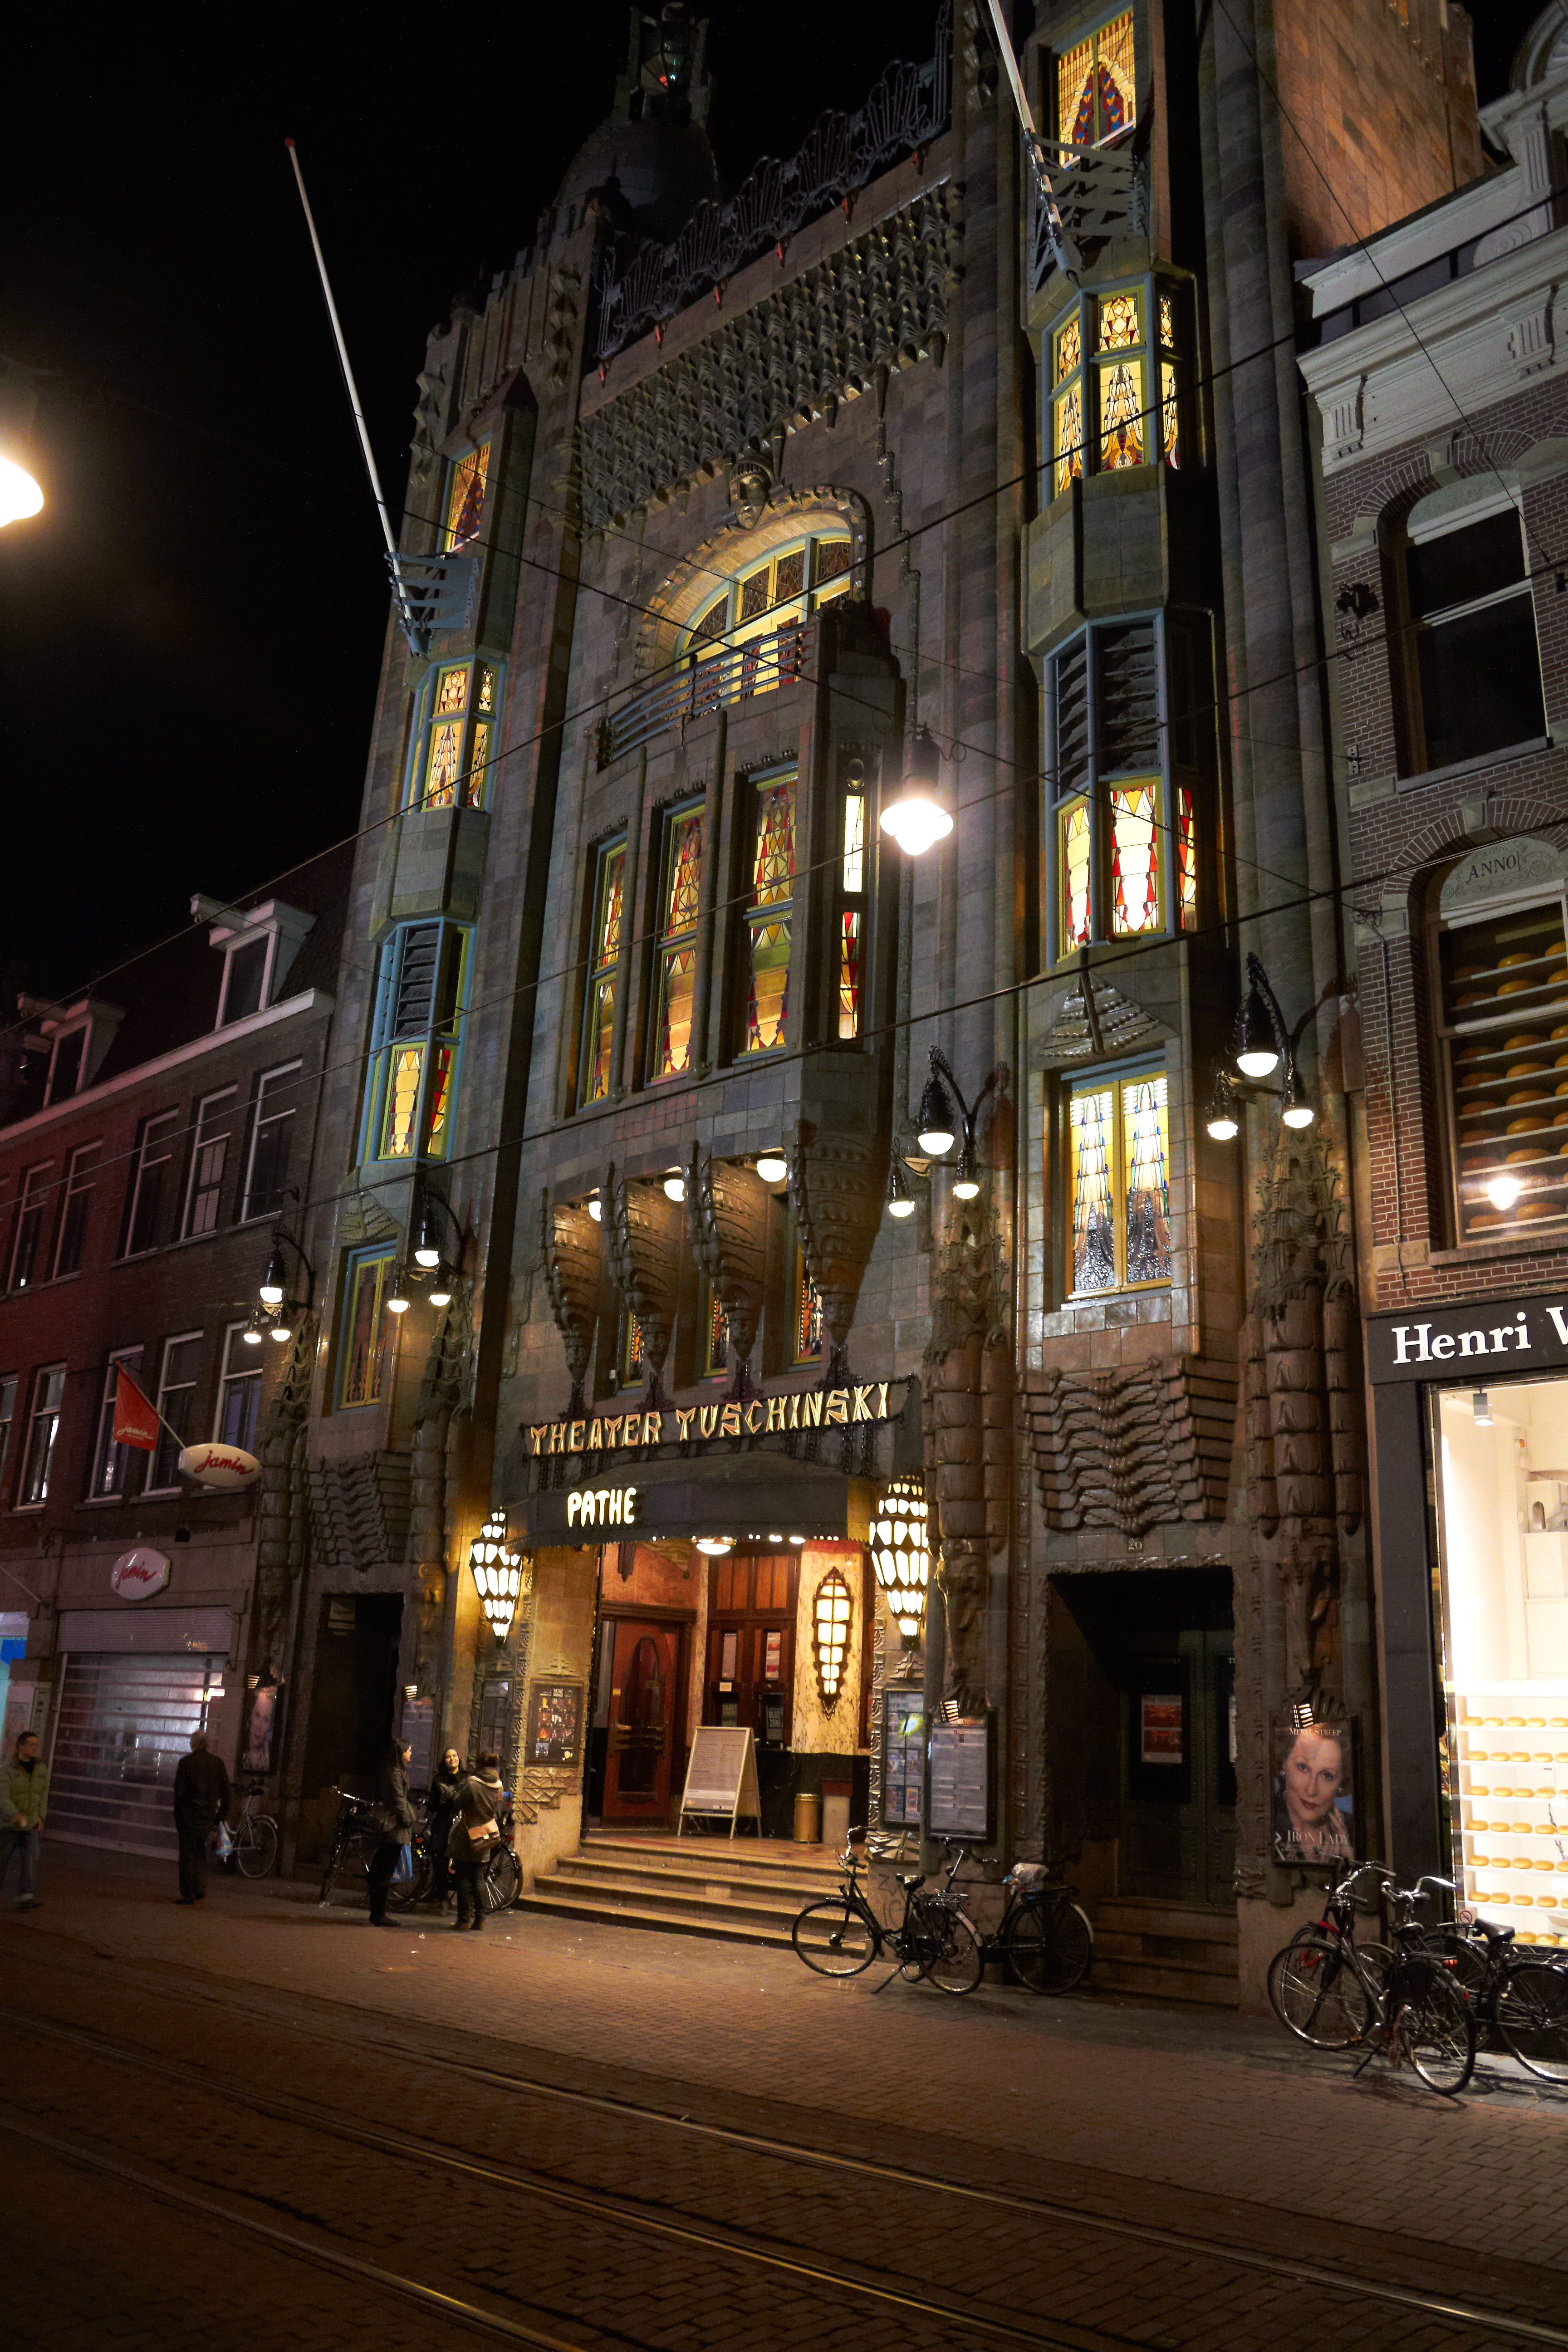
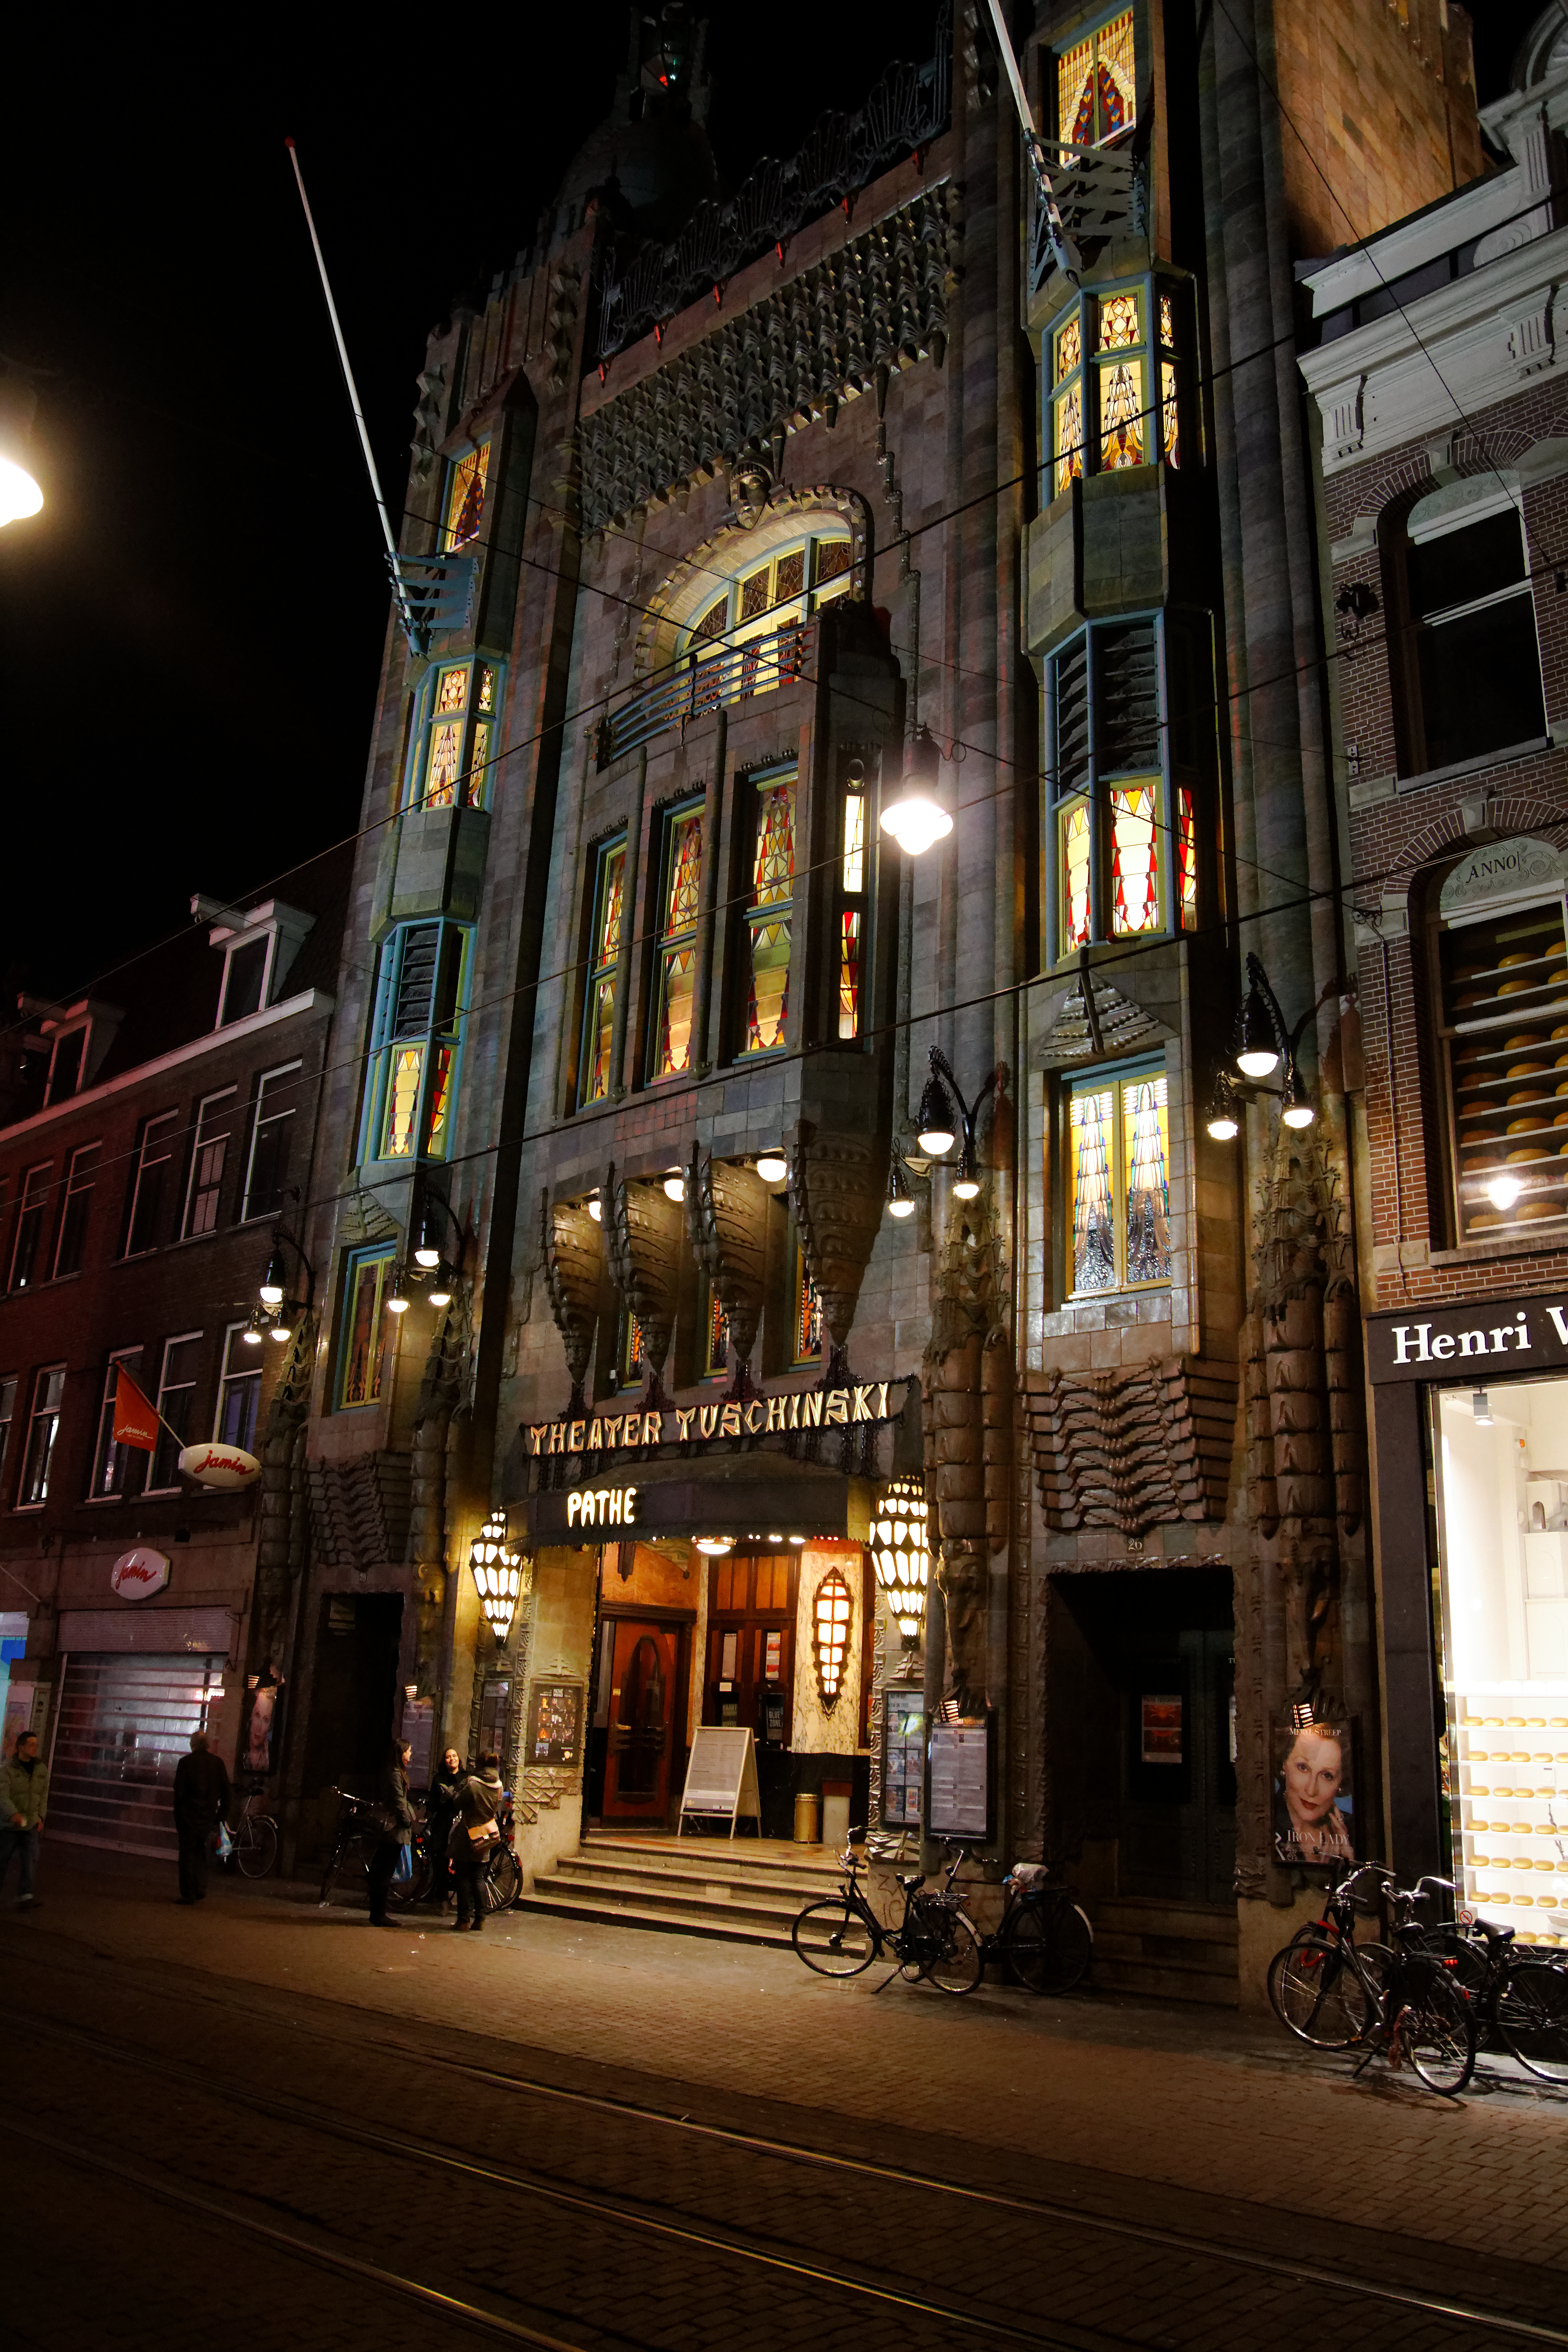
Amsterdam night shot Canon 7D 2000ISO
These pics are from my first time visiting Amsterdam and everything you’ve heard is true—the stairs are really steep there.
Aperture
It’s good but it’s not the most pleasing result of the lot, with prevalent murky noise. Chromatic aberration results are about the same as Lightroom—decent but not great. Just beats out the Bibble Pro result but it’s near the bottom for sure.
Bibble Pro
With the default unregistered version of Noise Ninja noise reduction tool, Bibble has a hard time getting smooth results since you can’t isolate chroma and luminance noise settings. The end result is too smooth in some areas and too noisy in others. It has an overall junky feeling but the chromatic aberration removal is good, even if it does leave a fringe around the edge of the image. Obviously Bibble needs to stop relying on a paid upgrade of Noise Ninja for a complete noise removal solution.
Capture One Pro
I was expecting Capture One to have its usual problems with high-noise images but it looks like the developers have worked hard to address that. This conversion looks quite good. It has a richness to it but it’s still a bit too murky with some stuck-pixel-like blips that need cleaning up. The evaluative chromatic aberration is nearly flawless and just bests DxO for the best CA-removal result.
DxO Optics Pro
Very good conversion from DxO even though it’s slightly noisier than the Lightroom 4 result. The sharpness and gradual transitions are really good, and it’s really just the blippy artifacts and slight jaggedness to the window edges that are keeping it from being exceptional. Also, that red fringing is a problem.
Lightroom 4
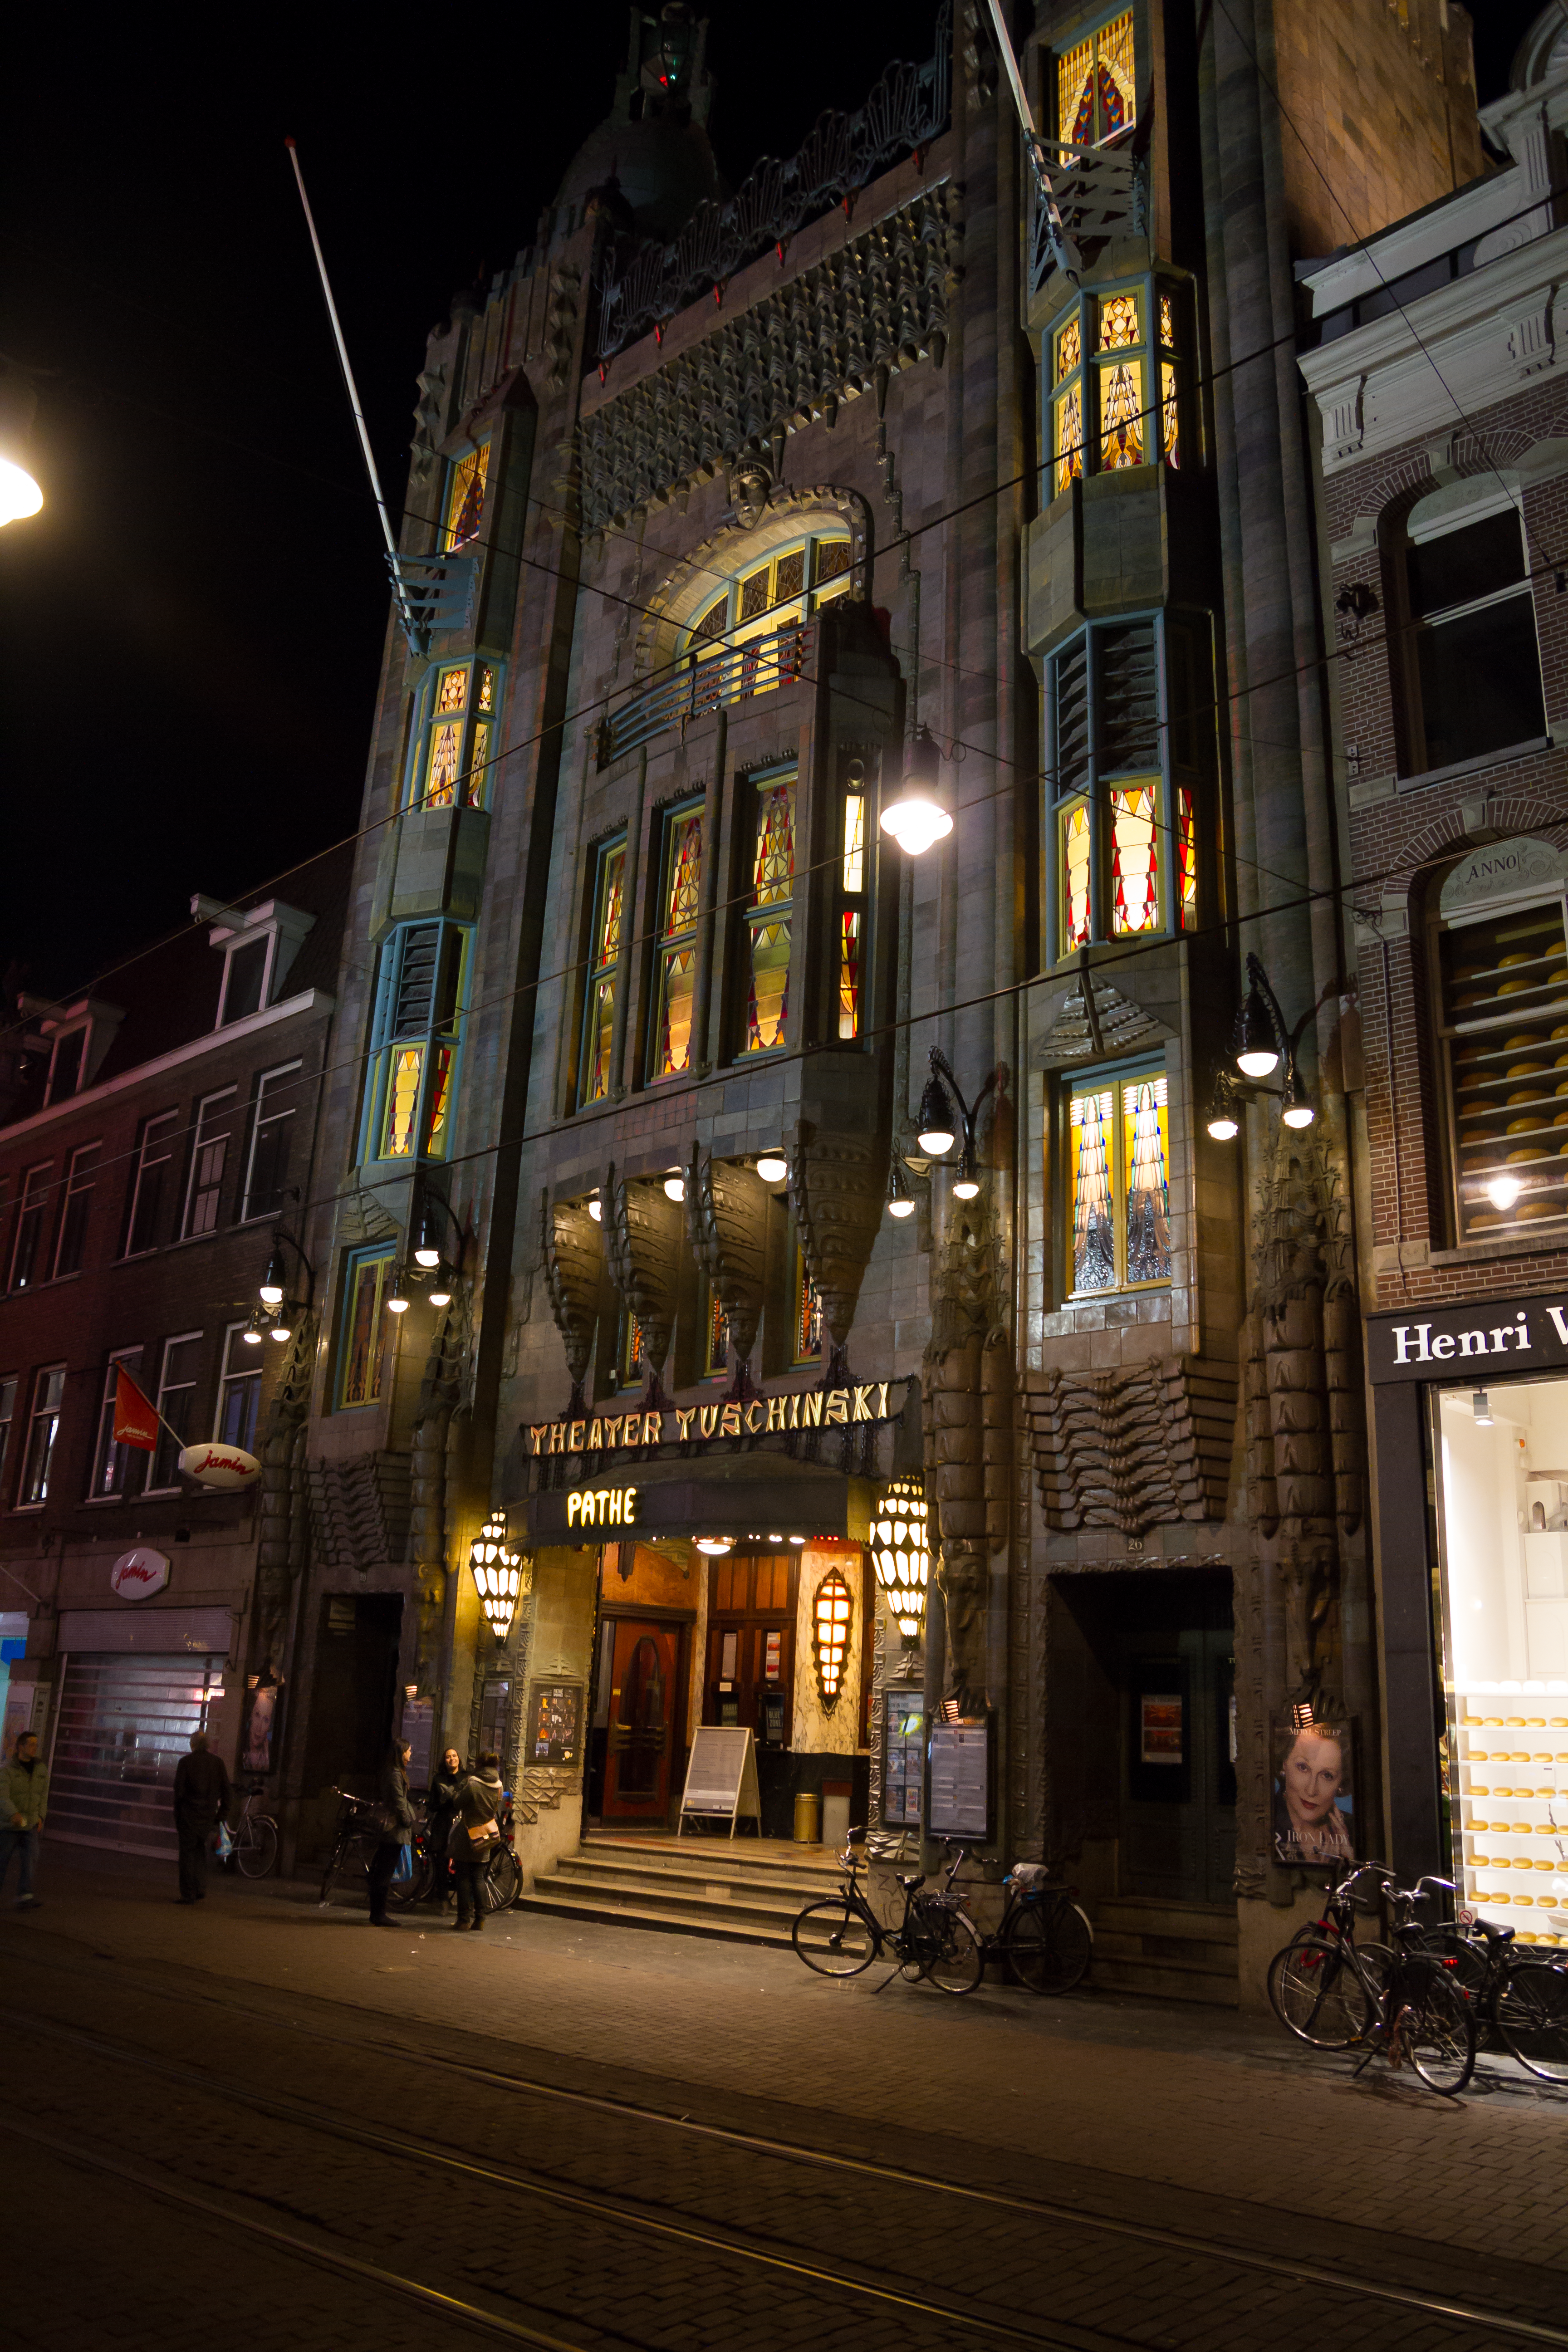
A stellar conversion overall and surprisingly sharp and noise free for 2000ISO at night with the 7D. Chromatic aberration reduction is not as good as DxO Optics Pro or C1 but it’s definitely the cleanest looking overall. The lines around the stained glass windows are free of artifacts, showing that Lightroom’s initial RAW demosaic filter really helps with a tricky combo of sharp lines and noise. The only issue the red fringing. This is the poster child for shooting RAW and it could pass for a 200ISO JPEG from the camera. “Lush” and “2000ISO” are not things you usually see in one sentence.
Winner: Lightroom 4
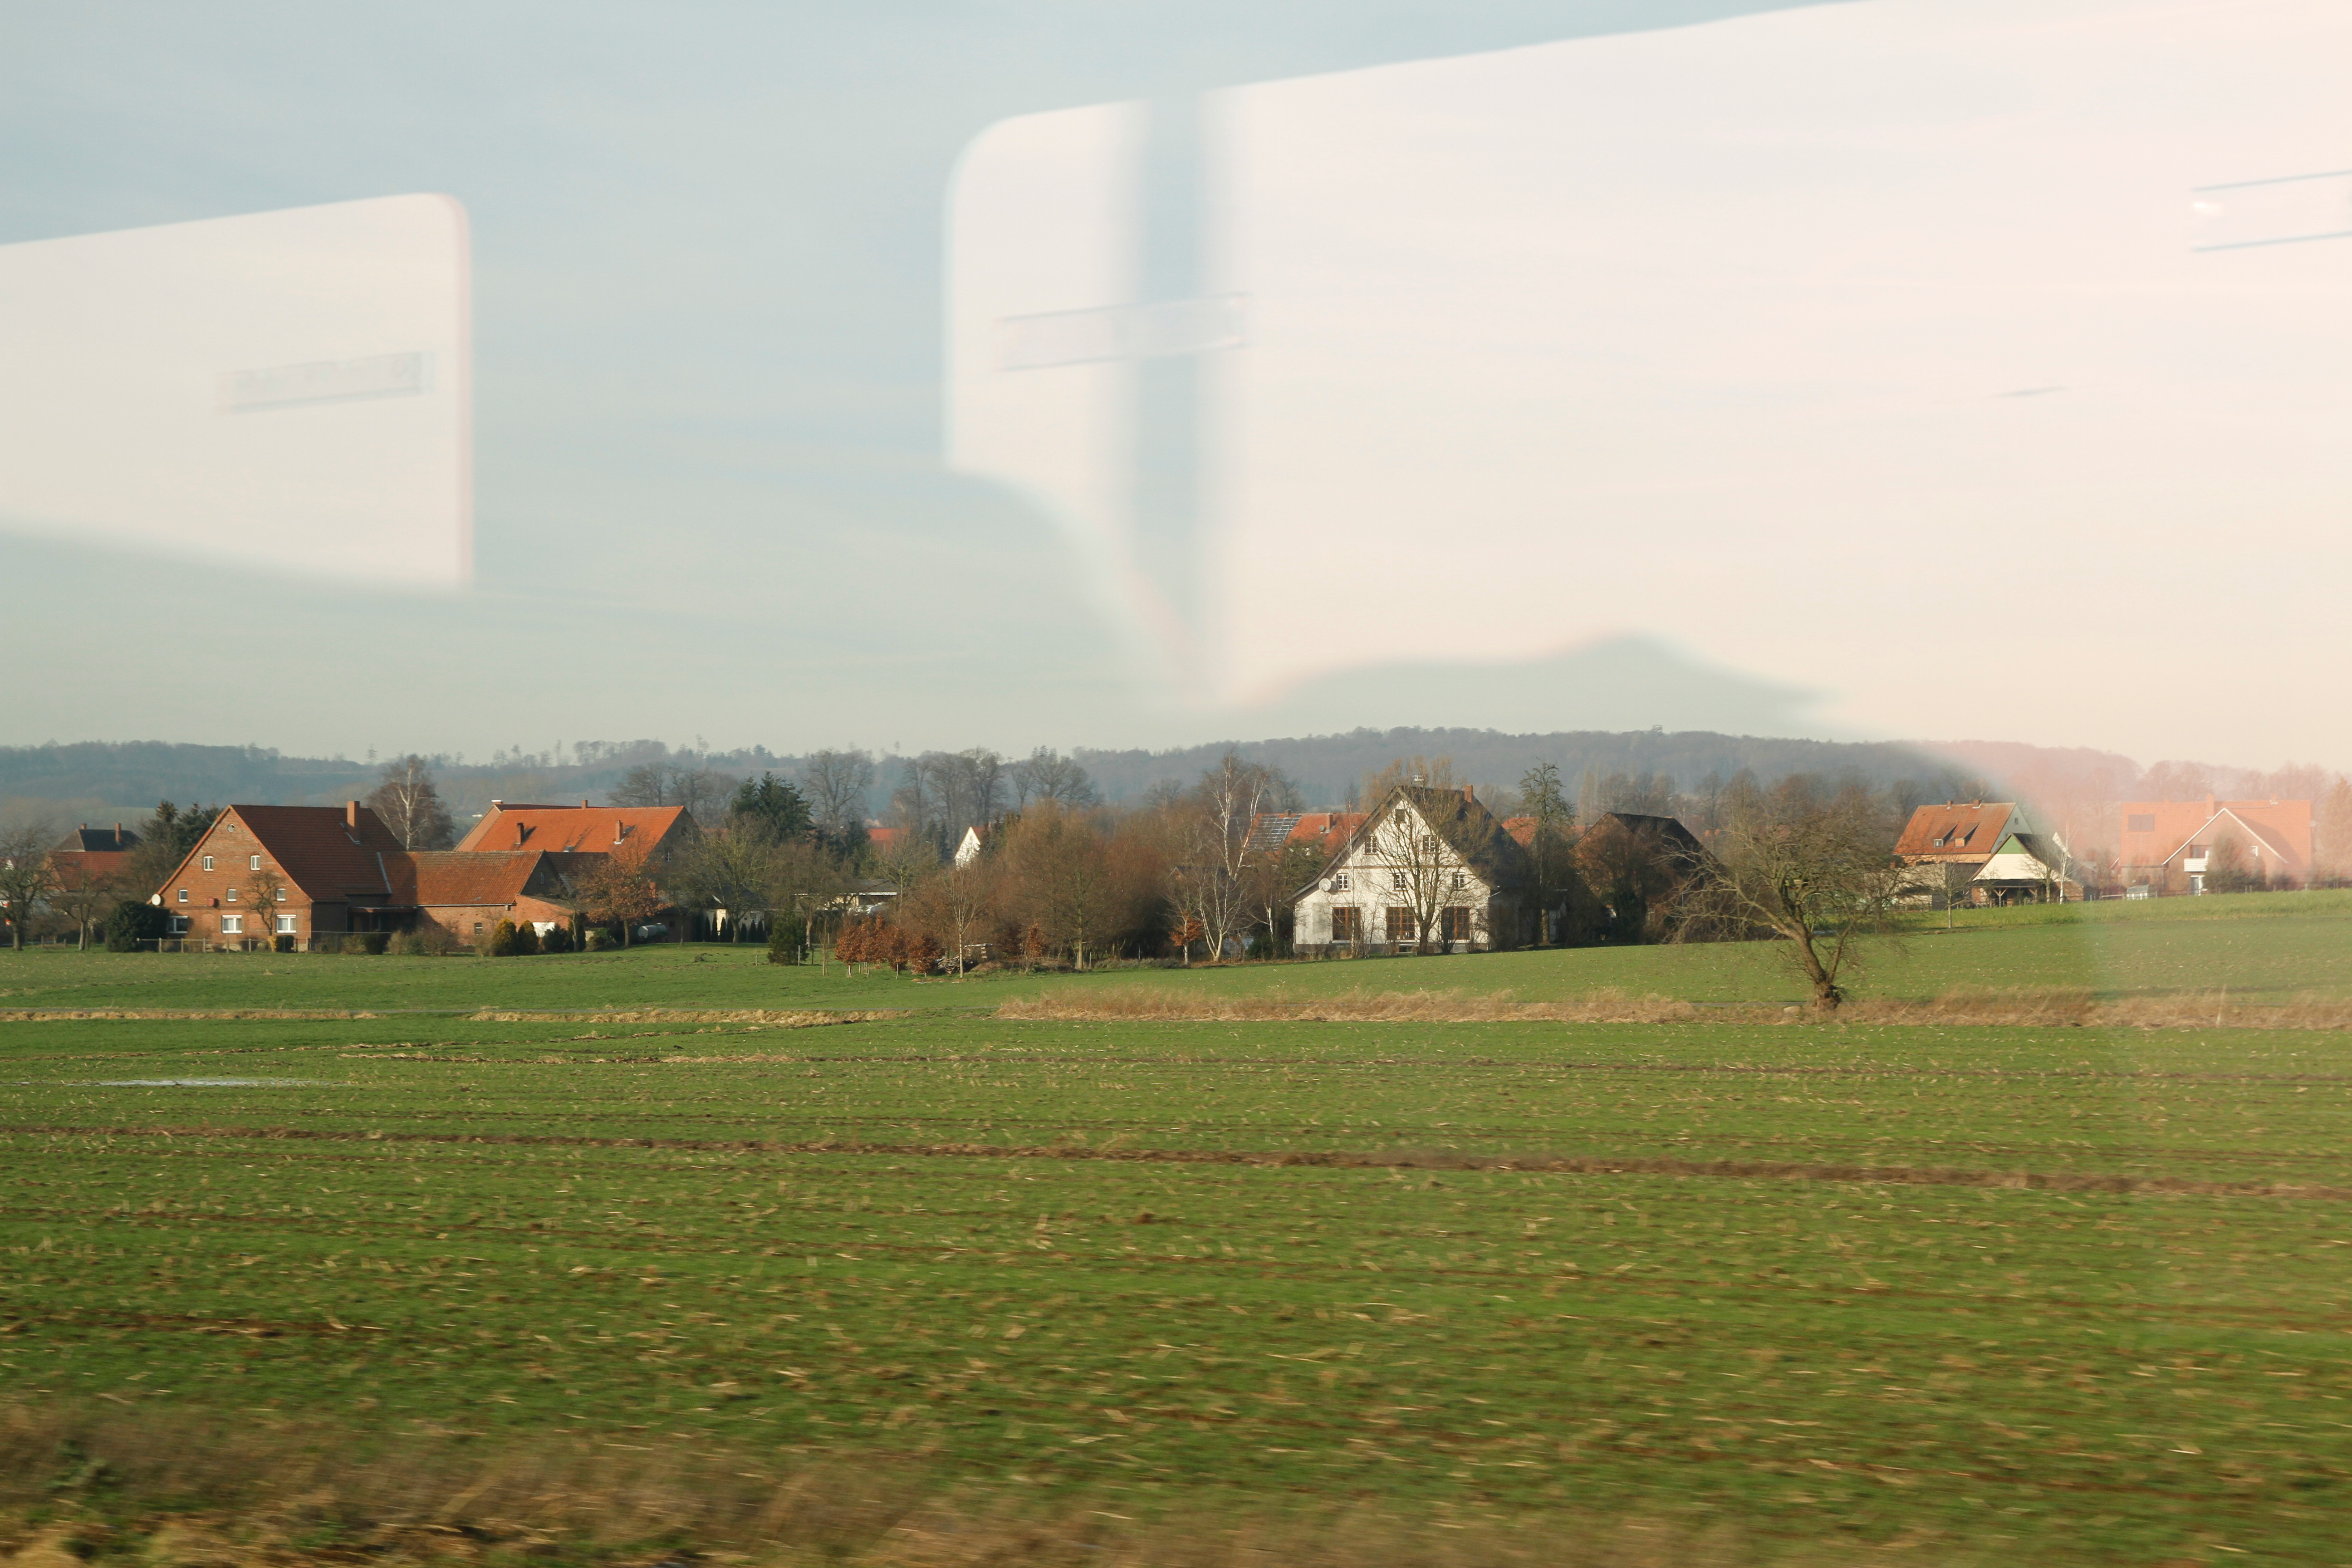
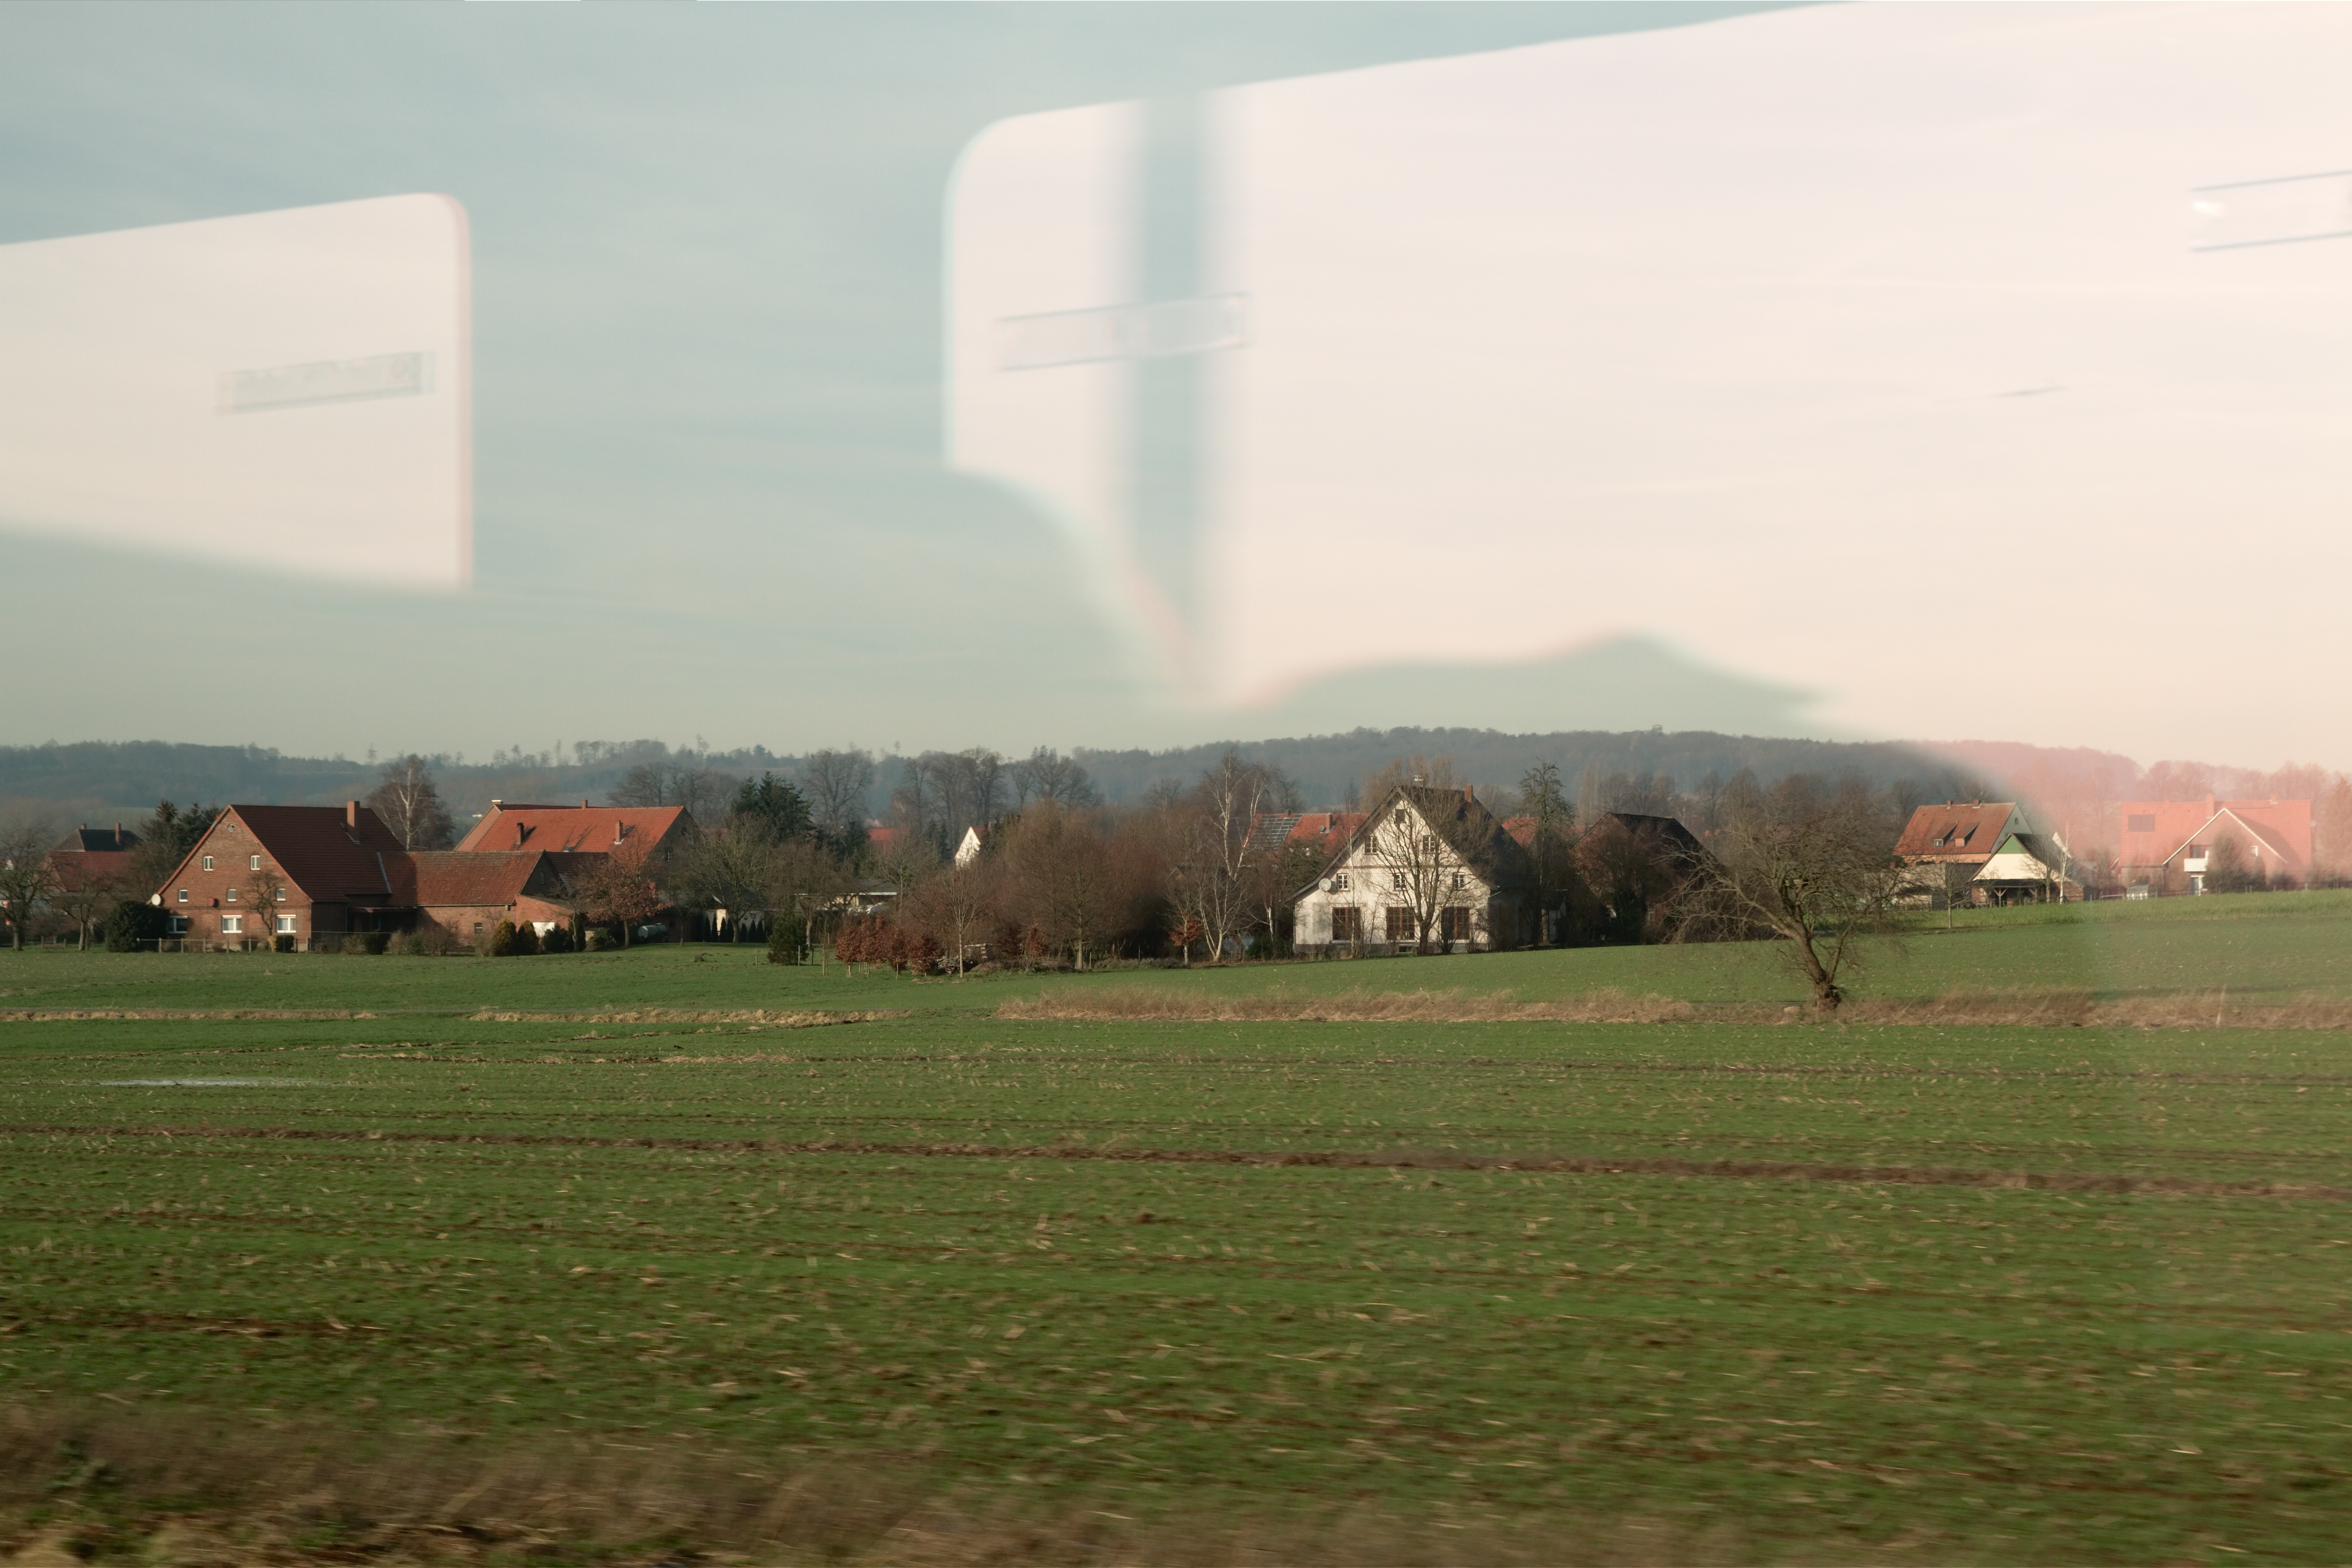
Dutch train ride 200ISO
Ask your lover to give you a Dutch train ride some time. This was a tricky conversion because I wanted the buildings to look sharp but not so sharp that it popped them out from the motion blur in the foreground. There was also the challenge of preserving the fluctuations in color in the background leaves, since many apps could mistake that as very low-frequency chromatic noise.
Aperture
The Aperture result is okay, but it’s a little too smooth around the the overlapping tree branches and the tree in front of the white house is starting to get halos from oversharpening. We’re getting a middle-of-the-road result. If it was a school paper, it’d get a B-.
Bibble Pro
The Bibble Pro conversion is more natural-looking and noticeably sharper around the foreground trees. Background luminance noise is well suppressed and the overall image is very pleasing, with rich transitions.
Capture One Pro

This is the archetypal Capture One conversion—you can hate the blips if you look up close but at 100 percent, it looks very good. C1 does little initial anti-aliasing so you get a lot of little stuck pixel-like blips, but it’s a trade-off for the very sharp results it gets. The trees to the left of the white house feel less muddy than the other conversions. The high sharpness is not haloed and the white house and foreground trees look very good. It’s a little too noisy in the background but overall it’s a great conversion.
DxO Optics Pro 7
Another very good conversion from DxO. Very sharp without harsh transitions and really nice noise suppression in the background. This is a really film-like image but the trees to the left of the white house are a little muddy.
Lightroom 4

We’re getting a very good conversion from Lightroom but it has a painted feel. I’m guessing this results from anti-aliasing in the demosaic algorithm and then resharpening, even though my detail settings and noise reduction levels were optimal.
Winner: Capture One Pro
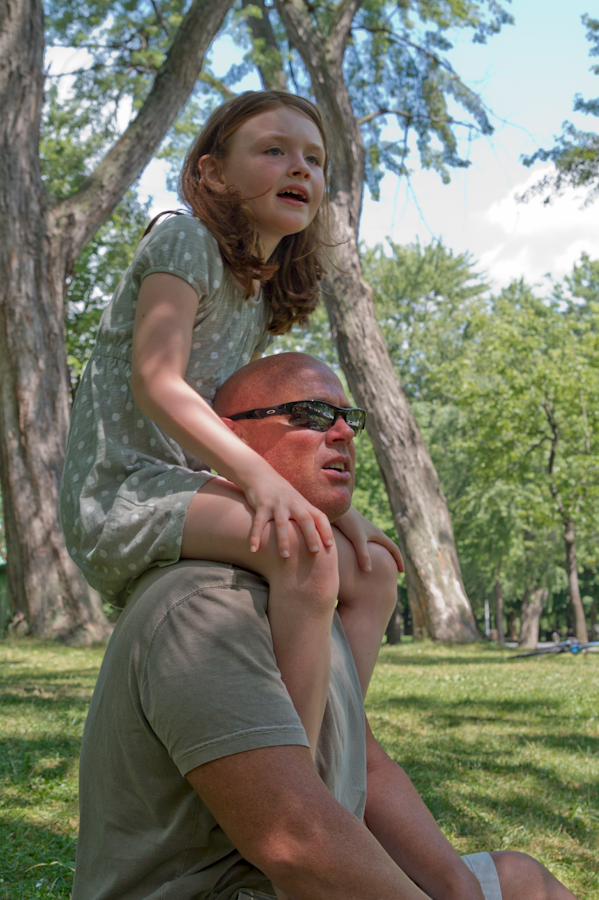
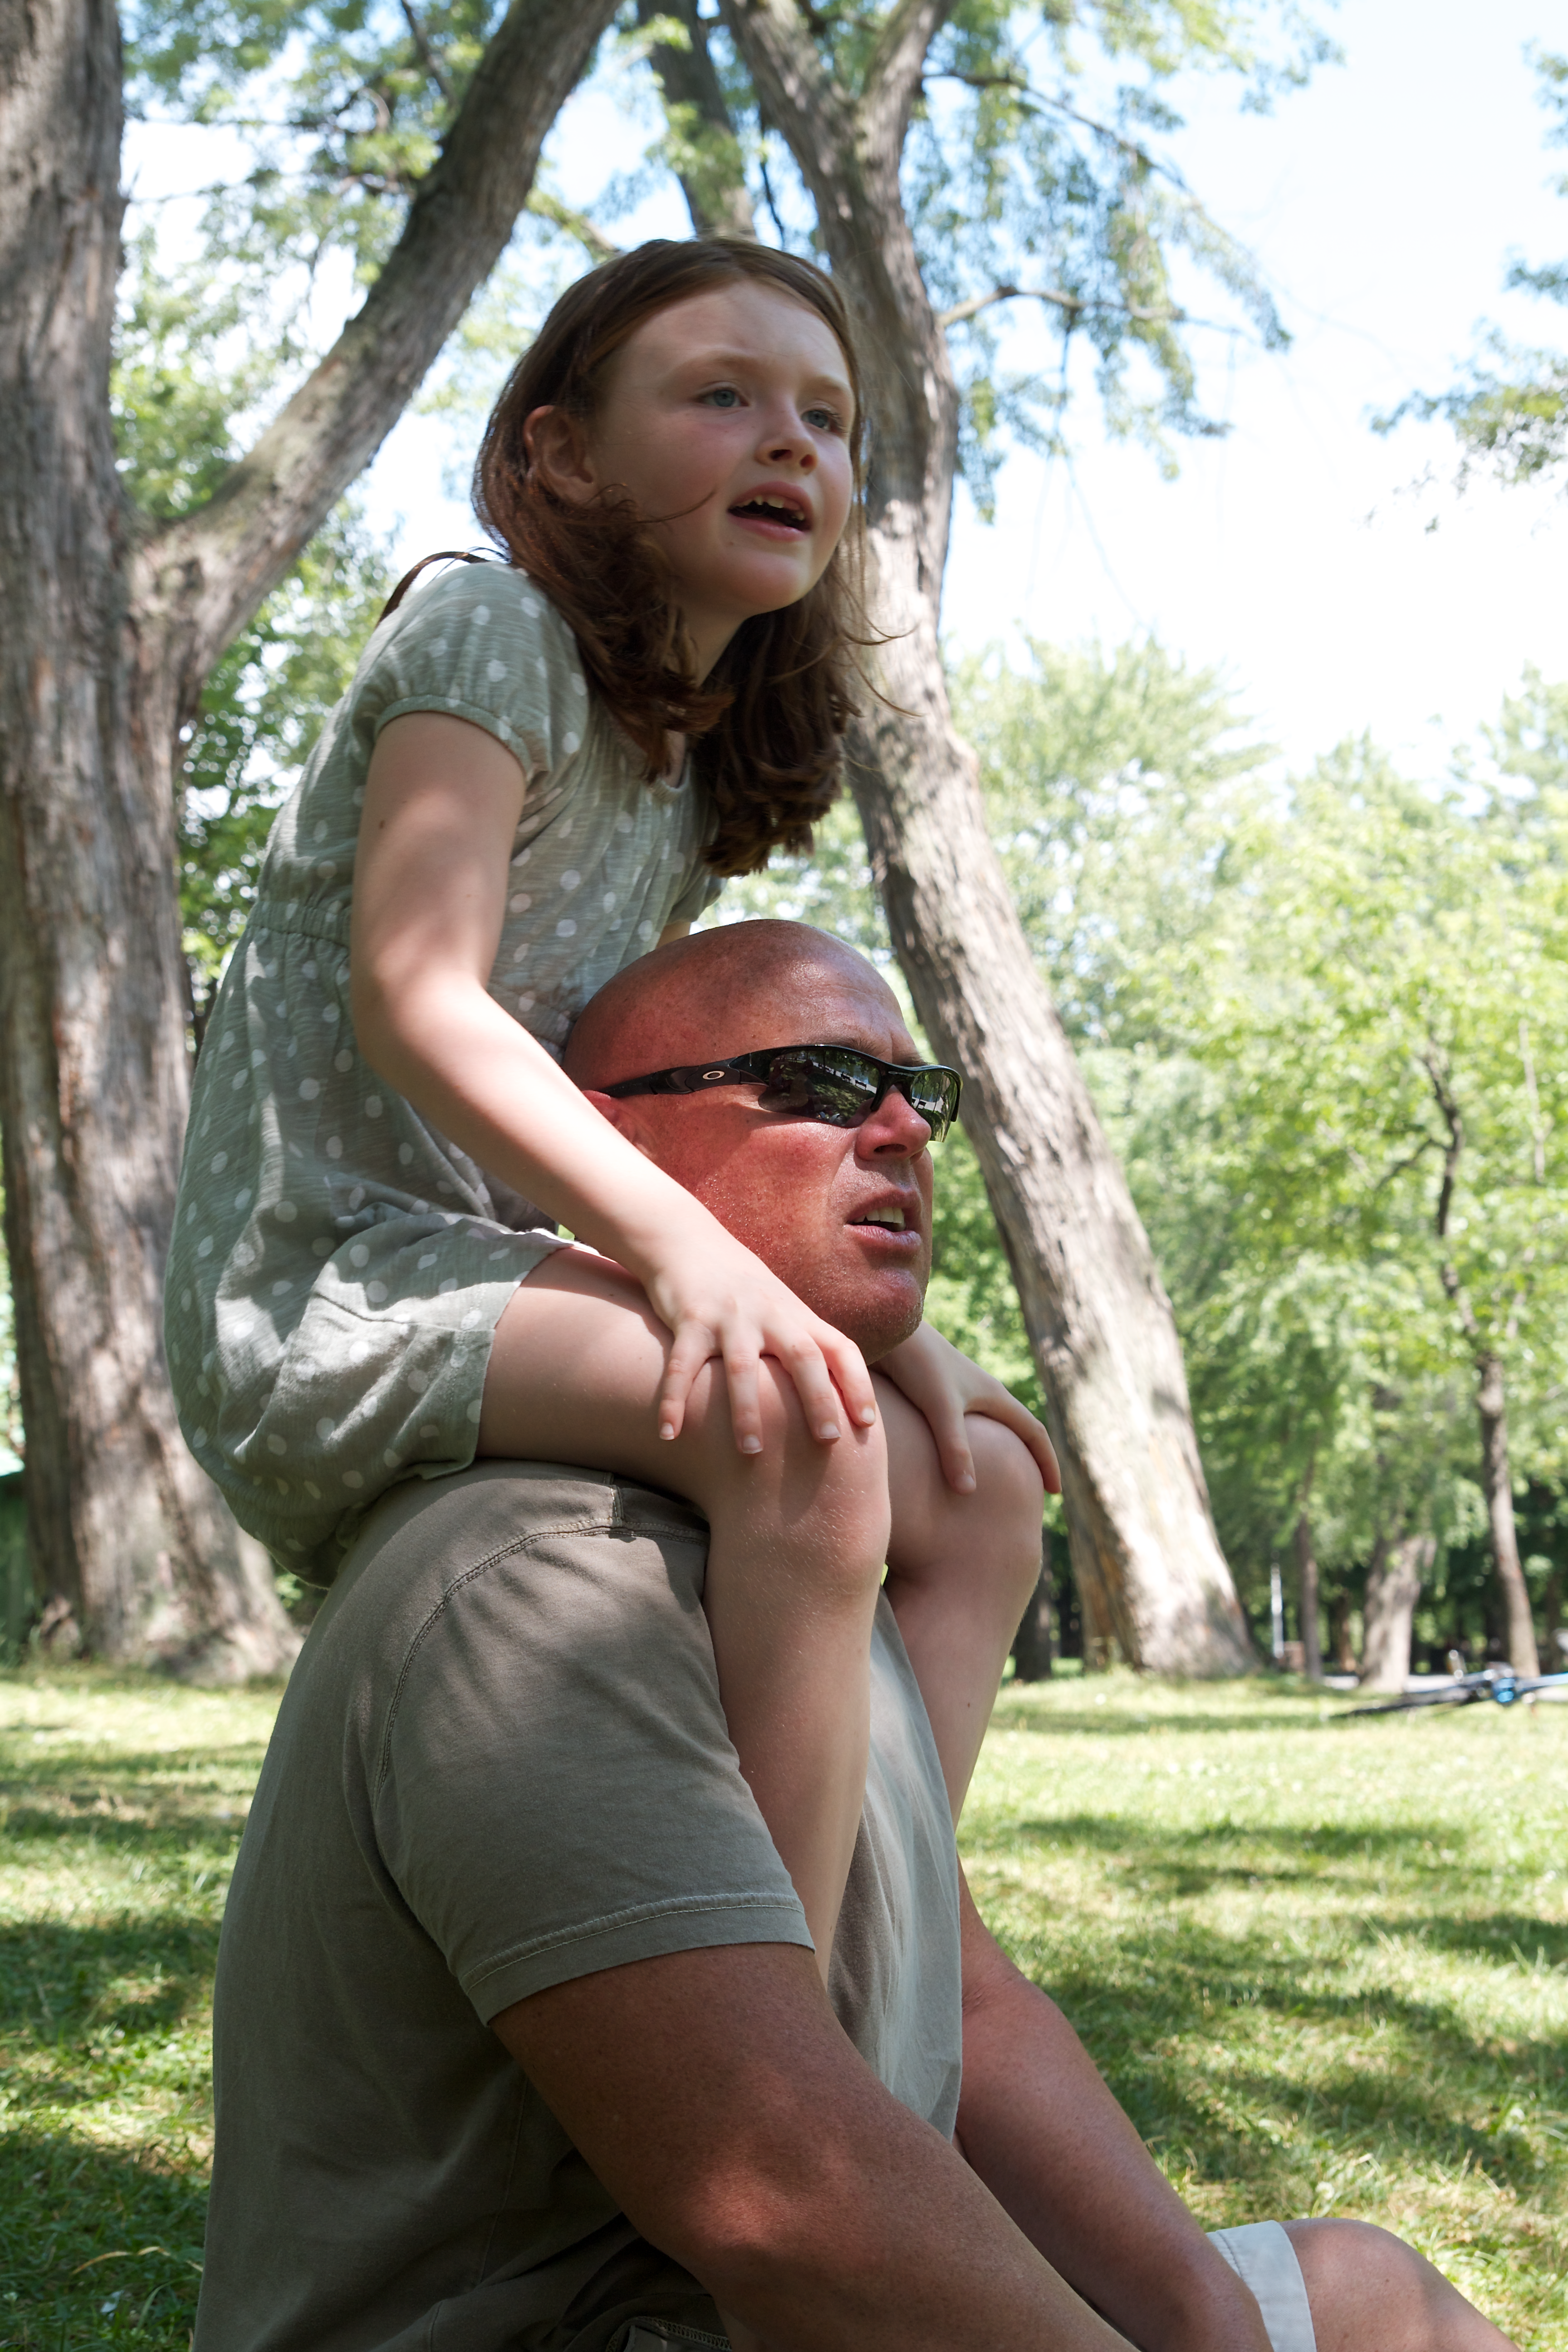
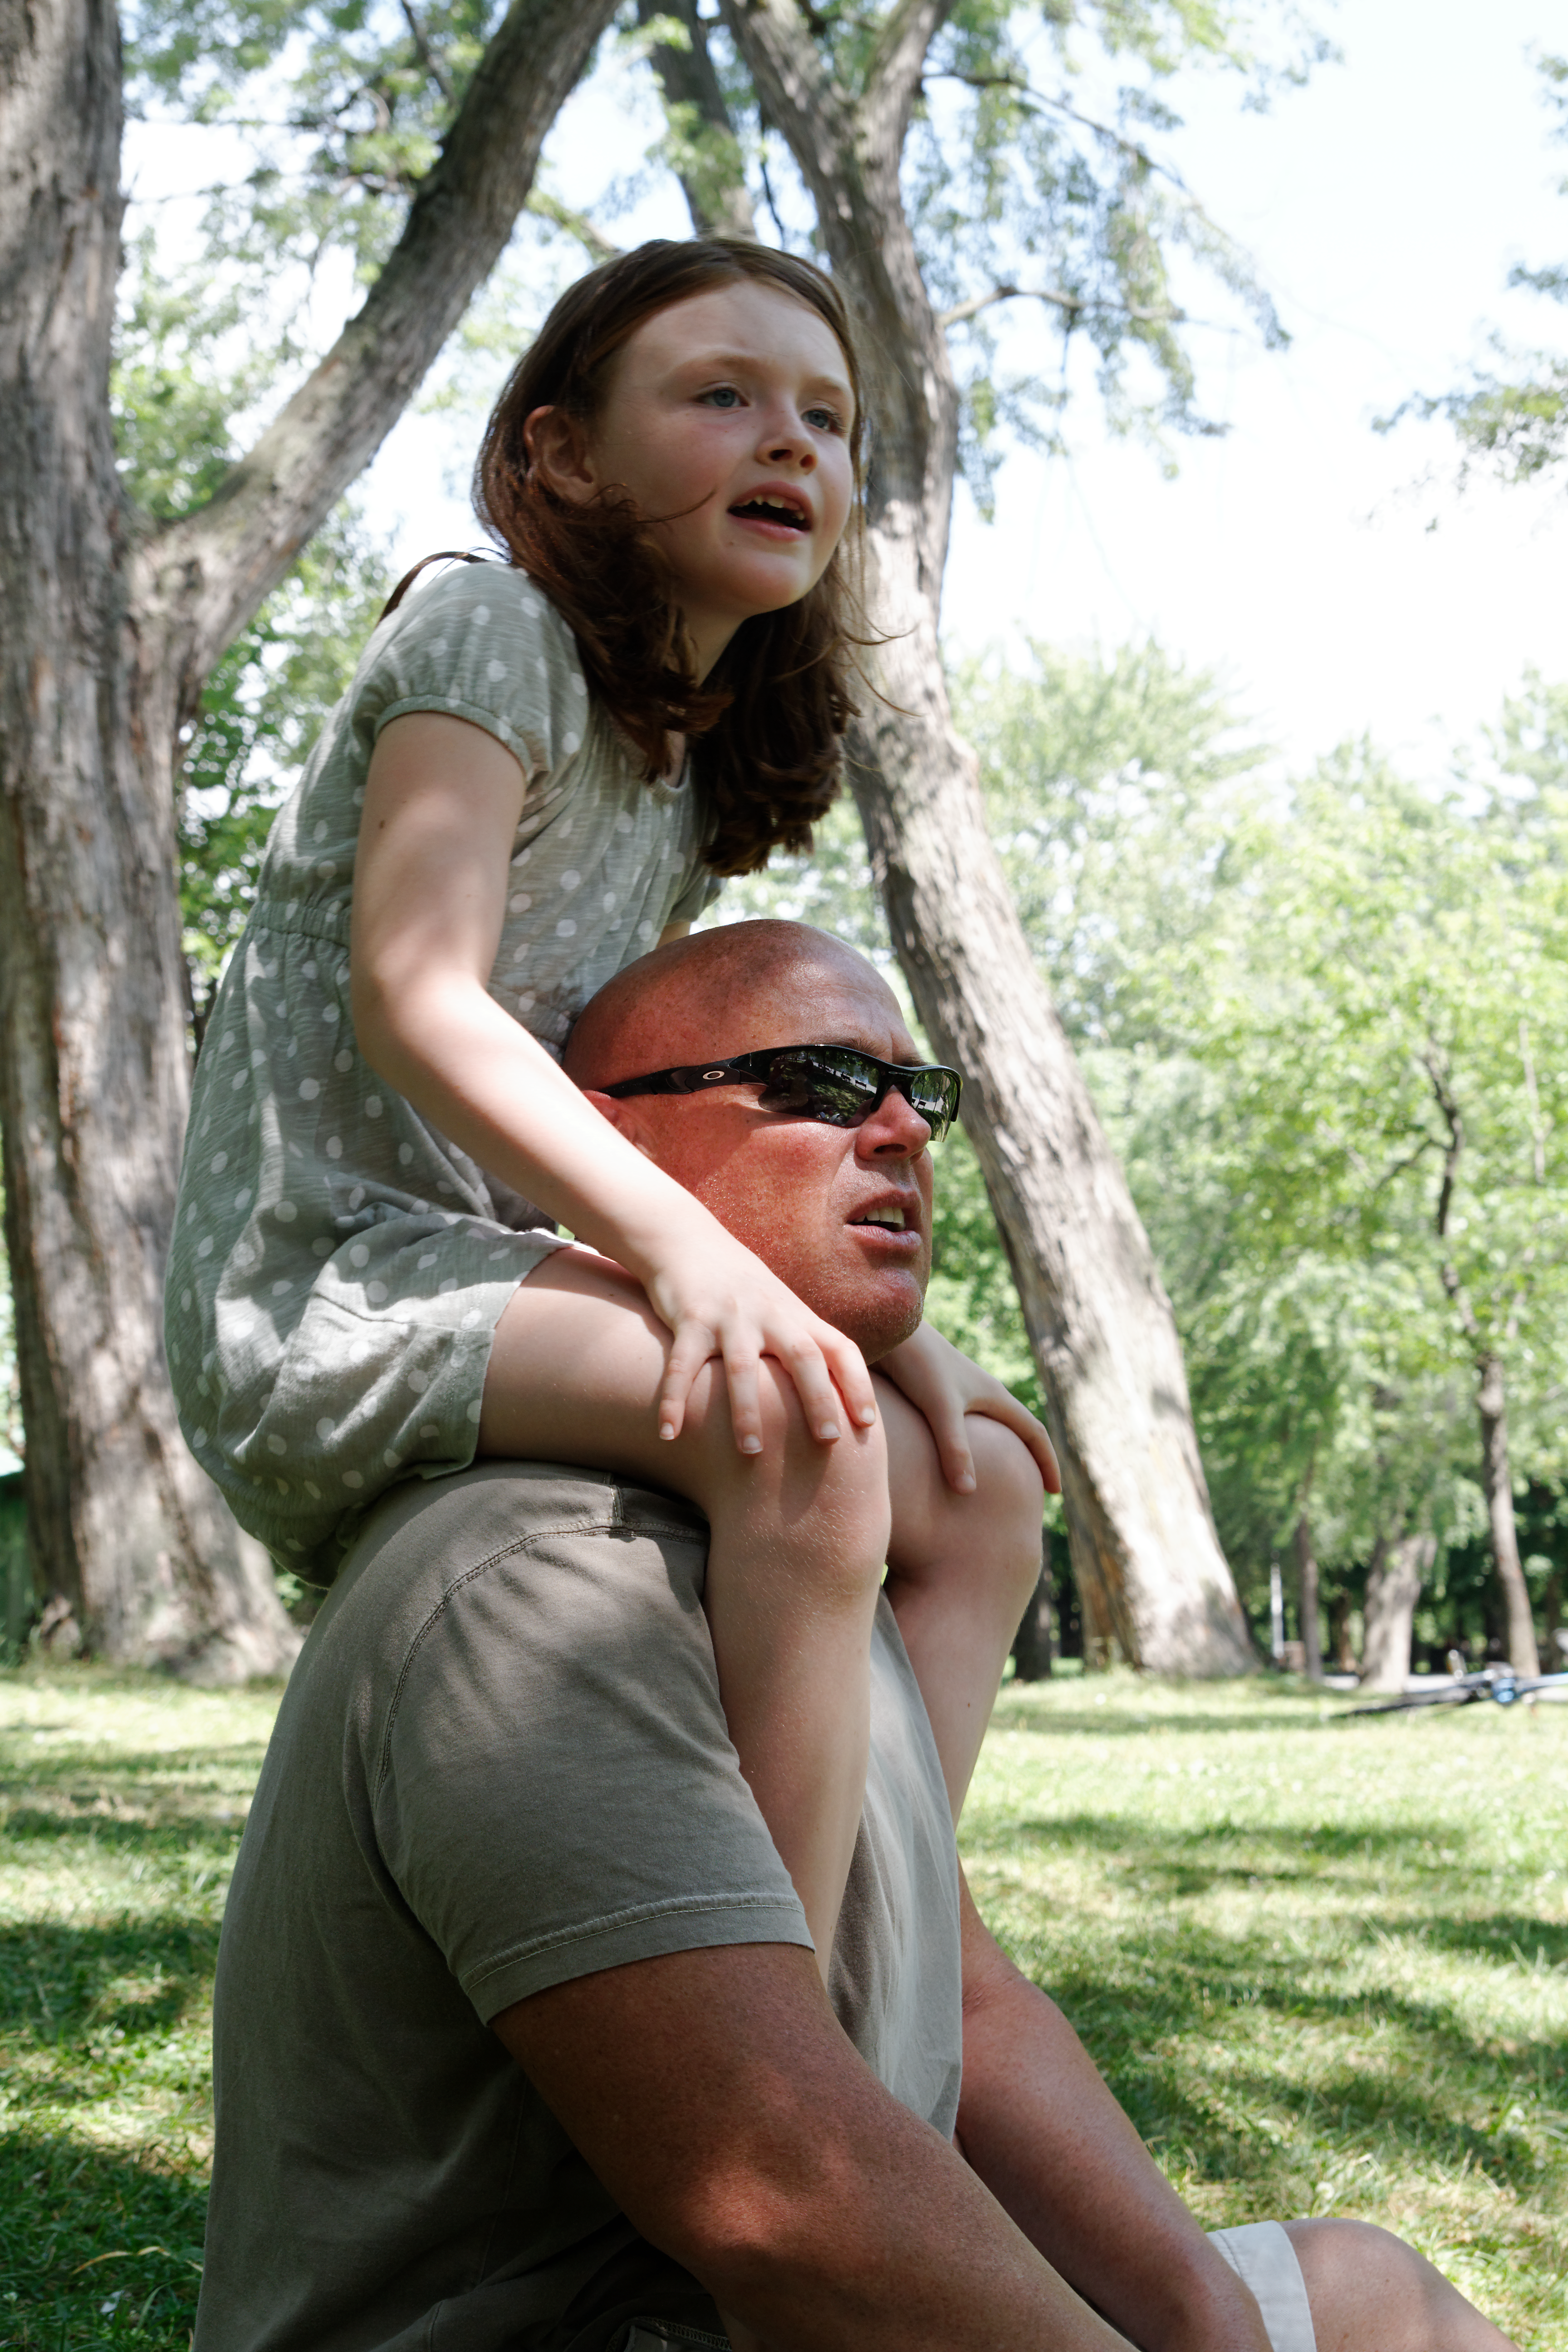
Mike and Meah at park 200ISO
Not the best photo since it’s lacking fill flash but it’s a good test shot since it has a lot of detail in Mike’s shirt and skin. It also has a light amount of noise that needs to be reduced. To make the challenge more interesting, I tried to get no noise in the background while preserving the lines in Mike’s shirt. Sort of a moot point since you can do localized noise reduction in Lightroom 4 but the less work done by having to add local edits, the better.
Aperture
A very nice image from Aperture with a good balance of sharpness and noise suppression. I wasn’t able to push the sharpness as far as the others, but the transitions are the most pleasing and natural of all. Still, there is too much detail lost in the grey shirt to love it.
Bibble Pro

Bibble gets very sharp detailed areas but trying to remove the noise in the background obliterated the shirt detail in the shadows. Again, the Noise Ninja basic is too limited to tweak this balance.
Capture One Pro

Another C1 conversion you could spot a mile away. The details are very good but a little bit too much pop-in of luminance noise in the background. Still, it’s razor sharp in the shirt and not patchy. It’s much easier to clean up blips with the dust and scratches filter than it is to get back detail lost in demosaicing.
DxO Optics Pro 7
The DxO conversion looks a lot like C1’s. It gets really great detail but there’s a bit of detail pop-in on the shirt and background, even though it’s not quite as sharp as the Capture One output. But this one looks nicer in the smoother areas like Meah’s arm and the blurred background.
Lightroom 4

The Lightroom version looks good but the unnatural patchiness/painted quality again becomes a problem in the face. It beats out the Bibble and Aperture conversions but it’s squarely in the middle.
Winner: Capture One Pro
RAW conversion wrap-up
For very noisy images, Lightroom’s smoothing of transitions helps but I find it a little too smooth for highly detailed images. You end up trying to get back some of the detail smoothed out during initial demosaicing. Obviously, RAW conversion algorithms factor in a balance of trade-offs for a number of problems. Lightroom’s smoothness puts it far ahead for high-noise conversions, but I’d like to see it get richer transitions and less of the patchy and painted feeling for sharp RAW images. Is this minor annoyance enough to push people to use another app? I doubt it. The Lightroom 4 results are very good overall but it lacks the film-like richness of the better RAW converters. This isn’t just a matter of pushing up the saturation. Some could argue that the lower Lightroom price means Adobe doesn’t need to compete with more expensive standalone RAW converters that aren’t as fully-featured, but Adobe’s needs to retain a reputation as the go-to professional imaging company. Hopefully Lightroom 5 will see Adobe re-take the RAW crown, but for now, it’s still getting consistently better results than Aperture 3.
In conclusion
Lightroom 4 doesn’t make big strides on the quality front, but the new features are significant and well executed. Lightroom 3 users have little reason not to upgrade—the Maps, Books, and rejigged tonal adjustments should appeal to both professionals and hobbyists. If you’re looking for the best option for video handling in a photo management app, this is definitely it. The evaluative chromatic aberration sounded promising but Lightroom’s results aren’t as good as the other RAW apps that have this feature. This is the only underwhelming part of version 4. Overall, this is a great update to a great application.
Pros
- Half the price of Lightroom 3
- GPS and mapping features
- Tonal recovery updates are very good
- More localized adjustments
- Book layouts are easy and sleek
- Basic video editing
Cons
- New chromatic aberration filter is not that great
- Some minor bugs like import thumbnails not updating
- No improvements to the weak Grain effect introduced in Lightroom 3 and no film-like grading profiles
- Online video and photo service support limited without additional plug-ins
The Take-away
- The new features are great and the price is lower. I think that’s good.